Begun, the Spectrum Wars have. First, it was AM radio getting the shaft (last item) and being yanked out of cars for the supposed impossibility of peaceful coexistence with rolling broadband EMI generators EVs. That battle has gone back and forth for the last year or two here in the US, with lawmakers even getting involved at one point (first item) by threatening legislation to make terrestrial AM radio available in every car sold. We’re honestly not sure where it stands now in the US, but now the Swiss seem to be entering the fray a little up the dial by turning off all their analog FM broadcasts at the end of the year. This doesn’t seem to be related to interference — after all, no static at all — but more from the standpoint of reclaiming spectrum that’s no longer turning a profit. There are apparently very few analog FM receivers in use in Switzerland anymore, with everyone having switched to DAB+ or streaming to get their music fix, and keeping FM transmitters on the air isn’t cheap, so the numbers are just stacked against the analog stations. It’s hard to say if this is a portent of things to come in other parts of the world, but it certainly doesn’t bode well for the overall health of terrestrial broadcasting. “First they came for AM radio, and I did nothing because I’m not old enough to listen to AM radio. But then they came for analog FM radio, and when I lost my album-oriented classic rock station, I realized that I’m actually old enough for AM.”
u-boot6 Articles
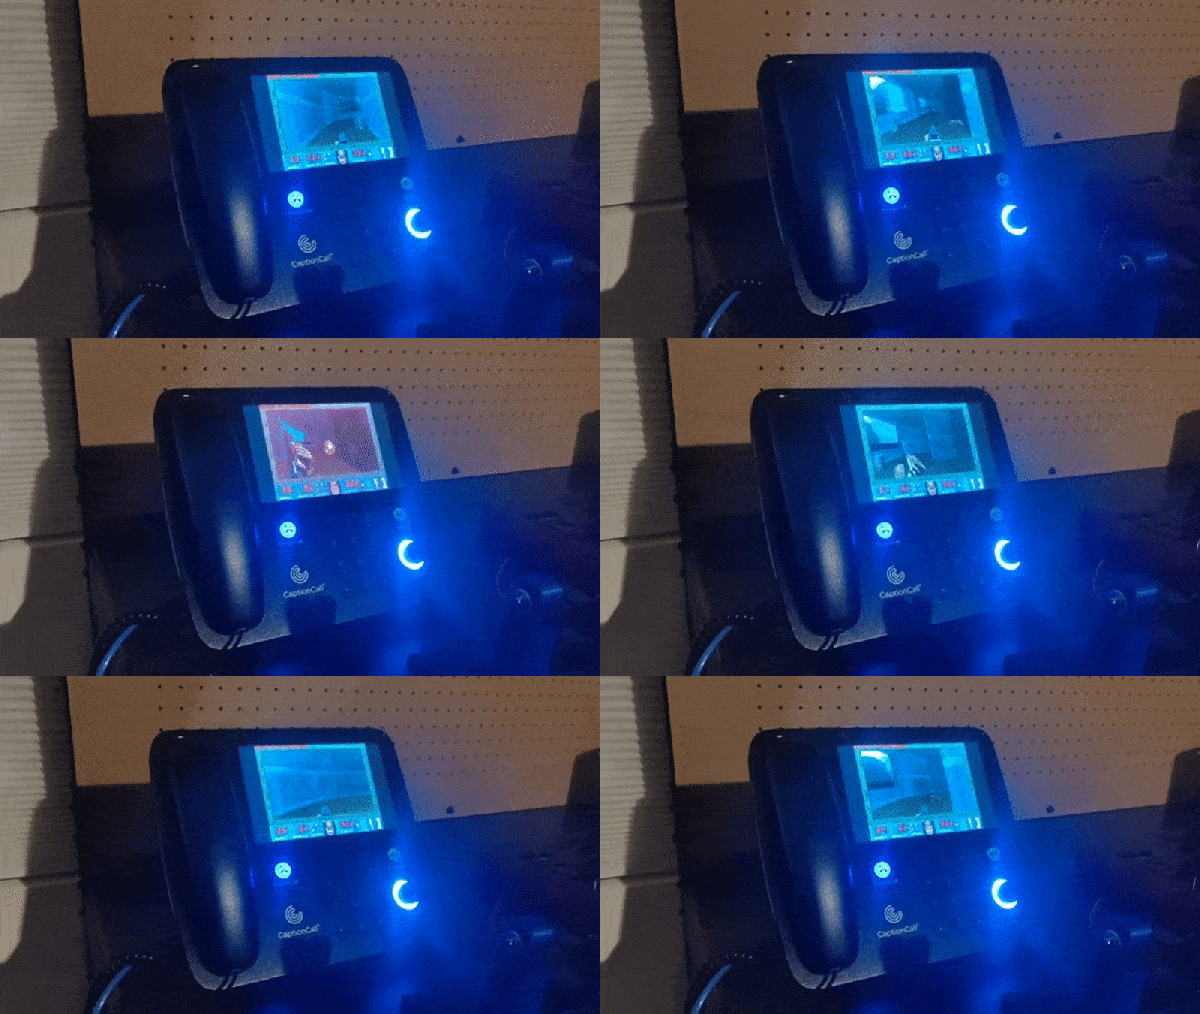
DOOM On A Desk Phone Is Just The Tip Of The Iceberg
These days we expect even the cheapest of burner smartphones to feature a multi-core processor, at least a gigabyte of RAM, and a Linux-based operating system. But obviously those sort of specs are unnecessary for an old school POTS desktop phone. Well, that’s what we thought. Then [Josh Max] wrote in to tell us about his adventures in hacking the CaptionCall, and now we’re eager to see what the community can do with root access on a surprisingly powerful Linux phone.
As the names implies, the CaptionCall is a desk phone with an LCD above the keypad that shows real-time captions. Anyone in the United States with hearing loss can get one of these phones for free from the government, so naturally they sell for peanuts on the second hand market. Well, at least they did. Then [Josh] had to go ahead and crack the root password for the ARMv7 i.MX6 powered phone, started poking around inside of its 4 GB of onboard NAND, and got the thing running DOOM.
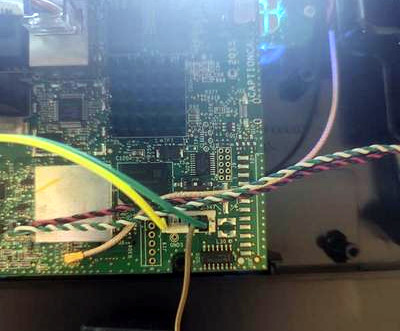
If you’re interested in the technical details, [Josh] has done a great job taking us step by step through his process. It’s a story that will be at least somewhat familiar to anyone who’s played around with embedded Linux devices, and unsurprisingly, starts with locating a serial port header on the PCB.
Finding the environment variables to pretty tightly locked down, he took the slow-route and dumped the phone’s firmware 80 characters at a time with U-Boot’s “memory display” command. Passing the recovered firmware image through binwalk
and a password cracker got him the root credentials in short order, and from there, that serial port got a whole lot more useful.
[Josh] kicked the phone’s original UI to the curb, set up an ARM Debian Jessie chroot, and started working his way towards a fully functional Linux environment. With audio, video, and even keypad support secured, he was ready to boot up everyone’s favorite 1993 shooter. He’s been kind enough to share his work in a GitHub repository, and while it might not be a turn-key experience, all the pieces are here to fully bend the hardware to your will.
Historically, running DOOM on a new piece of hardware has been the harbinger of bigger and better things to come. With unfettered access to its Linux operating system up for grabs, we predict the CaptionCall is going to become a popular hacking target going forward, and we can’t wait to see it.
WiFiWart Boots Linux, Moves To Next Design Phase
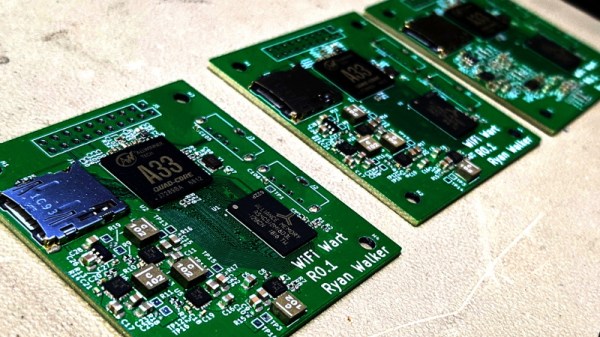
Over the last few months we’ve been keeping an eye on WiFiWart, an ambitious project to develop a Linux single-board computer (SBC) small enough to fit inside a USB wall charger. Developer [Walker] says the goal is to create an easily concealable “drop box” for penetration testing, giving security researchers a valuable foothold inside a target network from which to preform reconnaissance or launch attacks. Of course, we don’t need to tell Hackaday readers that there’s plenty of other things you can do with such a tiny open hardware Linux SBC.
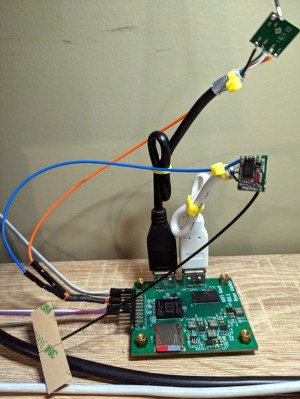
Today we’re happy to report that [Walker] has gotten the first version of the board booted into Linux, though as you might expect given a project of this complexity, there were a few bumps along the way. From the single missing resistor that caused U-Boot to throw up an error to the finer points of compiling the kernel for an embedded board, the latest blog post he’s written up about his progress provides fascinating insight into the little gotchas of bringing up a SBC from scratch.
Once the board was booted into Linux, [Walker] started testing out different aspects of the system. A memory benchmark confirmed the finicky DDR3 RAM was working as expected, and he was able to load the kernel modules for the dual RTL8188 interfaces and connect to a network. While the two WiFi modules are currently hanging off the board’s full-sized USB ports, they will eventually be integrated into the PCB.
Critically, this prototype board is also allowing [Walker] to get an idea of what the energy consumption of the final hardware might be. Even at full tilt, this larger board doesn’t go over 500 mA at 5 VDC; so if he designs the power supply with a maximum output of 1 A, he should have a nice safety margin. As mentioned in the previous post, the plan is currently to put the PSU on its own board, which will allow more effective use of the charger’s internal volume.
With the software and hardware now largely locked in, [Walker] says his attention will be turned towards getting everything small enough to fit into the final form factor. This will certainly be the most challenging aspect of the project, but with a growing community of hackers and engineers lending their expertise to the cause, we’re confident the WiFiWart will soon be a reality.
How To Backup And Restore Your IP Camera Firmware
[Filipe] has been playing around with custom firmware for inexpensive IP cameras. Specifically, he has been using cameras based on a common HI3815 chip. When you are playing around with firmware like this, a major concern is that you may end up bricking the device and rendering it useless. [Filipe] has documented a relatively simple way to backup and restore the firmware on these cameras so you can hack to your heart’s content.
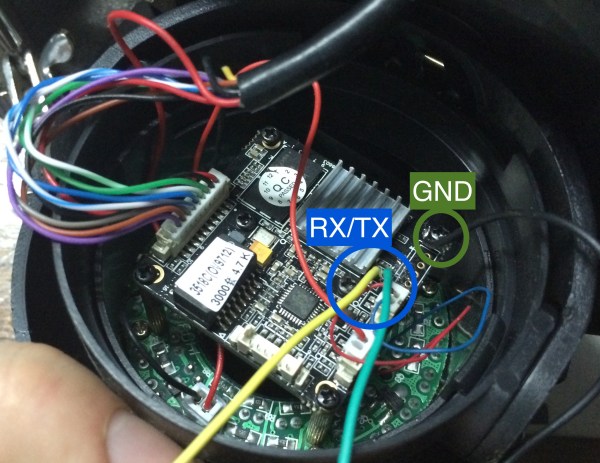
The first part of this hack is hardware oriented. [Filipe] cracked open the camera to reveal the PCB. The board has labeled serial TX and RX pads. After soldering a couple of wires to these pads, [Filipe] used a USB to serial dongle to hook his computer up to the camera’s serial port.
Any terminal program should now be able to connect to the camera at 115200 baud while the camera is booting up. The trick is to press “enter” during the boot phase. This allows you to log in as root with no password. Next you can reset the root password and reboot the camera. From now on you can simply connect to the phone via telnet and log in as root.
From here, [Filipe] copies all of the camera’s partitions over to an NFS share using the dd command. He mentions that you can also use FTP for this if you prefer. At this point, the firmware backup is completed.
Knowing how to restore the backup is just as important as knowing how to create it. [Filipe] built a simple TFTP server and copied the firmware image to it in two chunks, each less than 5MB. The final step is to tell the camera how to find the image. First you need to use the serial port to get the camera back to the U-Boot prompt. Then you configure the camera’s IP address and the TFTP server’s IP address. Finally, you copy each partition into RAM via TFTP and then copy that into flash memory. Once all five partitions are copied, your backup is safely restored and your camera can live to be hacked another day.
The Flaming Yinlips
No, that’s not a Playstation Vita up there, it’s a “Yinlips YDPG18A” portable game system. [Ian] found that his Yinlips was lacking in the flash memory department, so he fired up his soldering iron. The Yinlips is based on an Allwinner Sunxi series processor, and uses a standard TSOP48 footprint flash. There is some standardization in flash pin out and packages, so [Ian] picked up the largest pin compatible chips he could find – a pair of 256 gigabit (32 gigabyte) chips from Micron. Desoldering the existing flash proved to be a bit of an adventure as the flash was glued down. [Ian] also didn’t have his hot air gun handy, making things even more interesting. Careful work with a razor blade broke the glue bond.
It turns out that the soldering was the easy part. All flash chips have geometry, die count, page size, block count, sector size, etc. The geometry is similar to the geometry in a hard drive. In fact, just like in modern hard drives, a system will read some basic information before accessing the full storage array. In the case of NAND flash, the processor can access the first page of memory, and query the flash for its part number. Once the part number is known, the geometry can be determined via a lookup table. [Ian] checked the NAND table on github, so he knew going in that his flash chips were not supported. Due to the complexities of booting Allwinner processors into Linux or Android, the table and the NAND driver that uses it exist in several places. The bootloader’s axf file, U-Boot, and several flash application binaries sent from the PC based LiveSuit flash app all required modification. Most of these files were packed into a single flash image. [Ian] used imgrepacker to unpack the image, then opened the hex files. The fact that he knew what the original flash parameter tables looked like was key. He searched for an existing Micron flash table entry, and replaced the parameters with those of his new chips.
With all the files modified, [Ian] re-packed his flash image and sent it over. The Yinlips rewarded his hard work by continually resetting in a bootloop. [Ian] wasn’t going to give up though. He wired into the boot console, and discovered that a CRC check failure on one of his modified files was causing the reset. He then disassembled binary issuing the reset. Changing the return value of the CRC to always pass fixed the issue. [Ian’s] now has a collagen infused Yinlips with 58GB of internal storage. Pretty good for a device that only started with 2GB.
USB Host Comes To Zipit
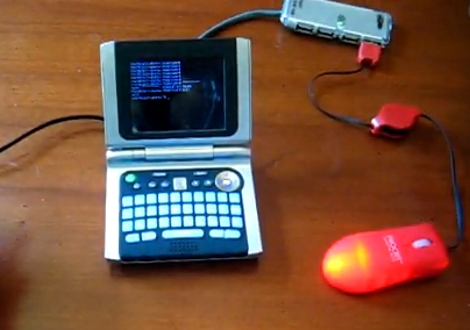
This USB to Zipit Dock adapter and a special kernel makes USB host mode for the Zipit possible. Previously, the cheap and hackable wireless client needed a hardware modification to enable USB support. The new kernel bootloader, called U-Boot, makes the internal alterations unnecessary (see the demo after the break). Now the only caveat is one of voltage. Zipit only supplies 3.3V when running on battery so your choices are to only use USB when the Zipit is plugged into a charger, or use a powered USB hub. But if you’re already building a hub adapter it shouldn’t be too much trouble to add in the option for a battery-powered hub.
So can we play our NES games using a USB controller now?