A Nerf Gun Upgrade

A lot of us have nostalgia for our childhood toys, and as long as they’re not something like lawn darts that nostalgia often leads to fun upgrades since some of us are adults with industrial-sized air compressors. Classics like Super Soakers and Nerf guns are especially popular targets for improvements, and this Nerf machine gun from [Emiel] is no exception.

The build takes a Nerf ball-firing toy weapon and basically tosses it all out of the window in favor of a custom Nerf ball launching rifle. He starts with the lower receiver and machines a pneumatic mechanism that both loads a ball into the chamber and then launches it. This allows the rifle to be used in both single-shot mode and also in fully-automatic mode. From there, a barrel is fashioned along with the stock and other finishing touches.

[Emiel] also uses a high-speed camera to determine the speed of his new Nerf gun but unfortunately it isn’t high-speed enough, suffering from the same fate as one of the fastest man-made objects ever made, and he only has a lower bound on the speed at 400 km/h. If you don’t want to go fast with your Nerf builds, though, perhaps you should build something enormous instead. Continue reading “A Nerf Gun Upgrade”

Upgrading A Classic Function Generator

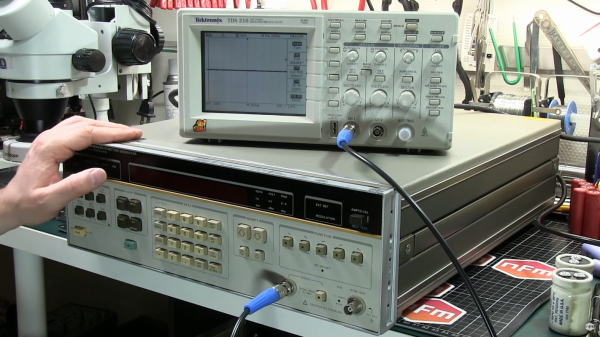
If you need an oscilloscope, function generator, or other piece of kit for your electronics workbench, there are plenty of modern options. Dropping $4,000 for a modern oscilloscope is nice if you have the money, but if you’d rather put it to better use there are great options that don’t cost a fortune. There are some addons that can turn a smartphone into an oscilloscope but one of the best values out there are older pieces of equipment from the 80s that still work great. You can even upgrade them with some more modern features too, like [NFM] did with this vintage function generator.

This function generator is an HP3325A and it is several decades old, so some work was needed just to restore it to original working condition. The cooling fan and capacitors all needed to be replaced, as well as a few other odds and ends. From there [NFM] set about adding one of the two optional upgrades available for this device, the high voltage output. This allows the function generator to output 40 volts peak-to-peak at 40 milliamps. While he did have an original version from HP, he actually had a self-made design produced that matches the function of the original.

Even if you don’t have this specific function generator, this guide goes into great details about the functioning of older equipment like this. Most of the parts are replaceable and upgrades aren’t completely out of the question like some modern equipment, and with the right care and maintenance these pieces of equipment could last for decades longer.

Continue reading “Upgrading A Classic Function Generator”

Bringing An IPod To The Modern NAND Era

Flash storage was a pretty big deal back in the mid ’00s, although the storage sizes that were available at the time seem laughable by today’s standards. For example, having an iPod that didn’t have a spinning, unreliable hard drive was huge even if the size was measured in single-digit gigabytes, since iPods tended to not be treated with the same amount of care as something like a laptop. Sadly, these small iPods aren’t available anymore, and if you want one with more than 8GB of storage you’ll have to upgrade an old one yourself.

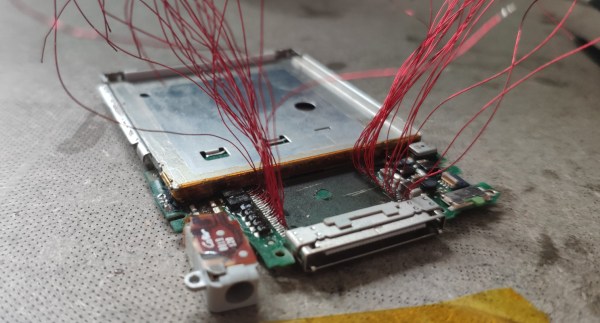
This build comes to us from [Hugo] who made the painstaking effort of removing the old NAND flash storage chip from an iPod Nano by hand, soldering 0.15mm enameled magnet wire to an 0.5mm pitch footprint to attach a breakout board. Once the delicate work was done, he set about trying to figure out the software. In theory the iPod should have a maximum addressable space of 64 GB but trying to get custom firmware on this specific iPod is more of a challenge and the drives don’t simply plug-and-play. He is currently using the rig for testing a new 8GB and new 16GB chip though but it shows promise and hopefully he’ll be able to expand to that maximum drive size soon.

The build is really worth a look if you’re into breathing new life into old media players. Sometimes, though all these old iPods really need to get working again is just to be thrown into a refrigerator, as some genius engineer showed us many years ago.

Official Arduboy Upgrade Module Nears Competition

We’ve been big fans of the Arduboy since [Kevin Bates] showed off the first prototype back in 2014. It’s a fantastic platform for making and playing simple games, but there’s certainly room for improvement. One of the most obvious usability issues has always been that the hardware can only hold one game at a time. But thanks to the development of an official add-on, the Arduboy will soon have enough onboard storage to hold hundreds of games

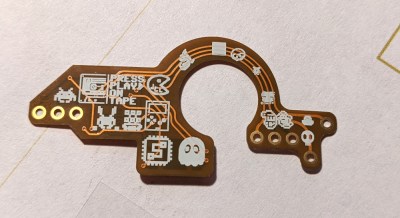
Even the rear silkscreen was a community effort.

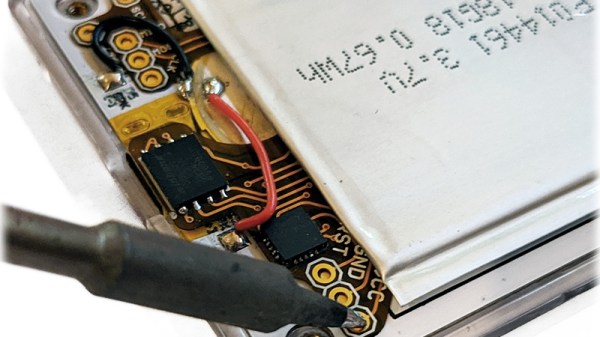
The upgrade takes the form of a small flexible PCB that gets soldered to existing test points on the Arduboy. Equipped with a W25Q128 flash chip, the retrofit board provides an additional 16 MB of flash storage to the handheld’s ATmega32u4 microcontroller; enough to hold essentially every game and program ever written for the platform at once.

Of course, wiring an SPI flash chip to the handheld’s MCU is only half the battle. The system also needs to have its bootloader replaced with one that’s aware of this expanded storage. To that end, the upgrade board also contains an ATtiny85 that’s there to handle this process without the need for an external programmer. While this is a luxury the average Hackaday reader could probably do without, it’s a smart move for an upgrade intended for a wider audience.

The upgrade board is currently available for pre-order, but those who know their way around a soldering iron and a USBasp can upgrade their own hardware right now by following along with the technical discussion between [Kevin] and the community in the “Project Falcon” forum. In fact, the particularly astute reader may notice that this official upgrade has its roots in the community-developed Arduboy cartridge we covered last year.

Continue reading “Official Arduboy Upgrade Module Nears Competition”

Upgrading The RAM In A 25 Year Old Oscilloscope

From reading his extensive write-ups on the subject, there’s one thing we know for sure: [Tom Verbeure] loves his Tektronix TDS 420A oscilloscope. While it might be older than some of the people reading this, it’s still an impressive piece of hardware with more than enough bells and whistles to keep the average hacker occupied. Especially if you’re willing to perform some hardware modifications.

Note the battery to retain calibration data.

[Tom] already knew how to tickle the scope into unlocking software features, a process not unlike what we’ve seen done on more modern scopes. But there’s only so far you can get by toggling software flags.

Some of the more advanced features that are turned off in the firmware actually need additional hardware to function. Simply bumping the sample points to 120,000 in software wasn’t enough, the scope actually needs the memory to hold them in.

Now logically, if there’s a software option to increase the number of samples, there must be a hardware upgrade that goes along with it. Sure enough, [Tom] found there were 6 open spots next to the scope’s existing M5M51008 static RAM ICs.

As luck would have it the chips are still available, albeit from a different manufacturer and a bit faster than the original parts. Digikey wouldn’t sell fewer than 100 of them, but UTSource was happy to sell him 10. In this case, the parts were cheaper than the shipping cost. Installation was about as straightforward as it gets, though [Tom] does note that he had to keep the board powered up during the operation or else the scope would have lost its calibration data.

Squeezing more features out of modern scopes like the Rigol DS2072A just takes a USB cable and some software. Sometimes it’s only a matter of tapping in a code. But we certainly appreciate [Tom] putting in a little extra effort to get the most out of this classic piece of hardware.

Raspberry Pi 4 Offers Up 2 GB For The Price Of One

The Raspberry Pi 4 represents a significant performance increase over previous generations, unlocking potential applications that were simply beyond the abilities of these diminutive Single Board Computers (SBCs) in the past. Some would even argue that the Pi 4, with a quad-core Cortex-A72 running at 1.5 GHz, now holds its own as a lightweight ARM desktop computer for those interested in finally breaking free from x86.

In light of the considerable upgrade in processing power, the choice to outfit the base model Pi 4 with just 1 GB of RAM always seemed a bit odd. So it’s little surprise that the Raspberry Pi Foundation has decided to shift things around and lower the price of the 2 GB model to the traditional $35. In a blog post this morning, Eben Upton said that with RAM prices falling over the last year, the company thought it was time they passed the savings onto the customer.

This change comes just two days before the Pi’s 8th birthday. There has been speculation that the Pi 4 is capable of operating with 8 GB of RAM and unveiling that news to coincide with this anniversary would have been a clever marketing move. Alas, it looks like we’ll have to continue to wait.

For those who are invested in the 1 GB model, have no fear. Rather than delete the product from the lineup entirely, the company will be keeping it available for anyone who needs it. So if you’ve got a commercial or industrial application that might not take kindly to the hardware getting switched out, you’ll still have a source of spares. That said, the pricing for the 1 GB model won’t be changing, so there’s no cost advantage to using it in new designs.

Combined with news that compatibility issues the Pi 4 had with generic USB-C power supplies was fixed with an under the radar board revision, it seems there’s never been a better time to upgrade to the latest and greatest version of everyone’s favorite Linux board. Happy Birthday, Raspberry Pi.

An Open Source Ebike

In the ebike world, there are two paths. The first is a homemade kit bike with motors and controllers from China. The second is a prebuilt bike from a manufacturer like Giant, with motors and controllers from China, which will be half as fast and cost three times as much. The choice is obvious, and there are other benefits to taking the first path as well, such as using this equipment which now has an open source firmware option.

The Tong Sheng TSDZ2 drive is popular in the ebike world because it’s an affordable kit motor which has a pedal-assist mode using torque sensors, resulting in a more polished experience. In contrast, other popular kit motors tend to rely on less expensive cadence sensors which are not as smooth or intuitive. This new open source firmware for the TSDZ2 further improves on the ride by improving the motor responsiveness, improving battery efficiency, and opening up the ability to use any of a number of color displays. (More information is available on a separate Wiki.)

If you have a TSDZ2-based ebike it might be time to break out the laptop and get to work installing this firmware. If you’re behind the times and still haven’t figured out that ebikes are one of the best ways to travel, here is the proof you need.

Thanks to [coaxial] for the tip! Photo via Reddit user [PippyLongSausage].