Neat And Tidy USB-C Conversions For Legacy Devices

USB-C has been on the market for a good few years now, and it’s finally starting to take over. Many new laptops only come with the newer port, making it difficult to use legacy USB-A devices. [Matt] doesn’t like mucking about with dongles and hubs, so set about converting some older hardware to the new standard. (Video, embedded below.)

[Matt] first set about hacking a Logitech wireless mouse dongle, peeling apart the original USB A connector to gain access to the PCB inside. A USB C breakout board is then sourced, and the relevant pins in the USB-C connector are soldered to the original USB-A connector pads. Unfortunately, the breakout board is configured as a host device, unsuitable for peripherals. Replacing a pull-up resistor with a pull-down on the VCONN and CC1 pins rectifies this. With the mod done, the mouse enumerates and is fully functional over USB-C. A little Sugru is then used to wrap everything up neatly.

[Matt] then progresses through several other similar mods to other hardware, sharing useful tips on how to make things as neat and useful as possible. It’s a tidy hack that could make your user experience with a new laptop much less painful. USB-C mods are becoming more common, and we’ve seen plenty done to soldering irons thanks to the Power Delivery spec.
Continue reading “Neat And Tidy USB-C Conversions For Legacy Devices”

An Open Hardware Sega Genesis Cartridge Dumper

You might be wondering why anyone would build device to dump Sega Genesis and Mega Drive cartridges. Perhaps they want to play their well-worn copy of The Lost Vikings on their phone, or they want to keep their QVC Limited Edition Maximum Carnage box set in near mint condition. Maybe. But we’re betting that [tonyp7] was just looking for a challenge, and as an added bonus, the world gets another cool open hardware gadget in the process. Sounds like a good deal to us.

Based on the ATmega324PB, the GenDumper can take those dusty old Sega cartridges and back them up to an image file on your computer. Right now the hardware depends on a Windows program, but according to the documentation, [tonyp7] is working on a platform-agnostic Python script so everyone can play along. What you do with the image file after you’ve dumped it is your business, but presumably loading it up in an emulator would be the next step.

Considering how easy it is to find ROMs for these old games online, do you actually need a GenDumper of your own? Probably not. But it’s still an interesting piece of hardware, and if you look close enough, you just might learn a thing or two from the design. For example, [tonyp7] shows how a relatively easy to work with 12 pin USB-C connector can be used on your USB 2.0 projects to embrace the new physical connector without diving into a full USB 3.0 implementation. The keen-eyed reader might also note there’s a lesson to be learned about finalizing the name of your project before sending off your PCBs for manufacturing.

A perusal of the archive uncovered a similar project from 2012 that, believe it or not, was also tested on a copy of Madden 96. Whether that means the game is so beloved that hackers want to make sure its preserved for future generations, or so despised that they are secretly hoping the magic smoke leaks out during testing, we can’t say.

Have JBC Soldering Handle, Will USB-C Power Deliver

Frequent converter-of-tools-to-USB-C [Jana Marie Hemsing] is at it again, this time with a board to facilitate using USB Power Delivery to fuel JBC soldering iron handles. Last time we saw [Jana] work her USB-C magic was with the Otter-Iron, which brought Power Delivery to the trusty TS100 with a purpose built replacement PCBA. This time he’s taking a different approach by replacing the “station” of a conventional soldering station completely with one tiny board and one giant capacitor.

If you’ve been exposed to the “AC fire starter” grade of soldering iron the name JBC might be unfamiliar. They make tools most commonly found with Metcal’s and high end HAKKOs and Wellers on the benches of rework technicians and factory floors. Like any tool in this class each soldering station comes apart and each constituent piece (tips, handles, base stations, stands, etc) are available separately from the manufacturer and on the used market at often reasonable prices, which is where [Jana] comes in.

The Otter-Iron PRO is a diminutive PCBA which accepts a USB-C cable on one side and the connector from a standard JBC T245-A handle on the other. JBC uses a fairly typical thermistor embedded in the very end of the iron tip, which the Otter-Iron PRO senses to provide closed loop temperature control. [Jana] says it can reach its temperature setpoint from a cold start in 5 seconds, which roughly matches the performance of an original JBC base station! We’re especially excited because this doesn’t require any modification to the handle or station itself, making it a great option for JBC users with a need for mobility.

Want to make an Otter-Iron PRO of your own? Sources are at the link at the top. It sounds like v3 of the design is coming soon, which will include its own elegant PCB case. Check out the CAD render after the break. Still wondering how all this USB-PD stuff works? Check out [Jason Cerudolo’s] excellent walkthrough we wrote up last year.

Continue reading “Have JBC Soldering Handle, Will USB-C Power Deliver”

Faking Your Way To USB-C Support On Laptops Without It

Is there no end to the dongle problem? We thought the issue was with all of those non-USB-C devices that want to play nicely with the new Macbooks that only have USB-C ports. But what about all those USB-C devices that want to work with legacy equipment?

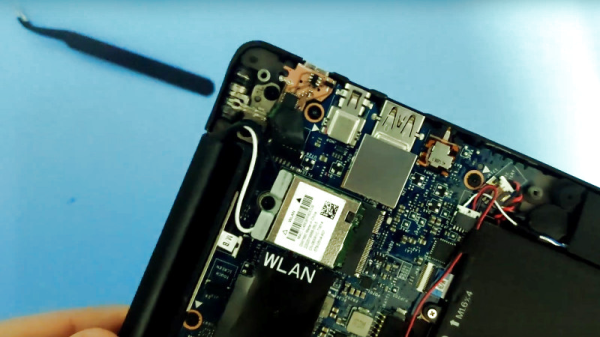
Now some would say just grab yourself a USB-C to USB-A cable and be done with it. But that defeats the purpose of USB-C which is One-Cable-To-Rule-Them-All[1]. [Marcel Varallo] decided to keep his 2011 Macbook free of dongles and adapter cables by soldering a USB-C port onto a USB 2.0 footprint on the motherboard.

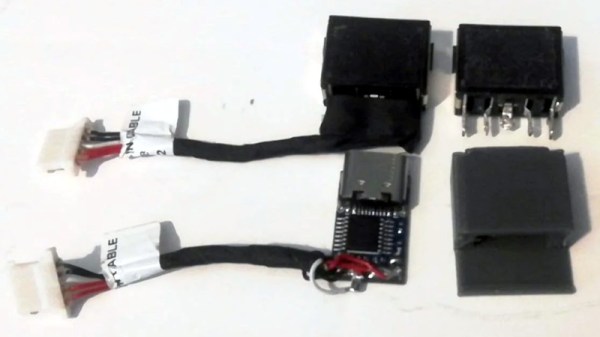
How is that even possible? The trick is to start with a USB-C to USB 3 adapter. This vintage of Macbook doesn’t have USB 3, but the spec for that protocol maintains backwards compatibility with USB 2. [Marcel] walks through the process of freeing the adapter from its case, slicing off the all-important C portion of it, and locating the proper signals to route to the existing USB port on his motherboard.

[1] Oh my what a statement! As we’ve seen with the Raspberry Pi USB-C debacle, there are actually several different types of USB-C cables which all look pretty much the same on the outside, apart from the cryptic icons molded into the cases of the connectors. But on the bright side, you can plug either end in either orientation so it has that going for it.

Hackaday Podcast 056: Cat Of 9 Heads, Robot Squats, PhD In ESP32, And Did You Hear About Sonos?

Hackaday editors Elliot Williams and Mike Szczys gab on great hacks of the past week. Did you hear that there’s a new rev of the Pi 4 out there? We just heard… but apparently it’s release into the wild was months ago. Fans of the ESP8266 are going to love this tool that flashes and configures the board, especially for Sonoff devices. Bitluni’s Supercon talk was published this week and it’s a great roadmap of all the things you should try to do with an ESP32. Plus we take on the Sonos IoT speaker debacle and the wacky suspension system James Bruton’s been building into his humanoid robot.

Take a look at the links below if you want to follow along, and as always tell us what you think about this episode in the comments!

Take a look at the links below if you want to follow along, and as always, tell us what you think about this episode in the comments!

Direct download (60 MB or so.)

Continue reading “Hackaday Podcast 056: Cat Of 9 Heads, Robot Squats, PhD In ESP32, And Did You Hear About Sonos?”

Raspberry Pi Slips Out New PCB Version With USB C Power Fix

When the Raspberry Pi people release a fresh model in their line of fruity single board computers, it’s always an event of great interest. The Raspberry Pi 4 brought some significant changes to the formula: they moved to mini micro HDMI and USB-C power sockets, for instance. The early adopters who scored one of those Pi 4s were in for a shock though, if they had all but the most basic USB C power cables the device wouldn’t power up. Now the Register has news that they have slipped out with little fanfare an updated version of the board containing a fix for this problem.

Our colleague Maya Posch delved deeply into the USB C specification and delivered a pithy analysis at the time which demonstrated that the fault lay with the configuration of the sense resistors used by intelligent USB C power sources to determine what power to supply. For the addition of a single surface mount resistor the problem need never have existed, and we’re guessing that’s how they fixed it.

There’s no need to despair should you have one of the older boards, though. They will still work as they always have done with the so-called “dumb” power supplies and cables, and meanwhile we’re sure that future Pi boards will have had a lot of attention paid to their USB power circuitry.

Adding USB-C To The TS100, But Not How You Think

USB-C has its special Power Delivery standard, and is capable of delivering plenty of juice to attached hardware. This has led many to modify their TS-100 soldering irons to accept the connector. [Jana Marie] is the latest, though she’s taken rather a different tack than you might expect.

[Jana] didn’t want to modify the original hardware or hack in an adapter. Instead, she struck out on her own, developing an entire replacement PCB for the TS-100 iron. The firmware is rough and ready, and minimal work has been done on the GUI and temperature regulation. However, reports are that functionality is good, and [Jana]’s demonstration shows it handling a proper desoldering task with ease.

Files are on Github for those that wish to spin their own. The PCB is designed to snap neatly inside the original case for a nice fit and finish. Power is plentiful too, as the hardware supports USB Power Delivery 2.0, which is capable of running at up to 100 W. On the other hand, the stock TS-80 iron, which natively supports USB-C, only works with Quick Charge 3.0, and thus is limited to a comparatively meager 36 W.

We’ve seen plenty of TS-100 hacks over 2019. Some have removed the standard barrel jack and replaced it with a USB-PD board. Meanwhile, others have created adapters that plug in to the back of the iron. However, [Jana] is dictating her own terms by recreating the entire PCB. Sometimes it pays to go your own way!

[Thanks to elad for the tip!]