A New Life For A Dead VIC-20

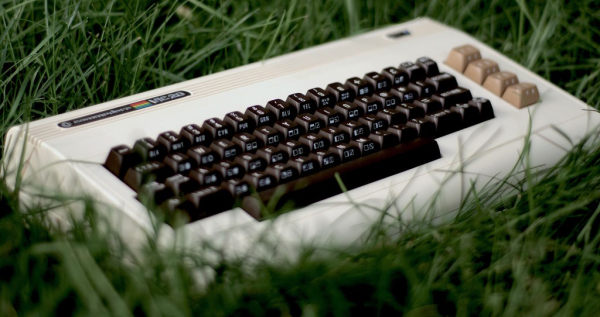
What was the first computer you bent to your programmatic will? If you’re old enough, it was probably a Commodore. For [Jagged-path], it was a VIC-20. After finding a broken one on Kijiji, he recaptured that 80s feeling with VicPi, a revitalization project that marries modern computing power with vintage form factor.

The VicPi can be used as a standalone computer or a USB keyboard for an external computer. As you’ve probably guessed, there’s a Raspberry Pi involved. There is also a Keyrah board, which is arguably the easiest way to convert Commodore (and Amiga) keystrokes to USB without breaking a sweat.

There are a lot of nice touches that really make this project. A toggle switch on the back selects between VicPi mode and keyboard mode, and the distinction is made with a two-color LED in place of the VIC-20’s power LED. [Jagged-path] used panel mount cables to extend the HDMI, 3.5mm, and USB ports and ran them out to a custom metal panel that’s treated with rubberized black paint. Another nice touch: the dedicated keyboard port is USB-B, so it’s easy to differentiate from the Pi inputs.

If you have a working VIC-20 but not the rare Votrax Type ‘n Talk synthesizer peripheral, you can use an old Android phone to hear those Voodoo Castle responses.

Print A Flexible Keypad

[Micah Elizabeth Scott] needed a custom USB keyboard that wrapped around a post. She couldn’t find exactly what she wanted so she designed and printed it using flexible Nijaflex filament. You can see the design process and the result in the video below.

The electronics rely on a Teensy, which can emulate a USB keyboard easily. The keys themselves use the old resistor divider trick to allow one analog input on the Teensy to read multiple buttons. This was handy, but also minimized the wiring on the flexible PCB.

The board itself used Pyralux that was milled instead of etched. Most of the PCB artwork was done in KiCAD, other than the outline which was done in a more conventional CAD program.

Continue reading “Print A Flexible Keypad”

This Binary Keyboard Is For ASCII Purists

So, you’re a keyboard enthusiast. The ‘board that came from Dell, HP, or whoever made your computer is just not for you. You have an ancient IBM, a decal-free Das Keyboard, or another similarly esoteric text input device. Your typing can be heard three blocks away as the unmistakable clack of bent-spring switches reverberates around you, but you don’t care because you’re in the Zone.

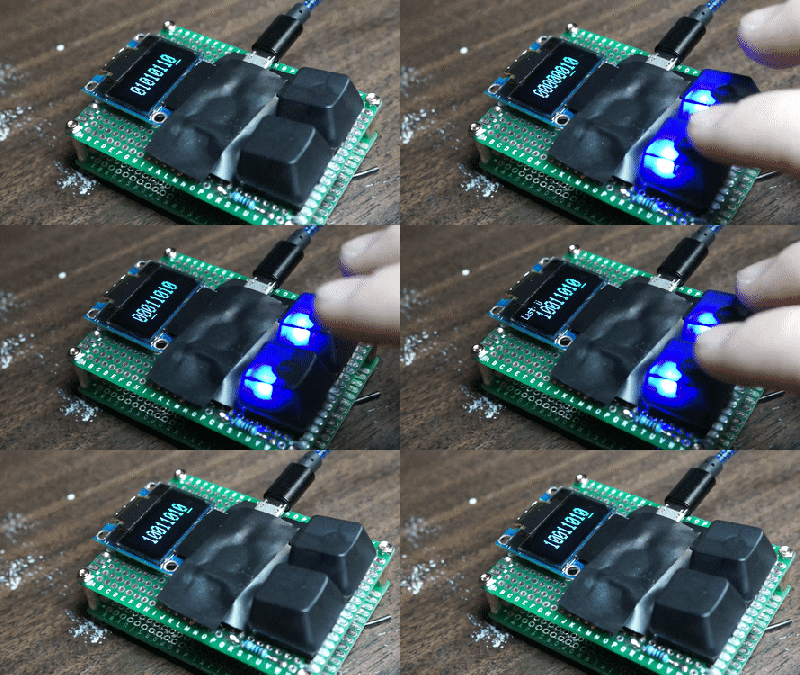
No keyboard can be as high-end as the one you already have, your position in the hierarchy of text entry is assured. But then along comes [Chris Johnston] with his project, and suddenly your desktop looks very cluttered. It’s a binary keypad with only a 0 key, a 1 key, and an OLED display. All input is as a series of binary bytes, so as a hardcore binary typist you’ll need to know your ASCII.

Behind the keys is an Arduino Pro Micro acting in USB HID mode, and running the code you can download from the GitHub link above. It’s a gloriously pointless input device, but we’re sure you’ll agree it has something of the 00110001 00110011 00110011 00110111 about it.

If you think you may have seen this before on Hackaday then you’re not quite right. We have had a binary keypad in the past, but that one had a return key and thus had three keys. This one’s a 2-key ‘board for binary purists.

[via /r/mechanicalkeyboards/]

Vintage Laptop Keyboard Types Again Through USB

Have you ever had a laptop you just wish you didn’t have to retire when its specification becomes to aged for your needs? Wouldn’t it be great if you could upgrade it and keep using the physical hardware!

[Alpinedelta] has a vintage Toshiba T1000 laptop, roughly a PC-XT clone from the late 1980s. Its 80C88 processor, CGA display, and 512k of memory make it a museum-piece, but he has plans to modernise it using a LattePanda Intel Atom based single board computer.

To make that happen, he has to ensure all the Toshiba’s peripherals will talk to a modern host. Unfortunately back in the 1980s many PC clones were clones in a rather loose sense, and especially so in the laptop arena. Thus there are no handy standard PC interfaces and since USB was several years away at the time, nothing the LattePanda can talk to directly. His solution for the keyboard is to wire its matrix directly to a Teensy microcontroller that then provides a USB interface, and he’s put up a useful step-by-step Instructables guide.

There is no standard for a laptop keyboard matrix, so the first and most tedious task is to unpick its layout.This he did by identifying each trace and assigning a different rainbow colour to it, before noting down which keys appeared on it and collating the results in a spreadsheet. The different colours of wire could then be assigned to the colours of a piece of rainbow ribbon cable, and wired in sequence to the Teensy’s I/O pins. There then follows a step in the software in which he assigns the pin mappings to the lines in his spreadsheet, then the sketch can be compiled and uploaded to the Teensy. Result: a vintage keyboard now talking USB.

Using a Teensy to present a USB keyboard to the world is a well-worn path, we’ve seen it with both newer keyboards and other relics like this one from a DEC VT100.

Thanks [Brent] for the tip.

Physical Kill Switch For Rogue Applications

Necessity is the mother of invention, but sometimes frustration is as good a motivator. [Maciej] does a bunch of statistics in his day job using SPSS. silaczLike most complicated pieces of software, it can get hung, and the only way to stop it is to manually kill the running processes. Apparently, that happened one time too many for [Maciej].

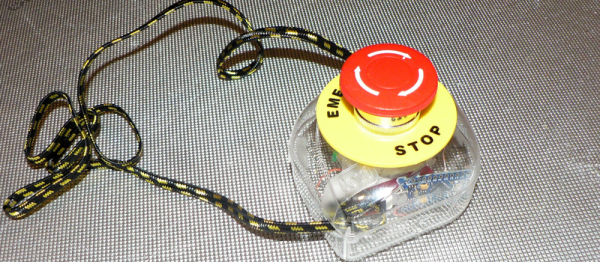
He took matters into his own hands, repurposing a big red emergency-stop button for the task. It’s mounted on a jar, and the microcontroller inside is configured as a USB keyboard. When he mashes the button, it opens the “Run…” menu and types out taskkill spssengine.exe for him.

We can totally see the therapeutic value of such a device. Plus, in case SPSS is gobbling up his system memory and everything’s approaching standstill, the vital seconds saved by the microcontroller’s quick-typing fingers could be a lifesaver.

ZX Spectrum Turned Into A USB Keyboard

ZX

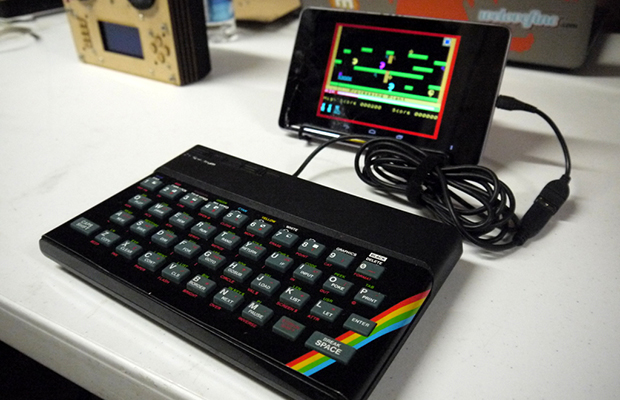
They’re a little hard to find in the US, but the ZX Spectrum is right up there with the Commodore 64 and the Atari 8-bit computers in England. [Alistair] wanted to recreate the feeling of sitting right in front of the TV with his Speccy, leading him to create the ZX Keyboard, a Spectrum repurposed into a USB keyboard.

While most projects that take an old key matrix and turn it into a USB keyboard use the TMK firmware, [Alistair] wanted to flex his programming muscles and wrote the firmware from scratch. It runs on an Arduino Pro Mini, scanning the matrix of five columns and eight half rows to turn combinations of keypresses into an astonishing number of commands, given the limited number of keys on the ZX.

The firmware is available on [Alistair]’s repo, available to anyone who doesn’t want to pay the £50 a new ZX Spectrum keyboard will cost. As far as the usability of a Spectrum keyboard goes, at least [Alistair] didn’t have an Atari 400 sitting in the attic.

A Wireless Computer Remote That Emulates A USB Keyboard

PCRemote

If you are anything like [Antoine], you would love to be able to control your PC with a simple hand-held remote control from anywhere in your house. [Antoine] wrote in to tell us about his wireless computer remote that emulates a USB keyboard, making it suitable for any device that uses a USB keyboard.

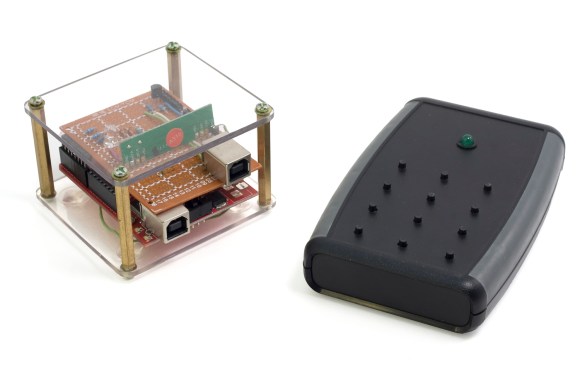
His blog post is very well written and contains a ton of design information and background on the project. He initially wanting to easily control his PC’s music from anywhere in his house without needing to be within line of sight of his computer. The end result is a very handy remote that can be used to change music, video, and even launch applications on his computer. The system consists of a base station for his remote that connects to the computer and acts as a USB keyboard, and the remote itself. The base station uses V-USB on an Arduino to interface with the computer, and VirtualWire to handle the wireless protocol for the remote. For those of you who don’t know about VirtualWire (now superseded by RadioHead), it is a very cool Arduino library that lets you easily use raw wireless interfaces (also called vanilla wireless interfaces).

Without going into too much detail here (be sure to see the actual post for more information), the remote itself was redesigned after the initial proof of concept to maximize battery life. The final power consumption is very impressive, resulting in a battery life of more than two years! This remote system is very well put together and contains many aspects that can easily be reused for other projects.