These days, most of us are carrying capable smartphones with high-quality cameras. It makes shooting video so easy as to take all the fun out of it. [AIRPOCKET] decided to bring that back, by converting an old spring-driven 8mm film camera to shoot digital video.
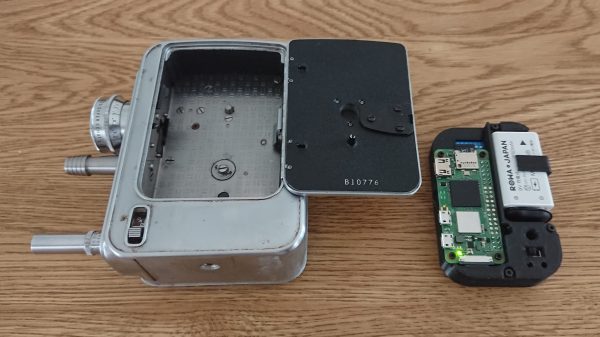
The camera in question is a magazine-fed Bell & Howell Model 172 from the 1950s. In its original spring-driven form, it could shoot for approximately 35 seconds at a (jerky) frame rate 16 fps.
In this build, though, the film is replaced with a digital imaging system designed to fit in the same space as the original magazine. A Raspberry Pi Zero 2 was pressed into service, along with a rechargeable battery and Pi camera module. The camera is timed to synchronise with the shutter mechanism via a photosensor.
Since it uses the original optics and shutter speed, the resulting video is actually very reminiscent of the Super 8 cameras of the past. It’s an impressive way to get a retro film effect straight into a digital output format. The alternative is to just shoot on film and scan it afterwards, of course! Video after the break.
Continue reading “Hackaday Prize 2022: A Spring-Driven Digital Movie Camera”