IoT Traffic Light Is Cardboard Made Fun

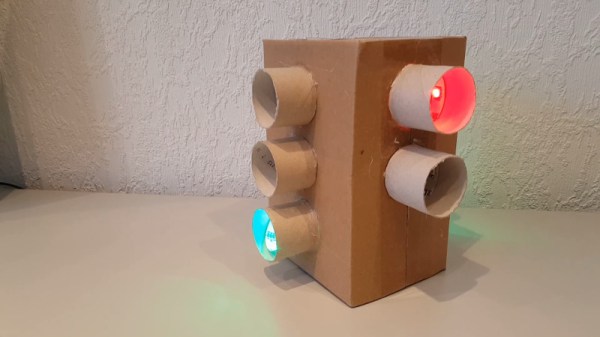
Traffic lights! Kids love them, hackers love them, and they’re useful in industrial contexts to see if the giant machine is currently working or having a bad day. While the real deal are unwieldy and hard to come by, there’s nothing stopping you tackling a fun cardboard build at home.

It’s a great way to teach kids about traffic rules, too.

In this case, the light is courtesy of WS2812b LED strips. They’re a great choice, as they interface easily with most microcontrollers thanks to readily available libraries. An ESP8266 runs the show here, serving up a basic web interface over WiFi. This allows the color of the various LEDs to be controlled remotely. It also allows the lights to be switched on and off to direct whatever traffic you may be controlling. The whole project is all wrapped up in a simple cardboard enclosure, mimicking the municipal street furniture which so resolutely commands our movements.

The cardboard traffic light is a project that shows just what can be done with some off-the-shelf parts and some good old-fashioned kindergarten-style arts and crafts. If you find yourself similarly admiring these devices, check out our primer on the North American traffic signal. Video after the break.

Continue reading “IoT Traffic Light Is Cardboard Made Fun”

Glow In The Dark Globe On A Spherical Screen

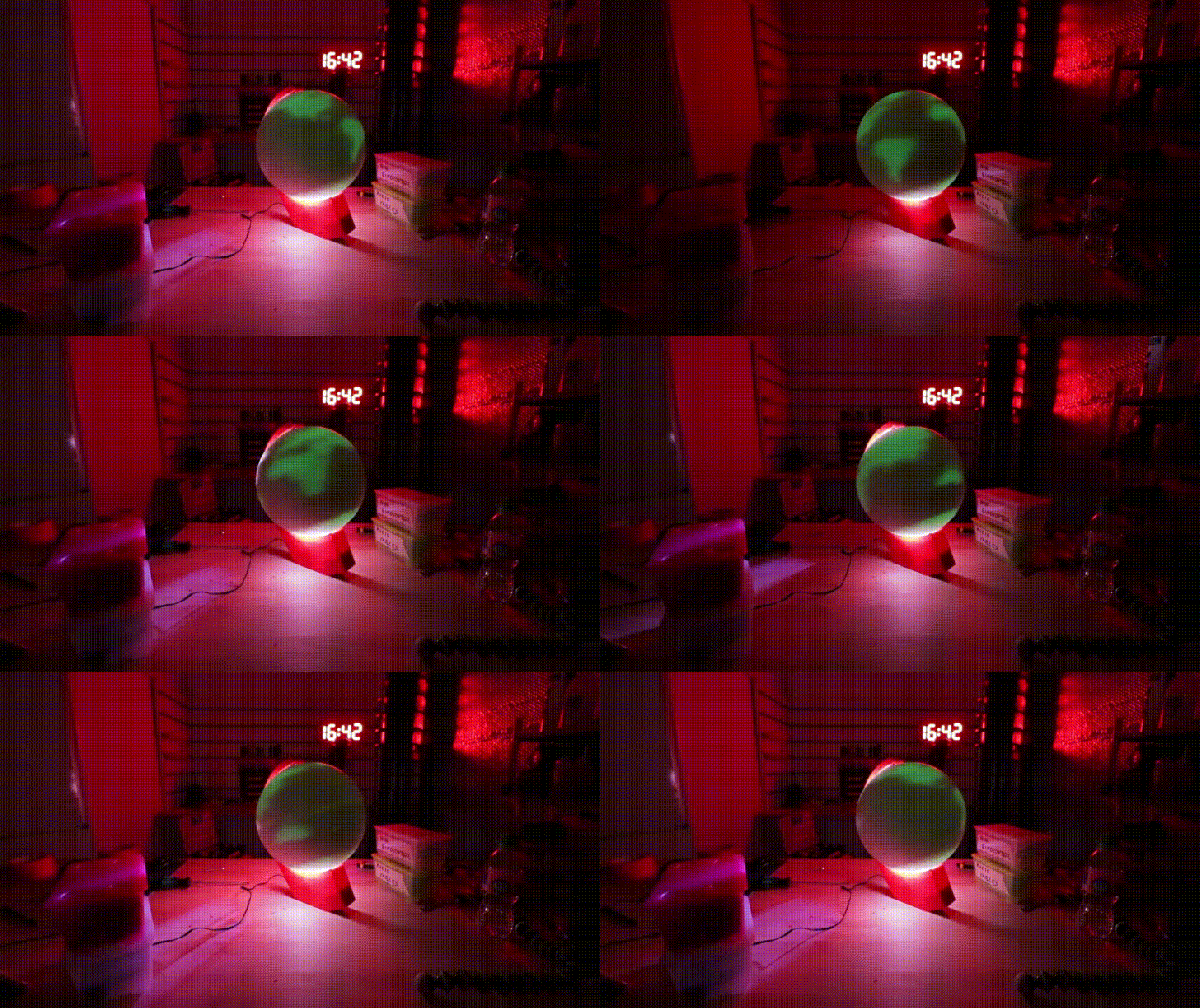
Terrestrial globes are almost a thing of the past in an era of Google Earth, but they can still be an exciting object worth hacking together, as [Ivan Miranda] shows with his glow-in-the-dark globe. It’s a globe, it’s a display, and it’s a great use of glow in the dark filament.

For the mechanical part of this build, [Miranda] used glow in the dark filament to 3D print a sphere and a reinforcing ring that hides inside. A threaded rod through the middle secured with screws and bearings make an appropriate spindle, and is attached to a stepper motor in the 3D printed stand. So far, it’s a sphere made of glowey plastic. Where’s the ‘globe’ part coming from?

To project a globe onto this sphere, [Miranda] used a strip of WS2812B LEDs stuck to the inside of the stand’s arc are programmed to selectively illuminate the globe as it rotates on its axis. After a brief hiccup with getting the proper power supply, he was ready to test out his new….. giant light ball.

It turns out, the filament was a bit more transparent than he was expecting so he had to pull it all apart and cover the interior with aluminium tape. [Miranda] also took the chance to clean up the wiring, code, and upgrade to a Teensy 3.1 before another test.

Despite the resulting continental projection being upside-down, it worked! [Miranda] added a USB cable before he closed it up again in case he wanted to reprogram it and display any number of images down the line.

[Thanks for the tip, olivekrystal!]

Tron Inspired LED Desk Lighting

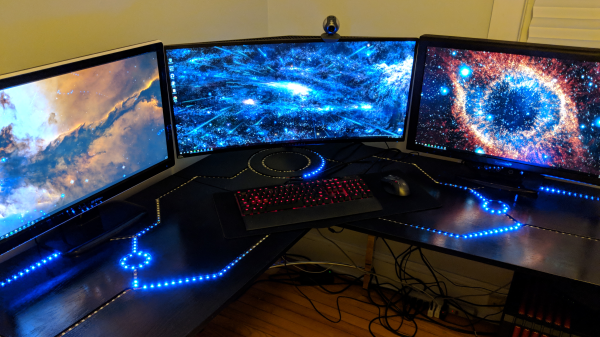
Reddit user [barbarisch] thought his computer desk was a bit boring, so he came up with a cool project to spice it up: A Tron-inspired computer desk with embedded LED strips!

[Barbarisch] took a basic desk and replaced the tops with ¾” oak plywood. The LED routes were planned out on the computer first and then marked out on the plywood. Using straightedges, [barbarisch] carefully used a router to create the straight grooves and then he created a jig for doing the circles. A bit of trimming and sanding and the three pieces of the desk match up.

After painting the desk, it was time to take a crack at the LEDs. Originally, [barbarisch] thought about 3D printing some diffusers to cover the individual WS2812B lights, but it wasn’t coming out to his liking, so diffusers have been put on the back-burner for now. Holes were drilled in the desk so that connections could be made between the different parts of the grooves and soldering was done between bits of the strips when turning corners. The whole thing’s being controlled by a Raspberry Pi and a Fadecandy USB controller for RGB strips. [Barbarisch] modified a Pi case so that the Fadecandy board would fit as well as printing out a bracket to mount the hardware under the desk.

A fun project to update that boring computer desk and to help you out, the python code which communicates with the Fadecandy server has been put up on GitHub. From the Reddit discussion, it looks like [barbarisch] might have found a solution for diffusing the LEDs! If it’s an LED desk you’re interested in, though, we’ve seen interactive LED tables and Mega LED desks before!

Continue reading “Tron Inspired LED Desk Lighting”

There’s More To MIDI Than Music – How About A Light Show?

MIDI instruments and controllers are fun devices if you want to combine your interest in music and electronics in a single project. Breaking music down into standardized, digital signals can technically turn anything with a button or a sensor into a musical instrument or effect pedal. On the other hand, the receiving end of the MIDI signal is mostly overlooked.

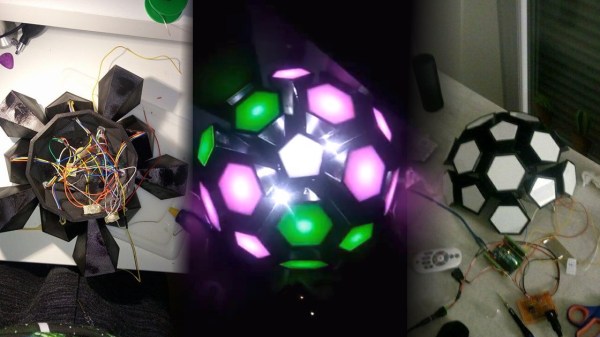
[FuseBerry], a music connoisseur with a background in electronics and computer science, always wanted to build a custom MIDI device, but instead of an instrument, he ended up with a MIDI controlled light show in the shape of an exploded truncated icosahedron ([FuseBerry]’s effort to look up that name shouldn’t go unnoticed). He designed and 3D-printed all the individual geometric shapes, and painstakingly equipped them with LEDs from a WS2818B strip. An Arduino Uno controls those LEDS, and receives the MIDI signals through a regular 5-pin DIN MIDI connector that is attached to the Arduino’s UART interface.

The LEDs are mapped to pre-defined MIDI notes, so whenever one of them is played, and their NoteOn message is received, the LEDs light up accordingly. [FuseBerry] uses his go-to DAW to create the light patterns, but any software / device that can send MIDI messages should do the trick. In the project’s current state, the light pattern needs to be created manually, but with some adjustments to the Arduino code, that could be more automated, something along the lines of this MIDI controlled Christmas light show.

Continue reading “There’s More To MIDI Than Music – How About A Light Show?”

Stecchino Game Is All About Balancing A Big Toothpick

Stecchino demo by the creator

Self-described “Inventor Dad” [pepelepoisson]’s project is called Stecchino (English translation link here) and it’s an Arduino-based physical balancing game that aims to be intuitive to use and play for all ages. Using the Stecchino (‘toothpick’ in Italian) consists of balancing the device on your hand and trying to keep it upright for as long as possible. The LED strip fills up as time passes, and it keeps records of high scores. It was specifically designed to be instantly understood and simple to use by people of all ages, and we think it has succeeded in this brilliantly.

To sense orientation and movement, Stecchino uses an MPU-6050 gyro and accelerometer board. An RGB LED strip gives feedback, and it includes a small li-po cell and charger board for easy recharging via USB. The enclosure is made from a few layers of laser-cut and laser-engraved material that also holds the components in place. The WS2828B WS2812B LED strip used is technically a 5 V unit, but [pepelepoisson] found that feeding them direct from the 3.7 V cell works just fine; it’s not until the cell drops to about three volts that things start to glitch out. All source code and design files are on GitHub.

Games are great, and the wonderful options available to people today allow for all kinds of interesting experimentation like a blind version of tag, or putting new twists on old classics like testing speed instead of strength.

Arduino BabyTV Is Big Fun At Low Resolution

What kind of TV do you have? An older 720p model, or the now standard 1080p? Perhaps you’ve made the leap to the next generation, and are rocking a 4K display in the living room. All those are are fine and dandy if you just want to watch the local sportball contest, but where’s the challenge in that? With all the technology and modular components we have access to anymore, nowadays all the real hackers are making their own TVs.

Of course, when [Nikolai] built his very own LED TV, he did have to make a few concessions. For one thing, there’s no tuner on this model. Oh, and there’s the small issue of only having a 16×16 resolution. It might not be your idea of the perfect display, but it’s just perfect for his newborn son.

That’s right, [Nikolai] got his entry for the “Hacker Parent of the Year” award in early, and built an LED display for his son that he’s calling “BabyTV”.

Rather than the shows, trash, advertisements that they play on the kid channels, this TV only shows animated characters from retro games. We’ll concede that this project might be an elaborate Clockwork Orange style attempt at hypnotizing his son to instill an appreciation for classic gaming. But we’ll allow it.

To make his BabyTV go, [Nikolai] used a 16×16 WS2812B LED panel and an Arduino Nano. Two rotary encoders are used to allow adjusting brightness and change the character currently being shown on the screen. As a particularly clever hack, the Arduino has an IR sensor attached and is constantly watching for any signals. If an IR signal is detected, the BabyTV switches to the next image. So if Junior has a standard IR remote in his hands, any button he presses will cause the display to change to the next “channel”.

Historically speaking we haven’t seen much stuff for children here at Hackaday, but 2018 seems to be changing that. Recent projects like the incredible scratch built mini excavator and gorgeous AT-ST high chair would seem to indicate we’re currently witnessing a generation of hackers become parents. Don’t panic folks, but we might be getting old.

Continue reading “Arduino BabyTV Is Big Fun At Low Resolution”

The Engineering Case For Fusing Your LED Strips

Modern LED strips are magical things. The WS2812 has allowed the quick and easy creation of addressable RGB installations, revolutionizing the science of cool glowy things. However, this accessibility means that it’s easy to get in over your head and make some simple mistakes that could end catastrophically. [Thomas] is here to help, outlining a common mistake made when building with LED strips that is really rather dangerous.

The problem is the combination of hardware typically used to run these LED strings. They’re quite bright and draw significant amounts of power, each pixel drawing up to 60 mA at full-white. In a string of just 10 pixels, the strip is already drawing 600 mA. For this reason, it’s common for people to choose quite hefty power supplies that can readily deliver several amps to run these installations.

It’s here that the problem starts. Typically, wires used to hook up the LED strips are quite thin and the flex strips themselves have a significant resistance, too. This means it’s possible to short circuit an LED strip without actually tripping the overcurrent protection on something like an ATX power supply, which may be fused at well over 10 amps. With the resistance of the wires and strip acting as a current limiter, the strip can overheat to the point of catching fire while the power supply happily continues to pump in the juice. In a home workshop under careful supervision, this may be a manageable risk. In an unattended installation, things could be far worse.

Thankfully, the solution is simple. By installing an appropriately rated fuse for the number of LEDs in the circuit, the installation becomes safer, as the fuse will burn out under a short circuit condition even if the power supply is happy to supply the current. With the example of 10 LEDs drawing 600 mA, a 1 amp fuse would do just fine to protect the circuit in the event of an accidental short.

It’s a great explanation of a common yet dangerous problem, and [Thomas] backs it up by using a thermal camera to illustrate just how hot things can get in mere seconds. Armed with this knowledge, you can now safely play with LEDs instead of fire. But now that you’re feeling confident, why not check out these eyeball-searing 3 watt addressable LEDs?

Continue reading “The Engineering Case For Fusing Your LED Strips”