Decompiling Sonic Runners

Usually, when you hear about games being decompiled and rebuilt, the games are often decades-old relics, loving and saved from the ravages of time. [MattKC] recently set out to decompile the 2015 game Sonic Runners.

The game was a 2D endless runner released on mobile platforms. Despite getting praise for the gameplay, it received mixed reviews for the pop-up ads and pay-to-play elements. A little over a year later, the game was discontinued. However, the game required a constant online connection, so once the servers were offline, it rendered the over five million downloads unplayable.

A team of developers worked to reverse engineer the server, and with a little bit of binary hacking, the client could be patched to connect to a community-hosted server instead. However, as phones with notched displays came out and suggestions for improvements stacked up, the community realized a new client would bring immense benefits. Compared to many decompilation projects, Sonic Runners was pretty easy as it uses Unity, which means most of the code is in C#. Unfortunately, the build of Unity used by the game is from 2012, meaning many of the tools designed for much later versions of Unity were inoperable.

However, one native code library called UnmanagedProcess was designed to confuse reverse engineering efforts. The library handled AES encryption and communication with the server. Luckily, the library was a later addition, and earlier versions of its functions still lingered in the C# code. Since an open source server already existed, it was trivial to validate the changes. Additionally, all the shaders were in OpenGL Shading Language (GLSL), which meant rewriting them in High-Level Shading Language (HLSL) and checking that they matched the original GLSL when building for Android.

Now the client has new game modes, no ads, and a proper offline mode. The community continues adding new features and refining the game, which is very satisfying. If you’re curious about reverse engineering, [Matthew Alt] can help you get started.

Continue reading “Decompiling Sonic Runners

The Legend Of Zelda: Decompiled

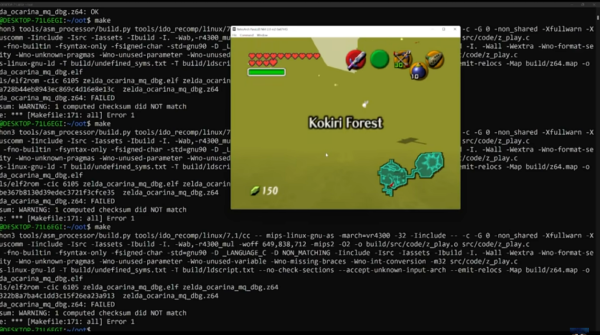
Keeping source code to programs closed is something that is generally frowned upon here for plenty of reasons. Closed source code is less secure and less customizable, but unfortunately we won’t be able to convince everyone of the merits of open source code any time soon. On the other hand, it is possible to decompile some of those programs whose source remains behind locked doors in an attempt to better understand that code, and one of the more impressive examples of that of late is this project which has fully decompiled The Ocarina of Time.

To get started with the code for this project, one simply needs to clone the Git repository and then use a certain set of software tools (depending on the user’s operating system) to compile the ROM from the source code. From there, though, the world is your rupee-filled jar. Like we’ve seen from other decompiled games, any number of enhancements to the original game can be made including increasing the frame rate, improving the graphics, or otherwise adding flourishes that wouldn’t otherwise be there.

The creators of this project do point out that this is still a work-in-progress as only one of the 18 versions have been completed, but the fact that the source code they have been able to decompile builds a fully-working game when recompiled speaks to how far along it’s come. We’ve seen similar processes used for other games before that also help to illustrate how much improvement is possible when re-writing old games from their source code.

Thanks to [Lazarus] for the tip!

Continue reading “The Legend Of Zelda: Decompiled”

Camera Hack Peels Back Layers Of Embedded Linux

Embedded Linux devices are everywhere these days, and sooner or later, you’re going to want to poke around in one of them. But how? That’s where posts like this one from [Felipe Astroza] come in. While his work is focused on the Foscam C1 security camera, the techniques and tools he outlines here will work on all sorts of gadgets that have a tiny penguin at their core.

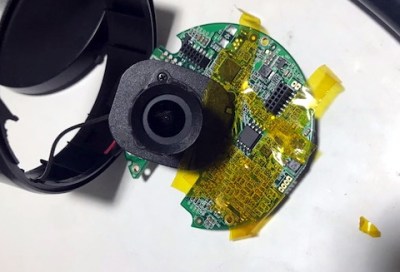
Rather than trying to go in through the front door, [Felipe] starts his assault with the nuclear option: removing the SPI MX25L12835F flash chip from the camera’s PCB and dumping its contents with a Raspberry Pi. From there he walks through the use of different tools to determine the partition scheme of the chip and eventually extract passwords and other interesting bits of information from the various file systems within.

Getting ready to remove the flash chip.

That alone would be worth the read, but things really get interesting once [Felipe] discovers the FirmwareUpgrade program. Since the Foscam’s software updates are encrypted, he reasons that reverse engineering this binary would uncover the key and allow for the creation of custom firmware images that can be flashed through the stock interface.

Further investigation with Ghidra and friends identifies an interesting shared library linked to the executable in question, which is then disassembled in an effort to figure out how the key is being obfuscated. We won’t ruin the surprise, but [Felipe] eventually gets what he’s after.

This isn’t the first time [Felipe] has played around with the firmware on these Internet connected cameras, and we dare say it won’t be his last. For those who are really into tinkering with these sort of devices, it’s not unheard of to install a socket for the flash chip to make software modifications faster and easier.

Giving Recalled Fitness Trackers A Second Chance

When it was released back in 2012, the Basis B1 fitness tracker was in many ways ahead of its time. In fact, the early smartwatch was so impressive that Intel quickly snapped up the company and made it the cornerstone of their wearable division. Unfortunately a flaw in their next watch, the Basis Peak, ended up literally burning some wearers. Intel was forced to recall the whole product line, and a year later dissolved their entire wearable division.

Given their rocky history, it’s probably no surprise that these gadgets can be had quite cheaply on the second hand market. But can you do anything with them? That’s what [Ben Jabituya] recently decided to find out, and the results of his experiments certainly look very promising. So far he hasn’t found a way to activate a brand-new Basis watch, but assuming you can get your hands on one that was actively being used when Intel pulled the plug, his hacks can be used to get it back up and running.

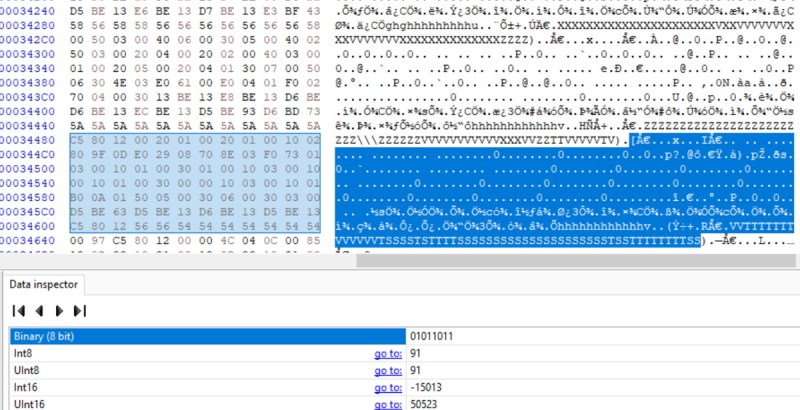
Examining the downloaded sensor logs.

The Basis Android application has long since been removed from the Play Store, but [Ben] said it wasn’t too hard to find an old version floating around on the web. After decompiling the application he discovered the developers included a backdoor that lets you configure advanced options that would normally be hidden.

How do you access it? As a reminder of the era in which the product was developed, you simply need to log into the application using Jersey and Shore as the username and password, respectively.

Between the developer options and API information he gleaned from the decompiled code, [Ben] was able to create a faux Basis authentication server and point the application to it. That let him get past the login screen, after which he was able to sync with the watch and download its stored data. Between examinations with a hex editor and some open source code that was already available online, he was able to write a Python script for parsing the data which he’s been kind enough to share with the world.

We’re very pleased to see an open source solution that not only gets these “bricked” smartwatches back online, but allows the user to keep all of the generated data under their own control. If you’d like to do something similar with a device that doesn’t have a history of releasing the Magic Smoke, the development of an open source firmware for more modern fitness trackers might be of interest.

Continue reading “Giving Recalled Fitness Trackers A Second Chance”

Debugging An Arduino With An Arduino

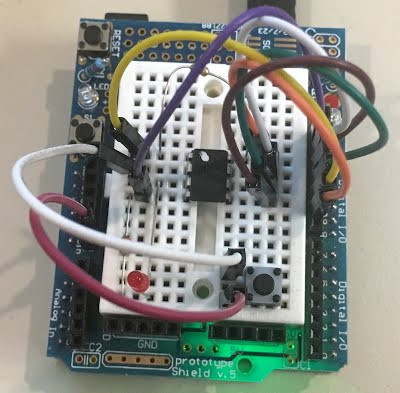
As every Hackaday reader knows, and tells us at every opportunity in the comments, adding an Arduino to your project instantly makes it twice as cool. But what if, in the course of adding an Arduino to your project, you run into a problem and need to debug the code? What if you could use a second Arduino to debug the first? That would bring your project up to two Arduinos, instantly making it four times as awesome as before you started! Who could say no to such exponential gains?

Debugging an ATTiny85

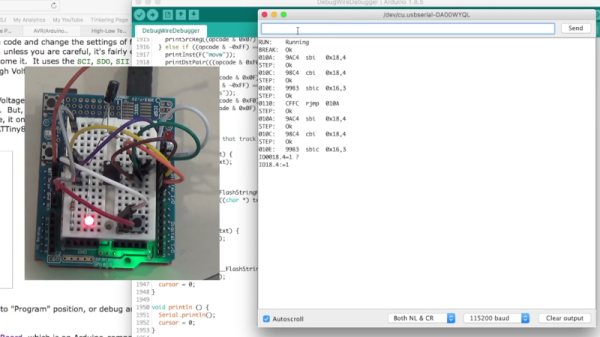
Not [Wayne Holder], that’s for sure. He writes in to let us know about a project he’s been working on for a while that allows you to debug the execution of code on an Arduino with a second Arduino. In fact, the target chip could even be another AVR series microcontroller such as a the ATTiny85. With his software you can single-step through the code, view and modify values in memory, set breakpoints, and even disassemble the code. Not everything is working fully yet, but what he has so far is very impressive.

The trick is exploiting a feature known as “debugWIRE” that’s included in many AVR microcontrollers. Unfortunately documentation on this feature is hard to come by, but with some work [Wayne] has managed to figure out how most of it works and create an Arduino Sketch that lets the user interact with the target chip using a simple menu system over the serial monitor, similar to the Bus Pirate.

[Wayne] goes into plenty of detail on his site and in the video included after the break, showing many of the functions he’s got working so far in his software against an ATTiny85. If you spend a lot of time working on AVR projects, this looks like something you might want to keep installed on an Arduino in your tool bag for the future.

Debugging microcontroller projects can be a huge time saver when your code starts running on real hardware, but often takes some hacking to get working.

Continue reading “Debugging An Arduino With An Arduino”

Decoding ZeuS Malware Disguised As A .DOC

[Ronnie] recently posted about his adventures in decoding malware. One of his users reported a phishy email, which did indeed turn out to contain a nasty attachment. The process that [Ronnie] followed in order to figure out what this malware was trying to do is quite fascinating and worth the full read.

[Ronnie] started out by downloading the .doc attachment in a virtual machine. This would isolate any potential damage to a junk system that could be restored easily. When he tried to open the .doc file, he was presented with an error stating that he did not have either enough memory or disk space to proceed. With 45GB of free space and 2GB of RAM, this should not have been an issue. Something was definitely wrong.

The next step was to open the .doc file in Notepad++ for analysis. [Ronnie] quickly noticed that the file was actually a .rtf disguised as a .doc. [Ronnie] scanned through large chunks of data in an attempt to guess what the malware was trying to do. He noticed that one data chunk ended with the bytes “FF” and D9″, which are also found as the ending two bytes of .gif files.

[Ronnie] copied this data into a new document and removed all new line and return characters. He then converted the hex to ASCII, revealing some more signs that this was actually image data. He saved this file as a .gif and opened it up for viewing. It was a 79KB image of a 3D rendered house. He also found another chunk of data that was the same picture, but 3MB in size. Strange to say the least.

After finding a few other weird bits of data, [Ronnie] finally started to see more interesting sections. First he noticed some strings with mixed up capital and lowercase letters, a tactic sometimes used to avoid antivirus signatures. A bit lower he found a section of data that was about the size of typical shellcode. He decoded this data and found what he was looking for. The shellcode contained a readable URL. The URL pointed to a malicious .exe file that happened to still be available online.

Of course [Ronnie] downloaded the .exe and monitored it to see how it acted. He found that it set a run key in the registry to ensure that it would persist later on. The malware installed itself to the user’s appdata folder and also reached out repeatedly to an IP address known to be affiliated with ZeuS malware. It was a lot of obfuscation, but it was still no match for an experienced malware detective.