LED Choker Is A Diamond In The Junk Pile

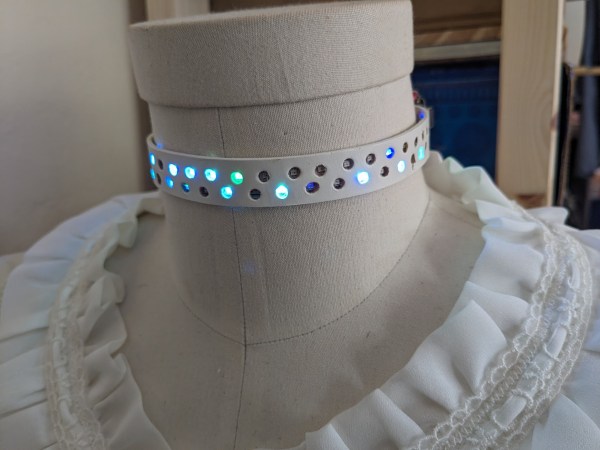
Isn’t it great when you find a use for something that didn’t work out for the project it was supposed to? That’s the story behind the LED strips in this lovely blinkenlights choker by [Ted].

The choker itself is a 15 mm wide leather strap with holes punched in it. According to [Ted], the hole punching sounds like the absolute worst and hardest part to do, because the spacing of the holes must be greater than that of the LEDs to account for flex in the strap. [Ted] tested several distances and found that there is little margin for error.

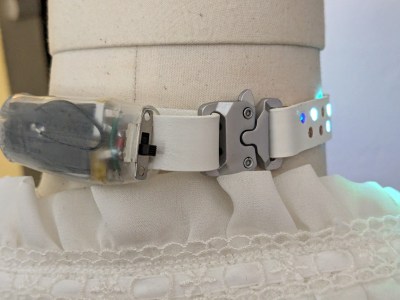
Controlling those blinkenlights is a Seeed Xiao S3, which fits nicely behind the neck in what looks like a heat shrink tube cocoon. [Ted] chose this because there was one lying around, and it happens to be a good fit with its LiPo charge controller.

The choker runs on four 300 mAh LiPo batteries, which makes for more bulk than [Ted] would like, but again, sometimes it’s about what you have lying around. Even so, the batteries last around two hours.

Sometimes it’s about more than just blinkenlights. Here’s an LED necklace that reports on local air quality.

Tetris Goes Round And Round

You’ve probably played some version of Tetris, but [the Center for Creative Learning] has a different take on it. Their latest version features a cylindrical playing field. While it wouldn’t be simple to wire up all those LEDs, it is a little easier, thanks to LED strips. You can find the code for the game on GitHub.

In all, there are 5 LED strips for a display and 13 strips for the playing area, although you can adjust this as long as there are at least 10 rows. The exact number of LEDs will depend on the diameter of the PVC pipe you build it on.

Continue reading “Tetris Goes Round And Round”

DIY Tube Lights Look Amazing For Just $50 A Piece

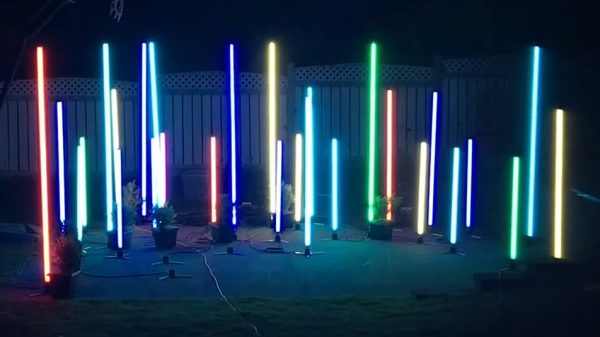
It’s the future. We should have weird glowy lights everywhere, all over our homes, cars, and businesses. In the automotive world, luxury automakers are doing their part with LED ambient lighting systems, but the rest of us have to step up. [Super Valid Designs] has developed an excellent modular DMX lighting rig that’s fit for this purpose; the rest of us just have to get to work and build our own!  (Video, embedded below.)

The design relies on hot-swapping powered bases that let a variety of different lights to be swapped in as needed. They use a custom four-pin socket designed by [Super Valid Designs] using PVC and ABS plumbing and conduit parts and tent pole springs from Home Depot. There’s a 3D-printable version, too, which is useful for those around the world that can’t get access to American standard gear easily. Anyone from the Nerf scene will understand this frustration well.

The real cool part of the modular rig, though, are the tube fixtures. There’s a ball design too, but they don’t look quite as future-cool as the tubes. They use fluorescent tube protectors as a cheap source of clear tubes, and use plumbing and conduit parts to make easy-insert connectors for pairing with the modular bases. Light is courtesy of old-school non-addressable RGB LED strips, attached to flat aluminium trim with their own adhesive combined with a wrap of clear packing tape as well. The LED strip is attached to one side of the tube, with parchment paper layered inside the tubes to act as a diffuser.

Building in quantities of 8 or more, [Super Valid Designs] reckons that the tubes can be built for $50 each or less. Of course, that adds up to a few hundred dollars in total, but the results speak for themselves.

If you’re thinking of tackling this project, but DMX is beyond your current skillset, fear not. We’ve got just the primer to get you started! Video after the break.

Continue reading “DIY Tube Lights Look Amazing For Just $50 A Piece”

1D LED PONG, Arduino-Style

Maybe it’s just us, but isn’t it kind of amazing that in a world of pretty darn realistic games, PONG is still thrilling to play? This 1D implementation by [newsonator] is about as exciting as it gets.

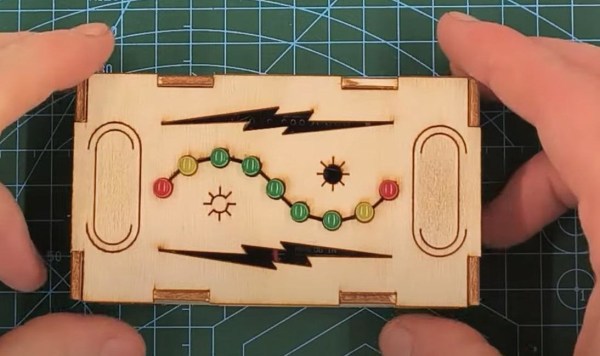
It works like you’d probably expect — the light moves back and forth between the two players. Keep it in the green and you have a nice, gentle volley going. Let it hit your red LED and you’ve lost a point. But if you can push your button while your yellow LED is lit, the light speeds up tremendously until the next button press in the green.

Our only wish is that subsequent yellow-light button presses would make it speed up even more. But there are really just the two speeds with the current programming.

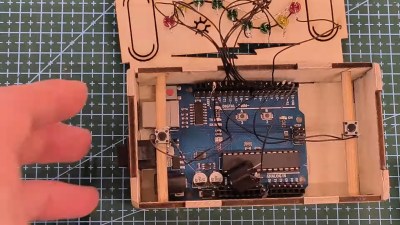
Inside the cool laser-cut box is an Arduino Uno and a 9V battery, plus a current-limiting resistor and the all-important buzzer. We like how [newsonator] wired up the LEDs to the Arduino by soldering them to a row of header pins and sticking that into the Arduino so it can be used in other projects down the line. We also like how [newsonator] shoved a couple of dowels through the box to ultimately support the two buttons.

Check out the intro video after the break for the overall details. The build is done over a few different short videos which follow.

Although this is pretty small, it isn’t quite the minimum viable.

Continue reading “1D LED PONG, Arduino-Style”

A Fully-Transparent Air Bubble Display

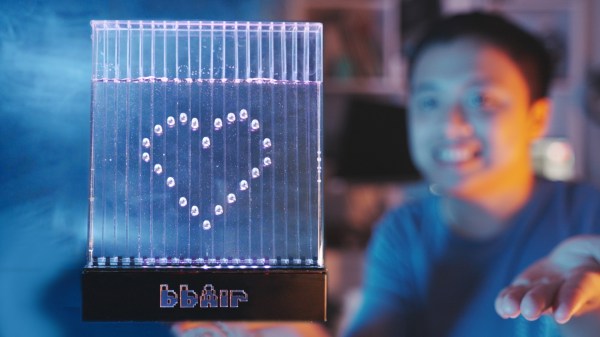
We all have good intentions when starting a new project, but then again, we all know where those lead. Such is the case with [RealCorebb]’s BBAir project, a completely transparent air bubble display. Although the plan was to spend about three months on it, the months slowly added up to a full year of tinkering.

It all started when [RealCorebb] made a subscriber counter using Minecraft campfire smoke to display the digits. Someone suggested using air to implement the next iteration, and for [RealCorebb], it was challenge accepted. After considering a syringe for each channel, a separate pump, or one pump and many solenoids, [RealCorebb] settled on solenoids to push air, and designed a PCB to reduce the amount of wire spaghetti.

Once [RealCorebb] created an acrylic enclosure and wired everything up, it was time to test it out. Everything worked, except that air was leaking from somewhere, which turned out to be the way the solenoids were installed. Then, of course, it was time to don sunglasses and write the code. We still don’t know if [RealCorebb] settled on water, glycerine, or silicone oil, but the end result is quite nice, and we’re betting on glycerine. Be sure to check out the build video after the break, which has English subtitles.

Although we’ve seen our share of bubble displays before, we often discuss bubble LEDs displays like this one.

Continue reading “A Fully-Transparent Air Bubble Display”

Add Some Blinkenlights To Your Supercon Badge

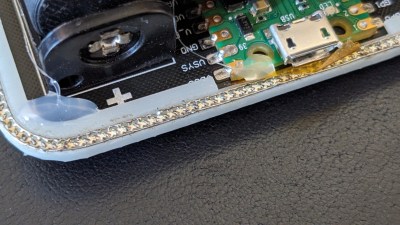
We’re not sure what is more amazing here: the glow of the blinkenlights themselves, the tedium involved in creating it, or the fact that [makeTVee] soldered 280 microscopic WS2812 LEDs while at Supercon.

This hack began before the con when [makeTVee] designed the LED-diffusing frame in Fusion 360 and printed it in clear resin. Rather than solder the LEDs straight, the frame has 280 teeth that support each one at a 55° angle.

Not only does this look cool, it makes the bridging of DOUT to DIN much easier. That leaves GND and VCC to be painstakingly connected with 30 AWG wire. How, you might ask? With a little help from 3.5x magnifying glasses and the smallest soldering iron tip available, of course.

But that’s not all. Since 280 addressable LEDs need a lot of power, [makeTVee] also designed a holder for the LiPo battery pack that fits into the existing AA holders.

Want to see more awesome badge hacks? Check out the compendium.

LED Ring Brings The Bling

We’ve seen our share of light-up jewelry over the years, but for some reason — probably power — it’s almost always earrings or necklaces. So when we saw [ROBO HUB]’s LED ring, we had to check it out. It involves a bit of behind-the-scenes action in the form of a battery holder that you palm, but the end effect is quite cool.

Essentially, this is a 3D printed ring with SMD LEDs painstakingly soldered together in parallel along a pair of thin copper wires. The ring itself is in two parts: a base, and a cover to diffuse and protect the LEDs. A pair of wires run out from the ring and connect to a printed coin cell holder.

Continue reading “LED Ring Brings The Bling”