Play Doom Or GTA V With Your Own Custom Controller And Xbox Emulator

[Arnov] is bringing his own custom-made controller to the party and it is sure to impress. The design appears to have been inspired by the Xbox controller layout. Two joysticks for fine control of game characters, 4 face buttons, and two shoulder buttons. He opted for all through-hole components to make the assembly easier. No messing with tiny surface mount components here. We really appreciate the detail given to the silkscreen and the homage paid to a staple of retro gaming.

We were pretty impressed with how smoothly the controller translated to the game. He mentioned that was a huge improvement over his previous design. His original design had buttons instead of joysticks, but switching to joysticks gave him much better in-game control. That could also have a lot to do with the Xbox controller emulator running the background, but still.

Given that gift-giving season is upon us, you could really impress the video game enthusiast in your life with this as a custom gift. You could even run Retro games like Doom if you hook it up to a RetroPie. That ought to get a few people’s attention.

Continue reading “Play Doom Or GTA V With Your Own Custom Controller And Xbox Emulator”

An array of open-source clocks that play Pac-Man (or Mrs. Pac-Man).

ESP32 Pac-Man Clock Keeps Track Of How Long You Watch It

There are so many elements that make a good clock worth looking at for much longer than necessary. Not only is this clock quite cool to behold, it plays Pac-Man around the time! Yes, of course you can interact with the Pac-Man — touching the edges of the screen will make him go left, right, up, or down accordingly. You can also change to Ms. Pac-Man and make all the animations go normal speed, fast, or crazy-fast.

[TechKiwiGadgets] built a Pac-Man clock a few years ago that was well-received, but not cheap or easy to mimic. Since then, they have ported the code to the ESP32 and made a new version that has fewer and friendlier components. Not only that, they have great instructions for building the ESP32 shield on protoboard and also offer the shield as an open-source fab-able PCB. Still too much work? The complete kit version is available over on Tindie. Be sure to check it out in crazy speed mode action after the break.

Although this isn’t the first Pac-Man clock we’ve seen, it devotes equal attention to the time and the game, whereas this one is more about the game itself.

Continue reading “ESP32 Pac-Man Clock Keeps Track Of How Long You Watch It”

Retro Game Bow Tie

[Greg] loves hacking his bow ties. Back in high school, he added some bright RGB LEDs to the bow tie he wore to prom and even won the male best-dressed award. Recently he decided to try another bow tie hack, this time giving his tie some retro arcade game feels.

He decided to use an ATtiny85 and to experiment doing some more lower-level programming to refresh his skills. He wrote all his libraries from scratch which really helped him learn a lot about the ATtiny in the process. This also helped him make sure his code was as efficient as possible since he had quite a bit of memory constraints using the ATtiny85 (only 512 bytes of RAM).

He designed the body of the bow tie with wood. He fit all the electronics inside the body while allowing the ATtiny to protrude out of the body giving his bow tie some wanted hacker aesthetic. Of course, he needed to access the toggle switch to play the game, so he made a slot for that as well.

Nice addition to the electronics bow tie collection on Hackaday. Really aesthetic design if you ask us. And you know how much we love retro games.

Continue reading “Retro Game Bow Tie”

Pac-Man Fever Comes To The Pano Logic FPGA

If you’ve been reading Hackaday for a while now, you might recall the tale of Pano Logic that we first covered all the way back in 2013. They were a company that put out some very interesting FPGA-based thin clients, but as occasionally happens in situations like this, the market wasn’t ready and the company went belly up. These thin clients, now without official support, invariably got dumped onto the second-hand market. Shame for Pano Logic and their staff, but good news for hackers like [Skip Hansen].

After seeing a few posts about the Pano Logic devices and general FPGA hacking, he decided to grab a few on eBay and dive in. Using open source tools and the wealth of information that’s available [Skip] was able to get a Pac-Man simulator up and running over his holiday break, and he tells us his life may never be the same again. FPGA hacking is a fascinating subject with a lot of activity right now, and since you can get these Pano Logic boxes on eBay for less than $10 USD in some cases, now is as good a time as ever to get your feet wet.

Like many open source projects, [Skip] says his code is built upon the existing work of a number of other programmers, which let him get up and running much faster than if he had to start from scratch. He describes his code as the “glue” that mashes these projects together, but we think he’s being somewhat modest there. It took more than copying and pasting some code into an IDE to get Blinky, Pinky, Inky and Clyde doing their thing on the Pano Logic.

The biggest challenge was the lack of I/O. The Pano Logic thin clients have USB ports, but it seems nobody has quite figured out how to get them working yet. To talk to the outside world, you’ve got to get a little more creative. Eventually [Skip] was able to track down four lines he could effectively use as GPIO: two which are used to drive the LEDs on the device, and two which are used for the VGA port’s Display Data Channel (DDC) pins. Soldering jumpers from the LEDs to the unused pins in the device’s VGA connector meant he was even able to get these four GPIO lines accessible from the outside of the Pano Logic without having to cut any holes in the case.

Anyone with a Pano Logic client that has a VGA port, an Atari 2600 joystick, and who doesn’t mind soldering a couple of wires can now play Pac-Man with the bitstream [Skip] has provided. But where do we go from here? How long until we see DOOM running on it? Perhaps one of you fine readers should pick one up and see what you can do to advance the state of Pano Logic hacking. Just be sure to let us know about it.

We’ve previously covered one of the projects used to get this Pac-Man simulator off the ground, a very cool ray tracing demo for the Pano Logic developed by [Tom Verbeure]. In fact, [Skip] says that project was what got him interested in FPGA hacking in the first place. If you’re thinking of following his lead, you might also want to check out our FPGA Boot Camp.

Delicious Vector Game Console Runs Pac-Man, Tetris, And Mario

The only question we have about [mitxela]’s DIY vector graphics game console is: Why did he wait five years to tell the world about it?

Judging by the projects we’ve seen before, from his tiny LED earrings to cramming a MIDI synthesizer into both a DIN plug and later a USB plug, [mitxela] likes a challenge. And while those projects were underway, the game console you’ll see in the video below was sitting on the shelf, hidden away from the world. That’s a shame, because this is quite a build.

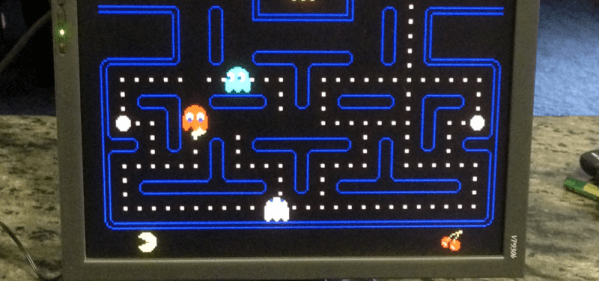
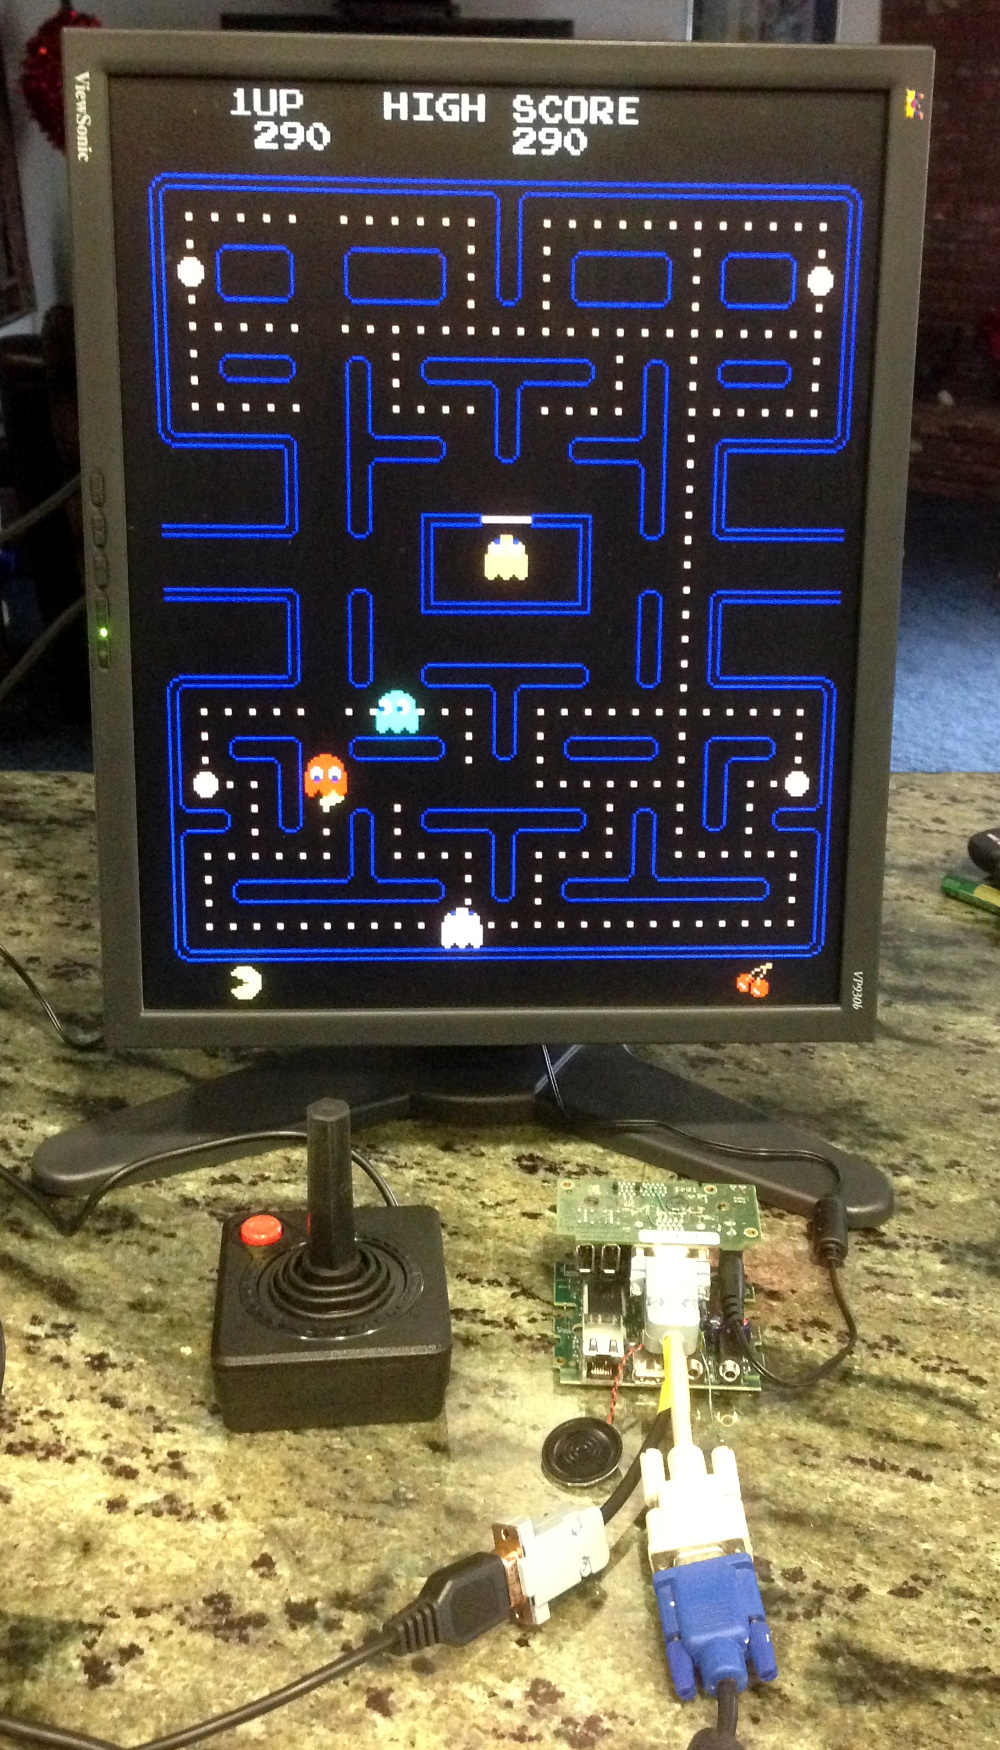
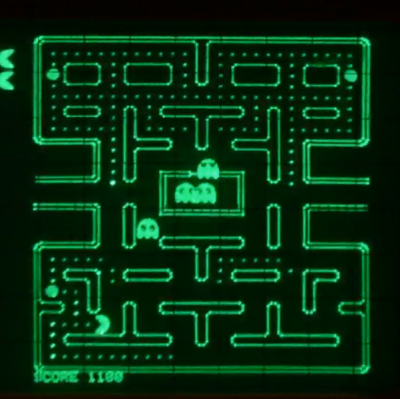
Using a CRT oscilloscope in X-Y mode as a vector display, the console faithfully reproduces some classic games, most of which, curiously enough, were not originally vector games. There are implementations of the Anaconda, RetroRacer, and AstroLander minigames from Timesplitter 2. There are also versions of Pac-Man, Tetris, and even Super Mario Brothers. Most of the games were prototyped in JavaScript before being translated into assembly and placed onto EEPROM external cartridges, to be read by the ATMega128 inside the console. Sound and music are generated using the ATMega’s hardware timers, with a little help from a reverse-biased transistor for white noise and a few op-amps.

From someone who claims to have known little about electronics at the beginning of the project, this is pretty impressive stuff. Our only quibbles are the delay in telling us about it, and the lack of an Asteroids implementation. The former is forgivable, though, because the documentation is so thorough and the project is so cool. The latter? Well, one can hope.

Continue reading “Delicious Vector Game Console Runs Pac-Man, Tetris, And Mario”

Pac Man On The Colour Computer 3

The 1980s were the heyday of the venerable Z80, a processor that found its way into innumerable home computers, industrial systems, and yes — arcade machines. However, not everyone had a Z80 based machine at home, and so sometimes porting is required. [Glen] is tackling this with a port of Pac Man to the Radio Shack Colour Computer 3.

The key to any good arcade port is authenticity – the game should feel as identical to the real thing as possible. The Atari 2600 port got this famously wrong. Porting to the Colour Computer 3 is easier in theory – with more RAM, a Motorola 6809 CPU running at a higher clock rate, and a more powerful graphics subsystem, fewer compromises need to be made to get the game to run at a playable speed.

The way [Glen] tackled the port is quite handy. [Glen] built a utility that would scrape a disassembled version of the original Pac Man Z80 code, look up the equivalent 6809 CPU instruction, and replace it, while placing the original Z80 code to the side as a comment. Having the original code sitting next to the ported instructions makes debugging much easier.

Level 256 as seen in [Glen]’s port.
There was plenty of hand tweaking to be done, and special effort was made to make sure all the data the original code was looking for was accessible at the same addresses as before. There was also a lot of work involved in creating a sprite engine that would reliably display the game video at a playable frame rate.

Overall, the port is highly faithful to the original, with the game code being identical at the CPU level. [Glen] reports that the same patterns used on the arcade machine can be used to complete the mazes on the Colour Computer 3 version, and it faithfully recreates the Level 256 bug as well. It’s an impressive piece of work to create such an authentic port on a home computer from 1986.

For another classic port, but with the temporal vectors flipped, check out Portal 2 on the Apple II.


Most Beautiful Mini-Galaga-Pi Ever!

The problem with click-bait titles, besides the fact that they make the reader feel cheated and maybe a little bit dirty for reading the article, is that they leave us with nothing to say when something is truly outstanding. But the video of [Tiburcio de la Carcova] building up a mini-Galaga cabinet (complete with actual tiny CRT screen from an old portable 5″ TV) is actually the best we’ve ever seen.

Plywood is laser-cut. Custom 3D printed parts are manufactured and assembled, including the joysticks and coin door. Aluminum panels are cut on a bandsaw and bent with a hand brake. Parts are super-glued. In short, it’s a complete, sped-up video of the cutting-edge of modern DIY fab. If that’s not enough reason to spend four minutes of your time, we don’t know what is.

[Tiburcio] has also made a mini Space Invaders, and is thinking of completing the top-20 of his youth. Pacman, Asteroids, and Missile Command are next. We can’t wait.

There are (ahem) a couple of Raspberry-Pi-powered video game emulators on Hackaday, so it’s a little awkward to pick one or two to link in. We’ll leave you with this build that also uses a small CRT monitor to good effect albeit in less-fancy clothing.

Continue reading “Most Beautiful Mini-Galaga-Pi Ever!”