The Coolest Homebrew Computer Gets Its Own Case

SONY DSC

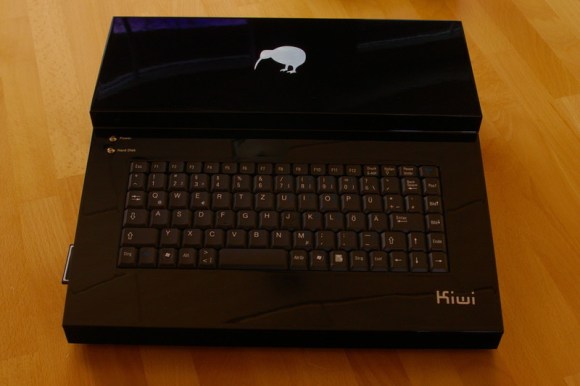
When you’re building one of the best homebrew computers ever created, you’ll also want a great case for it. This was [Simon]’s task when he went about building an enclosure for his Kiwi microcomputer.

We were introduced to the Kiwi last year as the end result of [Simon] designing the ultimate computer from the early to mid-1980s. Inside is a 68008 CPU, similar to the processor found in early Macs and Amigas, two SID chips taken from a Commodore 64, Ethernet, support for IDE hard drives and floppy disks, and a video display processor capable of delivering VGA resolution video at 32-bit color depth. Basically, if this computer existed in 1982, it would either be hideously expensive or extraordinarily popular. Probably both, now that I think about it.

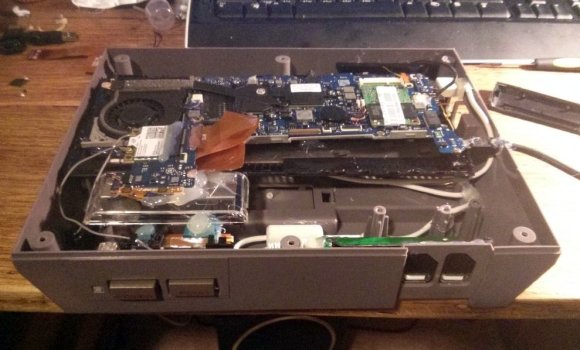
The case for the Kiwi was carefully cut from ABS sheets, glued together with acetone, and painted with auto body paint by a friend. It’s a great piece of work, but the effort may be for naught; [Simon] is reworking the design of his Kiwi computer, and hopefully he’ll be spinning a few extra boards for everyone else that wants a piece of the Kiwi.

NSL Takes Their Propeller Driven Car To The Drive Through

nsl-propeller-driven-land-vehicle

So what’s the first thing you do after completing your propeller driven land tricycle build? Head on over to the Starbucks drive through and see what kind of response you get from the workers. That’s exactly what the guys from North Street Labs did. You can see the response in the clip after the jump.

Having three wheels and being moved by an electric motor with a propeller led to the name TriFly. The build is their entry in The Deconstruction, a build contest which includes other entries like the Beer pouring machine we featured on Monday. Aside from the fun with the final project, NSL’s well-produced video includes a quick trip through the fabrication process. They did a great job making the machine about 40% street legal and it’s obvious they had a blast while doing so.

Continue reading “NSL Takes Their Propeller Driven Car To The Drive Through”

Mac EFI PIN Lock Brute Force Attack (unsuccessful)

[Oliver] wiped the hard drive from a Macbook Pro using the ‘dd’ command on another machine. This does a great job of getting everything off the drive, but he was still faced with the EFI PIN lock protection when he tried to put it back into the Mac. You used to be able to clear the NVRAM to get around this issue, but that exploit has now been patched. So [Oliver] set out to use a microcontroller to brute-force the EFI PIN.

You can read his back story at the link above. He had the chance to enter a 4-digit pin before the format process. Now that he’s wiped the drive the code is at least 6 characters long, which is a lot more possibilities (at least it’s numeric characters only!). To automate the process he programmed this Teensy board to try every possible combination. It worked great on a text editor but sometimes the characters, or the enter command wouldn’t register. He guesses this was some type of protection against automated attackers. To get around the issue he added different delays between the key presses, and between entering each code. This fixed the issue, as you can see in the clip after the break. Unfortunately after two 48-hour runs that tried every code he still hasn’t gained access!

Continue reading “Mac EFI PIN Lock Brute Force Attack (unsuccessful)”

Simple To Build Programmable Foot Switches

programmable-footswitches

Your hands do a lot of work between the keyboard and the mouse, why the heck are you letting your feet be so lazy? [Dossier van D.] is putting an end to the podiatric sloth. He built this set of three foot pedals which have gone through two versions of functionality.

The buttons themselves are made from a base plate of plywood with a smaller piece on top for each ‘key’. The two parts are separated with some foam carpet pad, with a tactile push button in between to register a click. The only thing we’d change about this is adding a couple of wooden spacers next to the switch so that accidentally sanding on a button doesn’t break that electronic component.

Originally each button was soldered to a gaming controller. This worked just fine using button mapping, but recently [Dossier] made the switch to using an Arduino Leonardo. This is a perfect choice. Unlike input devices made with older Arduino versions the Leonardo board can natively register as a keyboard, making it a snap to programmatically map any key to the switches.

If you like this project you should check out [Dossier’s] foot mouse as well.

Smashed Tablet In NES Case Lives Out Its Days As An Emulator

smashed-tablet-nes-emulator

The creator of this project started off with a 7″ tablet he received from a coworker. The screen was horribly smashed from one corner spreading out through the entire surface. But the hardware inside still worked, including the HDMI out port. He ended up transplanting the tablet hardware for use as an emulator.

After a bit of sizing up it was determined that the tablet hardware would fit inside the case of a broken NES. The battery would have been a tough fit, but this thing is always going to need to be connected to a television so there’s no need to work without mains power. The back plate was cut down to size and used as a try for mounting the motherboard in the case. Before that step he wired up a USB hub and mounted it so that two ports could be accessed through the original controller port openings.

There’s no details on the software used, but the final image in the gallery shows a game of Starfox being played.

[Thanks Cody]

Python Frontend Is A GUI For Different Microcontrollers

python-frontend-gui-for-microcontrollers

[Navin] has been hard at work producing a GUI which works with different micocontrollers. The idea is to make it even easier to develop projects by simplifying the feedback and control you can get from the prototyping hardware. The best part about it is that he designed the software to interface with any hardware which can be programmed in C++.

The screenshot above shows the program communicating with an mbed board which has an ARM microcontroller. But the Arduino board (which uses an ATmega chip) is supported as well. Support for additional architectures can be added by writing your own configuration file for the chip. The Python program then asks for the com port it should be using for this session.

The source package, including the code which runs on the microcontrollers, can be found at the project repository. The functions used in the sketches are quite simple and should be a snap to drop into your own code projects.

A Respectable Electronics Bench That’s Not A Pain To Move

electronics-workstation-that-moves

Apartment dwellers who are living the nomadic lifestyle take note. You don’t need to live your tinkering lifestyle out of a toolbox. Here is a great example of a respectable electronics bench which breaks down when it’s time to move (translated). We’re sure you already belong to your local hackerspace for the big projects, but this corner office will let you take some of your creations home for continued tweaking.

The bench uses slotted aluminum rails as the support structure. The slots accept small nuts, which have a spring-loaded ball bearing to keep them from sliding freely ([Nerick] mentions this is especially nice for working with the vertical runs). These fasteners ended up being the most costly component.  The desktop itself is the largest solid piece. It was machined using a CNC mill (we already mentioned having a hackerspace membership) so that the mounting screws are countersunk to leave a perfectly flat surface. It’s clean, has a small footprint, and gives you a place to dump all of your gear. What else could you ask for?