Connect A Retina Display To A Regular Computer

You don’t have to search very long before you find someone raving about the Retina display used in Apple iPads. We’re not going to disagree. These 9.7″ panels pack in a whopping 2048×1536 resolution and the color is fantastic. But we were surprised to hear you can get one of these for a meager $55. That’s how [Andrzej] sourced the part when he set out to connect a Retina display to a regular PC.

It turns out this isn’t all that hard. The display uses the eDisplayPort protocol. This is an extension of DisplayPort which is an alternative to LVDS that is gaining a foothold in the industry. An external DisplayPort adapter can already be found on higher-end laptops, which means this should be a snap to use as an external display if the signals can be routed correctly.

To do this, [Andrzej] figured out how to order the PCB connector for the panel’s ribbon cable. He then etched and populated his own board which serves as an adapter for a DisplayPort cable. It even powers the panel, but an external 20V supply is necessary for the backlight.

[Thanks Adam]

Automatic Tubular Bells Given A MIDI Interface Too

automatic-tubular-bells

We’ve got to say it… these tubular bells sound awful! They don’t really have a tight pitch center so they sound really out of tune to us. But we think that’s the failing of the instrument itself and not the work which [Tolaemon] did to automate the instrument.

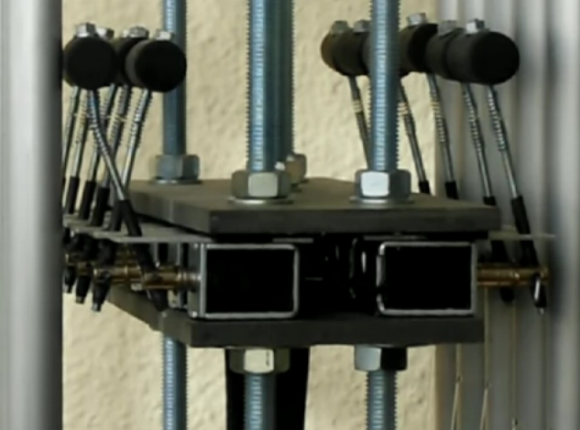
There are three main parts to his project. The first, which is shown above, adds a hammer for each bell. The hammers are hinged, with one side being pulled by a solenoid in order to strike the bell. The second part of the hack also uses solenoids, dampening the bell’s ability to ring by pressing a felt pad up against the bottom of the tube. The final portion of the project brings it all home by adding MIDI control to the hardware.

The clip after the break gives a good overview of the different features including some preprogrammed playback as well as direct control of the instrument using an electric keyboard. This reminds us of that scratch-built solenoid xylophone.

Continue reading “Automatic Tubular Bells Given A MIDI Interface Too”

Hackaday Links: Sunday, April 21st, 2013

hackaday-links-chain

Regular reader and master hacker [Bill Porter] got married. Congratulations [Bill] and [Mara]! The two of them just couldn’t leave their soldering irons at home. The actually swore their vows by soldering together a circuit during the ceremony (blinky wedding dress, el wire tuxedo, and all).

[Kevin] sent in a link to [Red Fathom’s] hacked Wacom tablet. It’s the screen from a Wacom-enabled laptop brought back to life with a Teensy and an LVDS interface module.

The Neato XV-11 is able to find its charging station when the batteries run low. [Derek] figured out that you can make a second station using some reflective tape.

If you use your drill a lot you’ll eventually break the rubber thing that holds the key to the chuck. Here’s a way to 3D print a replacement.

[Torxe] put eight floppy drives to use as a polyphonic Arduino-controlled MIDI player. And while we’re on the subject of Arduino controlled projects you should take a look at this web-interface to tell you if the foosball table is being used.

And finally [Th3 Bad Wolf] sent in this link to a milling machine built out of LEGO. It is able to mill floral foam and uses a lathe-like setup for one of the table axes.

Drop-in Pcb Makes Nintendo Four Score A USB Joystick

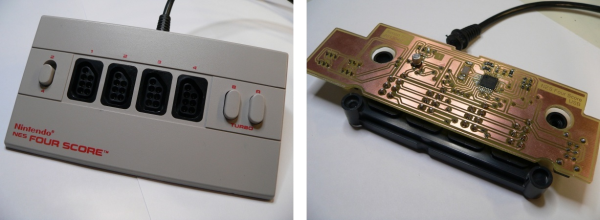
The Nintendo Four Score was a controller attachment for the original Nintendo Entertainment System which allowed you to use four controllers at one time. [Simon Inns] wanted to use some original NES controllers on his computer so he developed a drop-in replacement board that converts the device to USB.

As we’ve seen with other NES controller hacks, the hardware uses a simple parallel to serial shift register to deliver key-presses to the console. This means that reading four controllers at a time is no different than shifting in data to a microcontroller from the four different sources. The remaining portion of the problem is providing a USB connection that enumerates the device as a joystick. We’ve seen a bunch of USB projects from [Simon] so it’s no surprise that he was able to pull it off.

He went with the ATmega16U2 which has built-in support for USB. [Simon] wrote the code so that although there is only one USB cable, each of the four controller ports will appear as a separate USB joystick on the computer. To button up the project he carefully measured the original board and laid out his own version so that it fits the footprint of all the original components as well as the mounting brackets on the case. Top notch [Simon]!

3D Printing Some Sweet Music

3d-printer-music

If you don’t mind ending up with oddly shaped 3D printed parts you can get your printer to sing to you. The exhibit shown above is doing just that. The Lulzbot is being driven specifically to produce a certain frequency of sound with its stepper motors. The results of a few different songs are what’s hanging on the wall to the right. You can hear it printing Bizet’s Carmen in the clip after the break.

[Rickard Dahlstrand] hacked together a Python script capable of parsing a MIDI file and outputting a G-code equivalent that will produce the frequencies and durations necessary to hear the audio on a stepper motor. As we mentioned, he uses a Lulzbot but the script appears to include setting for Cupcake, Thingomatic, Shapercube, and Ultimaker. The parser script as well as the example G-code files for a library of classical music can be downloaded from his repository.

Now if you’re looking for some other crazy CNC music ideas you can’t beat this wineglass music hack.

Continue reading “3D Printing Some Sweet Music”

Mood Lamp/notifier Uses Neat Modular PCB Design

mood-lamp-with-modular-electronics

Not only does this mood lamp which [J. Sutton] built look great, but we love the modular design he adopted when building the circuit boards.

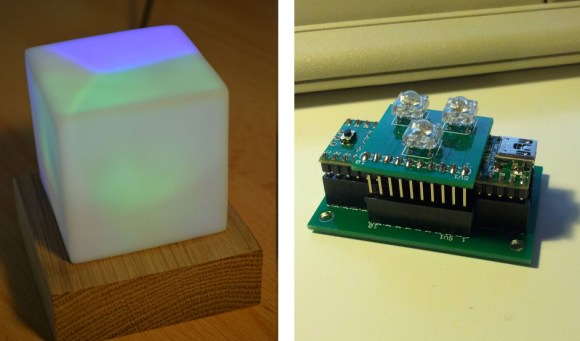
If you’re building something that is going to sit on your desk for some time it just has to look good. We think that he achieved that, using a small block of oak as the base, and a cloudy white cube of unknown origin as a diffuser. Notice that the different colors are not mixed. There’s a baffle inside the diffuser that keeps them separate as early testing showed any combination of intensities was resulting in nearly the same shade of color.

The part we really like is the modular design of his circuit boards. The project is based around a Teensy++ 2.0 board. He first built a PCB baseboard which feature two SIL sockets to accept the legs of the Teensy. There is a third SIL socket which accepts some long legs from the LED host board, letting it perch on top of the Teensy.

Continue reading “Mood Lamp/notifier Uses Neat Modular PCB Design”

GUI Window Manager On An AVR Chip

avr-window-manager-gui

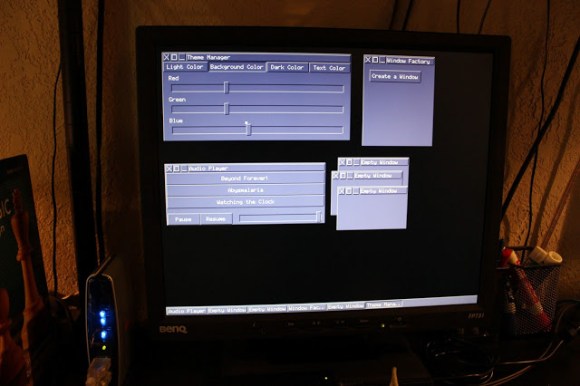
This project is reminiscent of the old days when window managers were an amazing new idea. The difference is that this window-based GUI is running on an ATmega1284 microcontroller. But the behavior and speed of the interface is pretty much exactly what you’d expect if working on an early 90’s home computer. It even uses a mouse as input.

So how is this even possible? The key to the project is a serial to VGA module which handles the heavy lifting involved with generating a VGA signal. We featured one of [Andrew’s] past projects which used an AVR chip to generate the VGA signal. But that doesn’t leave nearly enough cycles to implement something like a window manager, not to mention the fact that it got nowhere near the resolution shown here.

He uses a serial mouse with an RS-232 converter chip to interact with the windows. This is best shown in his video after the break. He’s able to generate and interact with new windows. He even implemented a set of rudimentary controls which allow him to adjust the theme of the windows and drive the audio playback feature included on that VGA controller he’s using.

Continue reading “GUI Window Manager On An AVR Chip”