An Introduction To Inertial Navigation Systems

acc_sens

Long before ships relied on GPS to determine their location – and even before radio navigation systems such as LORAN, vessels relied on a still impressively sophisticated means of determining their position: inertial navigation. The theory is simple: if you keep a few very accurate gyroscopes and accelerometers on board, you’ll be able to calculate where you are relative to your previous position. Since electronic gyros and accelerometers are all over the place, [Sebastian] thought he would have a go at creating his own inertial navigation system.

The difficulty in using this method is that every gyroscope invariably has some error. Since the measurements from the gyros and accelerometers are integrated together, the error is also integrated, resulting in an increasing positioning error as time goes on. With a few clever algorithms and very good sensors, it’s possible to minimize this error.

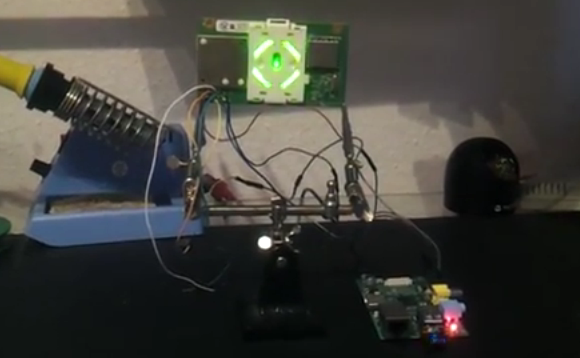
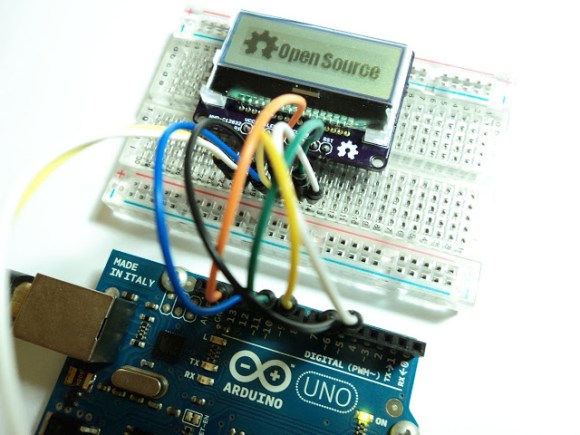
[Sebastian] doesn’t have really great hardware – he’s only working with a accelerometer/gyro breakout board that’s good enough for experimental purposes. After reading the accelerometer data with an Arduino, he’s able to capture all the sensor data and read it into a Python script.

The next steps are to figure out a decent algorithm to integrate all the sensor data, and possibly add a barometer and magnetic compass for better compensation for errors. The project is still in the early phases, but seeing as how an inertial navigation system is one of the engineering triumphs of the early 20th century, we’re eagerly awaiting any progress updates.

Xbox 360 Light Right And RF Module Connected To Raspberry Pi

rpi-connected-to-xbox-lightring

If you want to mess around with your Xbox 360 controllers on a computer Microsoft would be happy to sell you a USB dongle to do so. But [Tino] went a different route. The board that drives the Xbox 360’s status light ring also includes the RF module that wirelessly connects the controllers. He wired this up to his Raspberry Pi using the GPIO header.

The module connects via an internal cable and is treated much like a USB device by the Xbox motherboard. The problem is that it won’t actually handle the 5V rail found on a USB connector; it wants 3.3V. But this is no problem for the RPi’s pin header. Once a few connections have been made the lights are controlled via SPI I2C and [Tino] posted some example code up on Github to work with the RF module. He plans to post a follow-up that interfaces the module with a simple microcontroller rather than an RPi board. If you can’t wait for that we’re sure you can figure out the details you need by digging through his example code.

Any-size SIL Connector Kit

any-sized-SIL-cable-kit

Etching and populating a board is childs play compared to finding connectors which link several components. But Hackaday alum [Ian Lesnet] and his crew over at Dangerous Prototypes have come up with a solution that makes us wonder why we haven’t seen this long ago? They’re prepping an any-size ribbon cable kit.

So lets say you do find the type of connector you want. You need to cut the ribbon cable to length, crimp on the connectors, then seat those connectors in the housing. We’ve done this many times, and being cheapskates we use needle-nose pliers instead of buying a proper crimper. This solution does away with that grunt work. The kit will ship several different lengths of ribbon wire with the connectors already placed by machine. This way you peel off the number of connectors you need, select the proper house size and plunk it in place. Also in the kit are several lengths of male, female, and male/female jumper cables you can peel off in the same way.

Now what are we going to do with the rest of the spool of ribbon cable sitting in the workshop?

Touch Control For Every Key On The Keyboard

keys

Of all the musical instruments out there, the keyboard is among the worst for changing the pitch and timbre of individual notes. Wind and stringed instruments can do this easily in the hands of a skilled player, but outside the wheel and joystick controls of a few electronic keyboards, tickling the ivories means the only thing you can really change about how something sounds is the volume.

TouchKeys wants to put an end to this severe lack of dynamics available on keyboard instruments. Basically, it turns every single key on a keyboard into a multi-touch sensor, allowing any keyboardist to change the pitch, filter, timbre, or any other parameter of their instrument simply by moving their finger around on a key.

TouchKeys works by overlaying all the keys on a keyboard with circuit boards that plug into a module hidden under the hood. These boards are studded with capacitive sensing points, allowing a computer to recognize where the player is touching each key, and modifying filters or volume for each key independently.

The TouchKeys Kickstarter is offering a kit to equip a 25-key keyboard with these sensors for about $550. A hefty price tag, but hopefully we’ll see this tech in real production keyboards in the future.

Breakout Board For $11 LCD Module With Small Pitch

breakout-for-strange-pitch-LCD-screen

[Ibrahim] picked this little LCD module out because of its price point and resolution. In single units you can grab one of the 128×32 pixel displays for just $11. The only problem is that the pinout is too small to use with a breadboard. He whipped up a breakout board for it that throws in some extras.

First off, we like it that the board doesn’t add much to the part’s outline. What it does add is a Low-DropOut voltage regulator and a level converter. The upper range of the LCD’s input voltage is 3.3V, and these added parts make it possible to drive the device using 5V hardware like the Arduino Uno pictured above. While he was adding in parts he included a MOSFET to switch the backlight. This way he can use PWM for dimming as well.

We usually hit eBay when looking for LCD screens. A search for the NHD-C12832 part number didn’t turn it up. We tried out FindChips for the first time (owned by Supply Frame who just bought Hackaday) and it works just as well as Octopart which we’re more familiar with since we’ve seen some hacking of that site before.

BeagleBone Black Becomes A Handheld Classic Gaming Console

Over at TI, the 2013 Intern Design Challenge is underway, an opportunity for the interns of TI to flex their engineering muscle for a few prizes and a chance to have their designs turned into actual products. We’re thinking [Max] might just pull this one out with his BeagleBone Gaming Cape, an add-on to the BeagleBone Black that turns this ARM-powered Linux board into a retro gaming system.

The build was inspired by [Max]’s earlier MSP430 Launchpad GamingPack, an add-on board for the Launchpad that put two NES controllers, a VGA out, and an FPGA to create a custom gaming console that’s up there with the brightest and best consoles of the 16-bit era. For the new BeagleBone-based build, [Max] eschewed off-board processing, but did manage to include a magnetometer/accelerometer and an audio codec IC to provide the best gaming experience for all those NES, Game Gear. Gameboy, GBA and Doom .wad games.

In addition to a fabulous piece of hardware, [Max] also has the case design down to a tee. He first printed out a dozen or so layers of his case, sandwiching the BeagleBone, his cape, battery holders, and LCD display. Once he knew the dimensions would work, he sent his files off to be laser cut out of a matte black delrin. The finished piece is a work of art, and considering how well everything goes together, we wouldn’t mind giving this new retro-gaming console a spin ourselves.

Tools And Talent For Custom Platinum Jewelry

custom-platinum-jewelry


The diamond engagement ring is arguably the most universally adopted of all jewelry. It’s artwork that even the most common men and women appreciate, and it’s creation calls for skills that go back centuries. [Jerome Kelty] crafts custom jewelry from platinum. Here’s an in-depth look at his process.

The first step of his Instructable post is so long you might be fooled into thinking it’s the whole post. He shows off the equipment that he used in taking this ring from design to reality — we thought the use of beeswax to pick up small stones is an interesting technique.

Click through the steps to see that he starts with a cad drawing. This model is sent offsite for casting and arrives back as an oversized blank which he then begins to clean up. A range of differend files bring it to its finished shape. He preps the areas where stones will be set. A trip to the buffing wheel gives it the shine it needs before the diamonds are put in place.

Regular Hackaday readers may recognize his name. When [Jerome] isn’t making jewelry he’s building animatronics, like Predator or Stargate replicas.

Continue reading “Tools And Talent For Custom Platinum Jewelry”