Hackerspace Tours: Cambridge Makespace

Part of our whirlwind UK visit took us to Cambridge, where we had the joyous opportunity to check out Cambridge Makespace. The main space was formerly part of the Institute for Manufacturing Robot Lab at Cambridge University, so it has a long heritage of supporting engineering innovation. Continue reading “Hackerspace Tours: Cambridge Makespace”

Improving The T-962 Reflow Oven

The T-962A is a very popular reflow oven available through the usual kinda-shady retail channels. It’s pretty cheap, and therefore popular, and the construction actually isn’t abysmal. The controller for this oven is downright terrible, and [wj] has been working on a replacement firmware for the horribly broken one provided with this oven. It’s open source, and the only thing you need to update your oven is a TTL/UART interface.

[WJ] bought his T-962A even after seeing some of the negative reviews that suggested replacing the existing controller and display. This is not in true hacker fashion – there’s already a microcontroller and display on the board.

The new firmware uses the existing hardware and adds a very necessary modification: stock, the oven makes the assumption that the cold-junction of the thermocouples is at 20°C. The controller sits on top of an oven with two TRIACs nearby, so this isn’t the case, making the temperature calibration of the oven slightly terrible.

After poking around the board, [WJ] found an LPC2000-series microcontroller and a spare GPIO pin for a 1-wire temperature sensor. The temperature sensor is placed right next to the terminal block for the thermocouples for proper temperature sensing.

All the details of updating the firmware appear on a wiki, and the only thing required to update the firmware is a serial/USB/UART converter. A much better solution than ripping out the controller and replacing it with a custom one.

HDMI Out With A Brick Game Boy

A few years ago, some vastly clever people figured out how to listen in on the LCD display on the classic brick Game Boy from 1989. There have been marked improvements over the years, including a few people developing VGA out for the classic Game Boy. Now, the bar has been raised with an HDMI adapter for the Game Boy, designed in such a way that turns everyone’s favorite battery hog into a portable console.

Your classic beige or cleverly named Color Game Boy is composed of two halves. The rear half contains all the important circuitry – the CPU, cartridge connector, and the rest of the smarts that make the Game Boy game. The front half is fairly simple in comparison, just an LCD and a few buttons. By designing an adapter that goes between these two halves, [Zane] and [Joshua] were able to stuff enough circuitry inside the Game Boy to convert the signals going to the LCD to HDMI. Plug that into your TV, and you have a huge modern version of the Super Game Boy, no SNES required.

The HDMIBoy also breaks out the buttons to the classic NES controller connector. With HDMI out and a controller input, the old-school Game Boy become a portable if somehow even more brick-like console.

Darth Vader Magic 8 Ball

Imagine that your wife likes Darth Vader and wants help making important life choices. (Who doesn’t?) [bithead942] solves both problems in one project by gutting a Lego clock and making a talking animatronic Darth Vader 8-Ball-style oracle. Now his wife can simply press Darth’s head and her decision-making is handled by the Dark Side of the Force.

You can see the result in the video below the break.

The internals consist mainly of an Arduino Nano, a WTV020SD WAV playback chip, and some swanky servos. [bithead942] took a Dremel to the existing clock interior and found a way to make it all fit. The cloak helped, and the speaker was a good fit for the previous clock’s display.

Then he used IMDB and combed through the Star Wars movies to find Darth Vader quotes that kinda sound like the 8-Ball’s answers. As [bithead942] mentions Darth Vader doesn’t really dwell much on the positive, so finding instances where he says “yes” was hard work. This is in contrast to the original 8 Ball which has a brighter outlook than a cheerleader on Prozac, but there’s a reason they call it the Dark Side.

We really like the way the waist and arm servos work together to bring Darth to life. The added oak base with pull-out instruction card not only makes Darth look fancy, but prevents him from falling over when he leans forward to talk. All in all, a really nice build and well written-up with difficulties and their solutions.

Continue reading “Darth Vader Magic 8 Ball”

A 16-voice Homebrew Polyphonic Synth

Homebrew synths – generating a waveform in a microcontroller, adding a MIDI interface, and sending everything out to a speaker – are great projects that will teach you a ton about how much you can do with a tiny, low power uC. [Mark] created what is probably the most powerful homebrew synth we’ve seen, all while using a relatively low-power microcontroller.

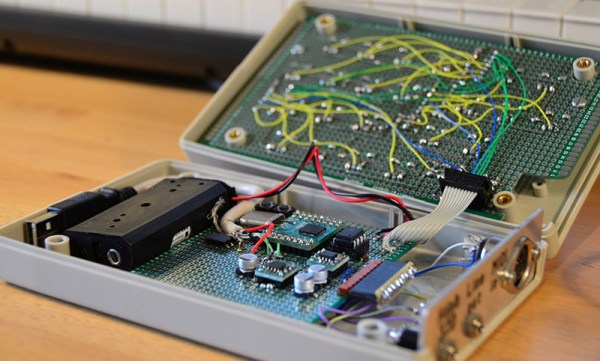
The hardware for this project is an LPC1311 ARM Cortex M3 running at 72 MHz. Turning digital audio into something a speaker can understand is handled by a Wolfson WM8762, a stereo 24-bit DAC. Both of these chips can be bought for under one pound in quantity one, something you can’t say about the chips used in olde-tyme synths.

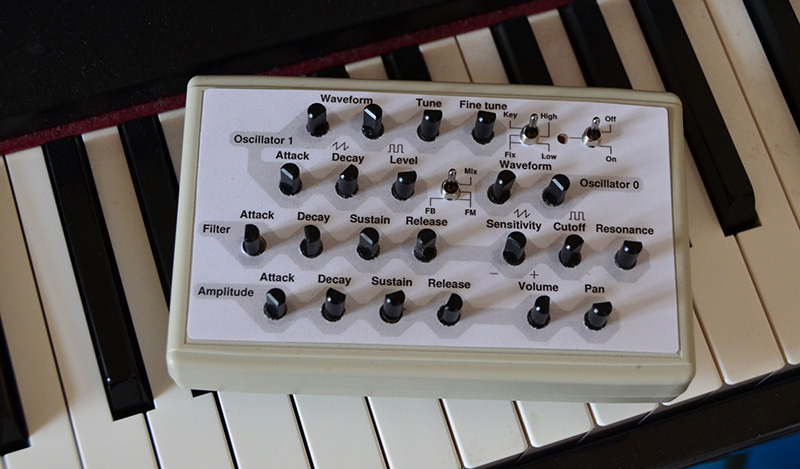
The front panel, shown below, uses 22 pots and two switches to control the waveform, ADSR, filter, volume, and pan. To save pins on the microcontroller, [Mark] used a few analog multiplexers. As far as circuitry goes, it’s a fairly simple setup, with the only truly weird component being the optocoupler for the MIDI input.

goom2

The software for the synth is written mostly in assembly. In a previous version where most of the code was written in C, everything was a factor of two slower. Doing all the voice generation in assembly allowed for twice as many simultaneous voices.

It’s a great project, and compared to some of the other synth builds we’ve seen before, [Mark]’s project is at the top of its class. A quick search of the archives says this is probably the most polyphonic homebrew synth we’ve seen, and listening to the sound sample on the project page, it sounds pretty good, to boot.

Thermostat

Custom Raspberry Pi Thermostat Controller

Thermostats can be a pain. They often only look at one sensor in a multi-room home and then set the temperature based on that. The result is one room that’s comfortable and other rooms that are not. Plus, you generally have to get up off the couch to change the temperature. In this day and age, who wants to do that? You could buy an off-the-shelf solution, but sometimes hacking up your own custom hardware is just so much more fun.

[redditseph] did exactly that by modifying his home thermostat to be controlled by a Raspberry Pi. The temperature is controlled by a simple web interface that runs on the Pi. This way, [redditseph] can change the temperature from any room in his home using a computer or smart phone. He also built multi-sensor functionality into his design. This means that the Pi can take readings from multiple rooms in the home and use this data to make more intelligent decisions about how to change the temperature.

The Pi needed a way to actually talk to the thermostat. [redditseph] made this work with a relay module. The Pi flips one side of the relays, which then in turn switches the buttons that came built into the thermostat. The Pi is basically just emulating a human pressing buttons. His thermostat had terminal blocks inside, so [redditseph] didn’t have to risk damaging it by soldering anything to it. The end result is a functional design that has a sort of cyberpunk look to it.

[via Reddit]

Anthropomorphizing Microprocessors

Vintage microprocessors usually do something, be it just sitting in an idle loop, calculating something, or simply looking cool in a collector’s cabinet. [Lee] has come up with a vastly cooler use for an old microprocessor: he’s anthropomorphized it by wiring LEDs up to the address lines and arranged those LEDs into a face. After wiring up the right circuit, the face of LEDs slowly changes expressions, making this tiny little board react to random electronic fluctuations.

The CPU used for this project is the RCA 1802, best known for being the smarts in the COSMAC Elf, a very early microprocessor training computer, but still capable of teaching the basics of computing today, albeit on a processor that isn’t made any more with an instruction set that is barely supported by anything modern.

[Lee] apparently has a lot of these 1802s, and to show off how simple a microcomputer can get, he created the strangest use for a CPU we’ve ever seen. You can’t program this face of LEDs; the data bus is left floating so random values are ‘displayed’ on the face. Only one of the data lines is pulled high. This prevents the data bus from ever being 0x00, the HALT instruction.

If you’re looking for something a little more useful to do with an RCA 1802 MPU, [Lee] also has a COSMAC Elf membership card. It’s a reproduction of the famous COSMAC Elf, repackaged into a board the size of an Altoid tin. It has the 1802 onboard, a few switches and blinkenlights,  and a parallel port for interacting with peripherals.