Bluetooth Photo Booth Gets Vetting At Wedding

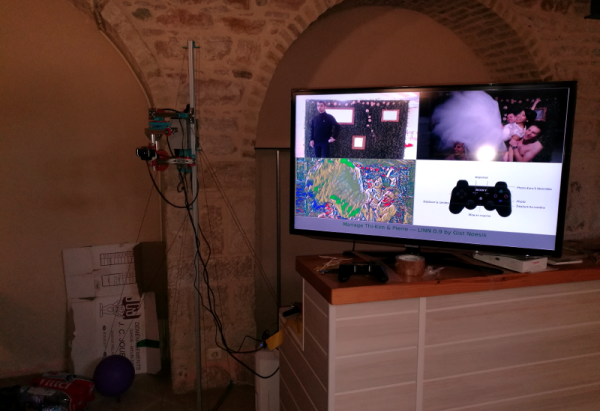
With just two weeks to go before his friends’ wedding, [gistnoesis] built a well-featured robotic photo booth. Using a Bluetooth PS3 controller, guests could move the camera around, take a picture, style it in one of several ways (or not), and print it out with a single button press.

The camera is mounted on a DIY 2-axis gimbal made from extruded aluminium and 3D-printed parts. It can be moved left/right with one joystick, and up/down with the other. [gistnoesis] set up a four-panel split-screen display that shows the live feed from the camera and a diagram for the controls. The third panel shows the styled picture. Guests could explore the camera roll on the fourth panel.

LINN uses two PCs running Lubuntu, one of which is dedicated to running an open-source neural style transfer program. After someone takes a picture, they can change the style to make it look like a Van Gogh or Picasso before printing it out. A handful of wedding attendees knew about some of the extra features, like manual exposure control and the five-second timer option, and the information spread gradually. Not only was LINN a great conversation piece, it inspired multi-generational collaboration.

Despite the assembled size, LINN packs up nicely into a couple of reusable shopping bags for transport (minus the TV, of course).  This vintage photo booth we saw a few years ago is more of a one-piece solution, although it isn’t as feature-rich.

Continue reading “Bluetooth Photo Booth Gets Vetting At Wedding”

LEDs Give HP 3457A DDM’s LCD Display The Boot

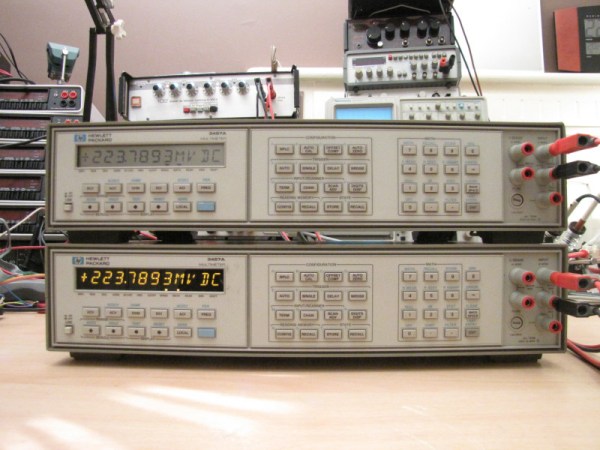
Have you ever been so frustrated with a digital display that you wanted to rip the whole thing out and create a better one? That is exactly what [xi] did. Replacing their constantly used HP 3457A multimeter’s LCD display with a brighter LED one was a necessary project — and a stress reducing one at that.

While this digital multimeter is well-known for its reliability, its standard display is rather lacking. In fact, there are several mods already out there that simply add a backlight. However, as [xi] notes, LCD screens always have a certain angle where they still don’t quite show properly. So this hack reverses the LCD’s protocol and details the process of creating new LED display.

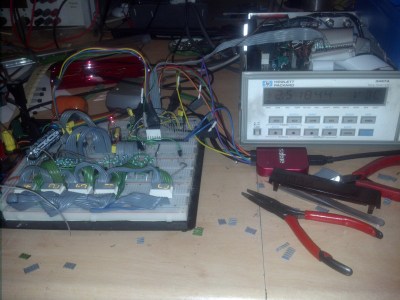
The issue of dim displays that comes with traditional digital multimeters is not a new one. One solution to this that we have seen before is a hack where someone decided to add a backlight onto their cheap multimeter. [Ken Kaarvik] got around the dimness altogether by giving his multimeter a wireless remote display of his choosing. It is interesting to see the different solutions that are made to the same nuisance. The first item on the agenda of [xi]’s hack was to successfully analyze the HP LCD protocol. With the aid of an ATmega32, the digits were decoded throughout the transmission frames.

Continue reading “LEDs Give HP 3457A DDM’s LCD Display The Boot”

The Perils Of Developing The Hackaday Superconference Badge

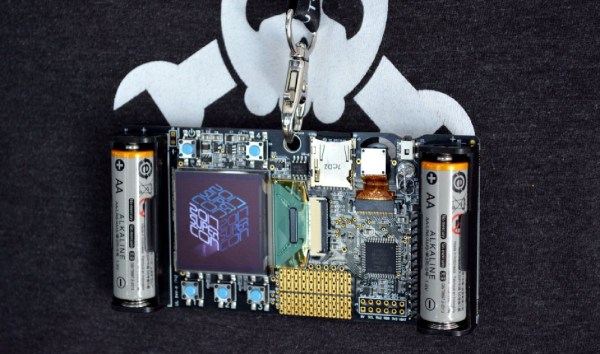
In case you haven’t heard, the best hardware conference in the world was last weekend. The Hackaday Superconference was three days of hardware hacking, soldering irons, and an epic hardware badge. Throw in two stages for talk, two workshop areas, the amazing hallwaycon and the best, most chill attendees you can imagine, and you have the ultimate hardware conference.

Already we’ve gone over the gory details of what this badge does, and now it’s time to talk about the perils of building large numbers of an electronic conference badge. This is the hardware demoscene, artisanal manufacturing, badgelife, and an exploration of exactly how far you can push a development schedule to get these badges out the door and into the hands of eager badge hackers and con attendees.

The good news is that we succeeded, and did so in time to put a completed badge in the hand of everyone who attended the conference (and we do have a few available if you didn’t make it to the con). Join me after the break to learn what it took to make it all happen and see the time lapse of the final kitting process.

Continue reading “The Perils Of Developing The Hackaday Superconference Badge”

Friday Hack Chat: High Speed Data Acquisition

For this week’s Hack Chat, we’re going to be talking all about High-Speed Data Acquisition. If you’ve ever needed to shove voltages, currents, logic signals, temperature, pressure, or sound into a computer, you’ve used a DAQ. If you’ve ever needed to acquire a signal at a very high speed, you’ve probably paid a lot of money for that piece of equipment.

Our guest for this week’s Hack Chat will be [Kumar Abhishek], engineering student, Hackaday Prize finalist, and creator of the very, very cool Beaglelogic, a logic analyzer for the BeagleBone. The interesting bit about the Beaglelogic is its utilization of the Programmable Real-Time Units (PRUs) found in every BeagleBone.

These PRUs are basically DMA machines, shuttling bits back and forth between memory and GPIOs. This year, [Kumar] turned the Beaglelogic cape into the Beaglelogic Standalone, a device based on the Octavo Systems OSD3358 (the ‘BeagleBone On A Chip‘) that gives those Saleae logic analyzers a run for their money.

In this Hack Chat, we’ll be discussing the PRUs found in various iterations of the BeagleBoard, how the Beaglelogic performs its data acquisition, and how programming the PRUs is actually accomplished. If you have a question for [Kumar], leave a comment on the Hack Chat page

join-hack-chatOur Hack Chats are live community events on the Hackaday.io Hack Chat group messaging. Usually, our Hack Chats go down at noon, PDT, Friday. This one is different. Because [Kumar] is in India, we’ll be running this Hack Chat at 9:30a PST, Friday, November 17th. What time is that in India, and what time is that where you live? Who cares! Here’s a time zone converter!

Click that speech bubble to the left, and you’ll be taken directly to the Hack Chat group on Hackaday.io.

You don’t have to wait until Friday; join whenever you want and you can see what the community is talking about.

We’re also looking for new Hack Chat guests! If you’ve built something cool, you’re working on an interesting project, or you’re about to introduce a really cool product, hit us up! Email our wonderful community managers, and we’ll see if we can slot you in.

Rewire Your Own Brushless Motors

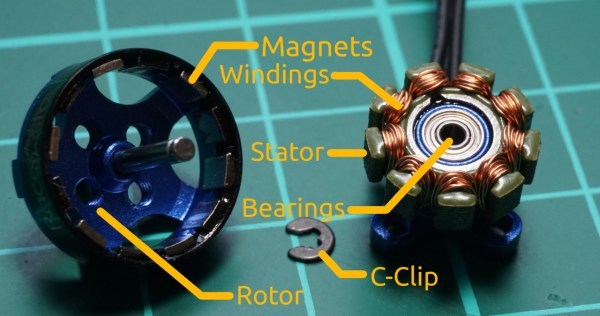
Hackaday likes the idea of fine-tuning existing hardware rather than buying new stuff. [fishpepper] wrote up a tutorial on rewinding brushless motors, using the Racerstar BR1103B as the example. The BR1103B comes in 8000 Kv and 10000 Kv sizes,  but [fishpepper] wanted to rewind the stock motor and make 6500 Kv and 4500 Kv varieties — or as close to it as he could get.

Kv is the ratio of the motor’s RPM to the voltage that’s required to get it there. This naturally depends on the magnet coils that it uses. The tutorial goes into theory with the difference between Wye-terminated and Star-terminated winding schemes, and how to compute the number of winds to achieve what voltage — for his project he ended up going with 12 turns, yielding 6700 Kv and 17 turns for 4700 Kv. His tutorial assumes the same gauge wire as the Racerstar.

Just as important as the theory, however, the tutorial also covers the physical process of opening up the motor and unwinding the copper wire, cleaning the glue off the stator, and then rewinding to get the required stats.

[fishpepper]’s handle has graced Hackaday before: he created what he calls the world’s lightest brushless FPV quadcopter. In addition to motors and drones, he also rocks a mean fidget spinner.


Visual 3D Print Finishing Guide

With 3D printers now dropping to record low prices, more and more people are getting on the additive manufacturing bandwagon. As a long time believer in consumer-level desktop 3D printing, this is a very exciting time for me; the creativity coming out of places like Thingiverse or the 3D printing communities on Reddit is absolutely incredible. But the realist in me knows that despite what slick promotional material from the manufacturers may lead you to believe, these aren’t Star Trek-level replicators. What comes out of these machines is often riddled with imperfections (from small to soul crushing), and can require considerable cleanup work before they start to look like finished pieces.

If all you hope to get out of your 3D printer are some decent toy boats and some low-poly Pokemon, then have no fear. Even the most finicky of cheap printers can pump those out all day. But if you’re looking to build display pieces, cosplay props, or even prototypes that are worth showing to investors, you’ve got some work cut out for you.

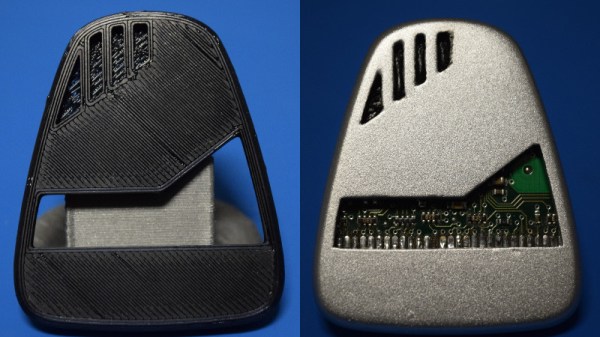
With time, patience, and a few commercial products, you can accomplish the ultimate goal: turning a 3D printed object into something that doesn’t look like it was 3D printed. For the purposes of this demonstration I’ll be creating a replica of the mobile emitter used by the “Emergency Medical Hologram” in Star Trek: Voyager. I can neither confirm nor deny I selected this example due to the fact that I’m currently re-watching Voyager on Netflix. Let’s make it look good.

Continue reading “Visual 3D Print Finishing Guide”

Homebrew SNES Mini Aims For Historical Accuracy

While “normies” are out fighting in the aisles of Walmart to snap up one of the official “Classic Mini” consoles that Nintendo lets slip out onto the market every once and awhile, hackers have been perfecting their own miniature versions of these classic gaming systems. The “Classic Mini” line is admittedly a very cool way to capitalize on nostalgic masses who have now found themselves at the age where they have disposable income, but the value proposition is kind of weak. Rather than being stuck with the handful of generation-limited games that Nintendo packed into the official products, these homebrew consoles can play thousands of ROMs from systems that stretch across multiple generations and manufacturers.

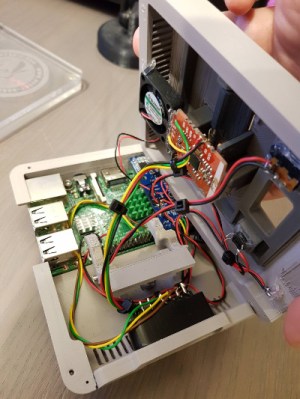
But for those old enough to remember playing on one of these systems when they first came out, these modern reincarnations always lack a certain something. It never feels quite right. That vaguely uncomfortable feeling is exactly what [ElBartoME] is aiming to eliminate with his very slick miniature SNES build. His 3D printed case doesn’t just nail the aesthetics of the original (PAL) console, but the system also uses real SNES controllers in addition to NFC “cartridges” to load different ROMs.

The project’s page on Thingiverse has all the wiring diagrams and kernel configuration info to get the internal Raspberry Pi 3 to read an original SNES controller via the GPIO pins. He also gives a full rundown on the hardware and software required to get the NFC-enabled cartridges working with EmulationStation to launch the appropriate game when inserted. Though he does admit this is quite a bit trickier than the controller setup.

[ElBartoME] has put a video up on YouTube that shows him inserting his mock cartridges and navigating the menus with an original SNES controller. If it wasn’t for the fact that the console is the size of a smartphone and the on-screen display is generations beyond what the SNES could pull off, you’d think he was playing on the real thing.

We’ve seen some incredibly impressive emulation boxes based on the Raspberry Pi, and builds which tried to embrace original hardware components, but this particular project may represent the best of both worlds.

Continue reading “Homebrew SNES Mini Aims For Historical Accuracy”