Hackaday Prize Entry : DEER — An Electronic Repellent

Ultrasonic repellent devices used to keep away insects, rodents, birds, and even large animals have been around for quite a while, but their effectiveness depends on who you ask.  Some critters just don’t seem affected, while some others definitely will avoid being around such a device. Deploying a few of these devices to scare off animals seems to be working quite well for [Ondřej Petrlík]. Around where he lives, the fields of tall grass need to be mowed down during the spring. Unfortunately, the tall grass is ideal for young, newborn animals to stay hidden and safe. The mowing machines would often cripple and hurt such animals, and [Ondřej] desperately wanted to solve the problem and prevent these mishaps.

He built an electronic repeller to keep away wild animals and their young from his farm/ranch/range back in the Czech Republic. He used an Arduino Mini to drive a large piezo transducer to scare away the wild animals from the vicinity of the device. He likely used a high enough frequency beyond human range, but we’ll know more when he publishes his code and details. There are also a few large 10mm LED’s – either to visually locate the device or help drive the animals away in conjunction with the ultrasound, with an LDR that activates the LEDs at night. Using the Arduino helps to turn on the transducer at random intervals, and hopefully, he is using a range of different frequencies so the animals don’t become immune to the device.

His first prototype was cobbled together using vanilla, off the shelf parts. An Arduino, a step up converter, an LDR, a couple of LEDs, a reed switch for powering it on via a magnet, and a large ultrasonic transducer, all powered by three alkaline AA batteries. He stuffed it all inside a weatherproof molded enclosure, holding it all together with a lot of hot glue. This didn’t make it very rugged for the long-term, outdoor field use. While the prototype worked well, he needed several of the devices to be placed all around his farm. To make assembly easy and make it more reliable, he designed a custom PCB to fit in the weather proof enclosure. This allowed him to easily mount all the required parts for a more reliable result. His project is still a work in progress, so if you have worked with these types of ultrasonic repellent devices to keep away animals, and have any insights that may help him, do chime in with your comments. [Ondřej] seems pretty satisfied with the results so far.

Metal 3D Printing: Insta-Layers

Selective Metal Sintering is cool but slow. Fear not, a technology that was initially developed to smooth and pattern laser beams is here to save the day, according to a new paper by Lawrence Livermore researchers.

In a paper titled “Diode-based additive manufacturing of metals using an optically-addressable light valve,” the researchers lay out a procedure for using an array of high-powered laser diodes among other things to print a whole layer of metal from powdered metal at one time. No more forward and backward, left and right. Just one bright flash and you’re done. Naturally, the technology is still in its infancy, but huge 3D printed metallic parts are something we’ve always hoped for.

According to [Matthews], the first author of the paper, the mojo of the process comes from a customized laser modulator: the Optically Addressable Light Valve which functions similarly to liquid crystal-based projectors but can handle the high energies associated with powerful lasers. There’s more information straight from the paper’s authors in this phys.org interview.

While it’s true that now is the time for direct metal 3D printing, it appears that for the time being the average hacker is stuck with alternative methods for printing metal. While it’s not the same, pewter casting with PLA might suffice.

Thanks to [Kevin] for sending this in!

Digital Clock Goes With The Grain

This good-looking clock appears to be made out of a block of wood with LED digits floating underneath. In reality, it is a block of PLA plastic covered with wood veneer (well, [androkavo] calls it veneer, but we think it might just be a contact paper or vinyl with a wood pattern). It makes for a striking effect, and we can think of other projects that might make use of the technique, especially since the wood surface looks much more finished than the usual 3D-printed part.

You can see a video of the clock in operation below. The clock circuit itself is nothing exceptional. Just a MAX7218 LED driver and a display along with an STM32 ARM processor. The clock has a DHT22 temperature and humidity sensor, as well as a speaker for an alarm.

Continue reading “Digital Clock Goes With The Grain”

Retrotechtacular: The Transistor (1953 Film)

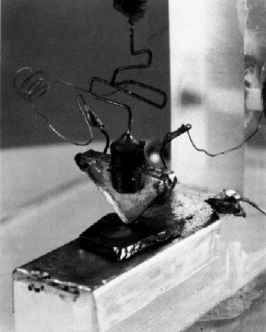
If we cast our minds back to the early years of the transistor, the year that is always quoted is 1947, during which a Bell Labs team developed the first practical germanium point-contact transistor. They would go on to be granted the Nobel Prize for their work in 1956, but the universal adoption of their invention was not an instantaneous process. Instead there would be a gradual change from vacuum to solid state that would span the 1950s and the 1960s, and even in the 1970s you might still have found mainstream devices on sale containing vacuum tubes.

First point contact transistor via kasap3

To speed up this process, Bell Labs made every effort to publicize their invention. Thus we come to our subject today, their 1953 publicity film The Transistor, in which the electronics industry of the era is described and how each part of it might revolutionize by the transistor is laid out.

We start with a look at a selection of electronic components, among which are a few transistors. The point contact device is already described as superceded by the junction transistor, but as well as those two we are shown a phototransistor and a junction tetrode, a now-obsolete design that had two base connections.

Unexpectedly we don’t dive straight into the world of transistors, but take a look back at the earlier years of the century to the development of vacuum electronics. We’re taken through the early development  and operation of vacuum tubes, then their use in long-distance radio communications, through the advent of electronics in mass entertainment, and finally into the world of radar and microwave links. Only then do we return to the transistor, with a posed shot of [John Bardeen], [William Shockley], and [Walter Brattain] hard at work in a lab. The merits of the transistor as opposed to the tube are then set out, though we can’t help wondering whether they have confused a milliwatt and a microwatt when they describe the transistor as requiring only a millionth of a watt to operate.

Continue reading “Retrotechtacular: The Transistor (1953 Film)”

Chocolate Factory Simulation Makes Bars With LEGO

[Michael Brandl] got to visit the Milka chocolate factory in Bludenz, Austria and was inspired to build this simulation of the production process for the LEGO world 2017 event in Copenhagen.

The process begins with the empty mold riding on a double row of tank treads. Subsequent modules seem to fill the mold with LEGO ingredients, cool the bars, and remove them from the mold. The last two steps rock: [Michael] built a dispenser that drops a tiny cardboard box onto the line, sized to hold 3 LEGO bars. The box rolls to the end of the line and is picked up by a pneumatic gripper that picks up the box and places it on a pallet.

While more whimsical than the LEGO liquid handler we featured recently, there are a lot of interesting robotic techniques to be learned here. On the reverse angle video you can see more of what’s going on with the wiring of the various motors and sensors. There are six EV3 bricks scattered along the length of the assembly line. The bricks control 15 small motors, 2 large motors, 7 touch sensors, and 3 light sensors. [Michael] added some nice touches, like the combo of two color sensors, seen around 1:45 of the reverse angle video, possibly used to keep the factory operations synced.

Check out [Michael’s] Mindstorms sendup of [Anouk Wipprecht’s] drink bot dress. The LEGO version was built for Robotexotica. In addition, he has a lot of projects featured on his site.

Continue reading “Chocolate Factory Simulation Makes Bars With LEGO”

Chess Set From Car Parts

Chess has been around for an awfully long time, automobiles less so. However, there’s no reason the two can’t be combined, like in this chess set fashioned from automotive components.

The project was made as a gift, and is the sort of thing that’s quite accessible for an interested maker to attempt at home. Parts used to build the set include valves, valve springs, spark plugs, castellated nuts and pipe fittings. As the parts don’t actually need to be in good working condition, a haul like this could likely easily be had for less than $50 from the local pull-it-yourself wrecking yard — or free if you know a mechanic with some expired engines lying around.

The metalworking side of things involves trimming down and welding together the parts, before polishing them up and applying a coat of paint to create the white and black, or in this case, gold and black pieces.

Overall, it’s a fun weekend project that could be tackled in any number of ways depending on your creativity and taste. For a different take, check out this 3D laser cut chess set.

Sega’s Game Gear Gets A Video Output

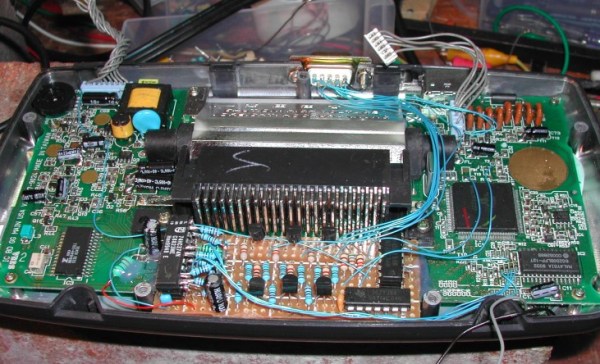
[EvilTim] dug deep into a classic system to finally give the Game Gear a proper video output.  The Game Gear was Sega’s answer to Nintendo’s Gameboy. Rushed to market, the Game Gear reused much of the hardware from the very popular Master System Console. The hardware wasn’t quite identical though – especially the cartridge slot. You couldn’t play Game Gear games on a Master System, and the game gear lacked an AV output, which meant gamers were stuck playing on a small fluorescent backlit LCD screen.

[EvilTim] wanted to play some of those retro titles on a regular TV using the original hardware. To accomplish this he had to start digging into the signals driving the Game Gear’s LCD. The Master System lineage was immediately apparent, as Game Gear’s LCD drive signals were similar in timing to those used to drive a TV. There was even a composite sync signal, which was unused on in the Game Gear.

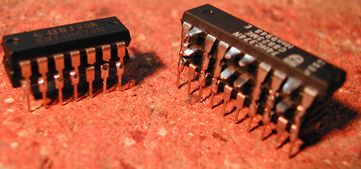
[EvilTim] first designed a circuit using discrete ’74 series logic which would convert the LCD drive signals to SCART RGB. Of note is the construction technique used in this circuit. A tower of three 74HC374 chips allows [EvilTim] to create R, G, and B outputs without the need for a complex circuit board.

As pretty as a three-story chip tower is, [EvilTim] knew there was a better way. He re-spun the circuit with a 32 macrocell CPLD. This version also has an NTSC and PAL video encoder so those without a SCART interface can play too. If you’re not up to building your own, [EvilTim] sells these boards on his website.

We’ve seen some incredible retro gaming hacks over the years. From a NES inside a cartridge to incredible RetroPi builds. Hit the search bar and check it out!