ESP8266 Beacon Announces Your Arrival

It used to be people were happy enough to just have to push a button in their car and have the garage door open. But pushing a button means you have to use your hands, like it’s a baby toy or something. We’re living in the 21st century, surely there must be a better way! Well, if you’ve got a home automation system setup and a spare ESP8266 laying around, [aderusha] may have your solution with MQTTCarPresence.

The theory of operation here is very clever. The ESP8266 is powered via the in-dash USB port, which turns on and off with the engine. When the engine is started, the ESP8266 is powered up and immediately connects to the WiFi network and pushes an MQTT message to Home Assistant. When Home Assistant gets the notification that the ESP8266 has connected, it opens the garage door.

When [aderusha] drives out of the garage and away from the house, the ESP8266 loses connection to the network, and Home Assistant closes the door. The same principle works when he comes home: as the car approaches the house it connects to the network and the garage door opens, and when the engine is shut off in the garage, the door closes again.

The hardware side of the setup is really just a WeMos D1 mini Pro board, though he’s added an external antenna to make sure the signal gets picked up when the vehicle is rolling up. He’s also designed a very slick 3D printed case to keep it all together in a neat little package.

We’ve covered automated entry systems based on the ESP8266 before, though usually the ESP stays at home. Be sure to check out the awesome series [Elliot Williams] has on the wonders of MQTT if you’re looking to setup your own automation system.

The SD-11 Sphericular Display: Pixels That Aren’t Pixels

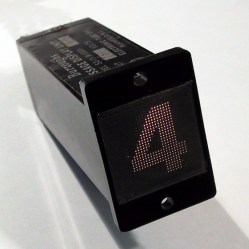
Ever heard of a sphericular display? [AnubisTTP] laid hands on a (damaged) Burroughs SD-11 Sphericular Display and tore down the unusual device to see what was inside. It’s a type of projection display with an array of bulbs at the back and a slab of plastic at the front, and the rest is empty space. The usual expected lenses and slides are missing… or are they? It turns out that the thin display surface at the front of the unit is packed with a two- dimensional 30 x 30 array of small lenses, a shadow mask, and what can be thought of as a high-density pixel mask. The SD-11 was cemented together and clearly not intended to be disassembled, but [AnubisTTP] managed to cut things carefully apart in order to show exactly how these fascinating devices solved the problem of displaying digits 0-9 (with optional decimal points) on the single small screen without separate digit masks and lenses to bend the light paths around.
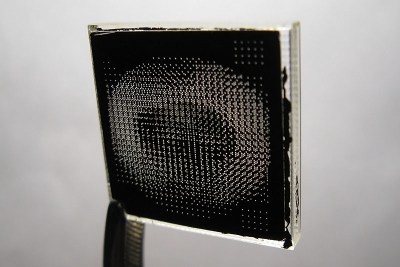
The “pixel mask” of the SD-11

The face of the display can be thought of as a 30×30 array of pixels, with each of the microlenses in the lens array acting as one of these pixels. But these pixels are not individually addressable, they light up only in fixed patterns determined by the “pixel mask”. How exactly does this happen? With each microlens in the array showing a miniature of the bulb pattern at the rear of the display, a fixed image pattern can be shown at the front by putting a mask over each lens: if a certain bulb at the rear needs to result in a lit pixel at the front, that mask has a hole in that bulb’s location. If not, there is no hole and the light is blocked. Just as the compound lens is a two-dimensional array of microlenses, so is the light mask really a two-dimensional array of smaller masks: exactly one per microlens. In this way the “pixel mask” is how each bulb at the rear results in a fixed pattern (digits, in this case) projected at the front.

The Burroughs SD-11 Sphericular Display was very light, containing mostly empty space where other projection displays had lenses and light masks. It turns out that the SD-11 operates using the same principles as other projection displays, but by using a high-density light mask and a compound lens array it does so by an entirely different method. It’s a great peek into one of the different and fascinating ways problems got solved before modern display solutions became common.

Ancient Insect Scales Analyzed With Help Of Nose Hair

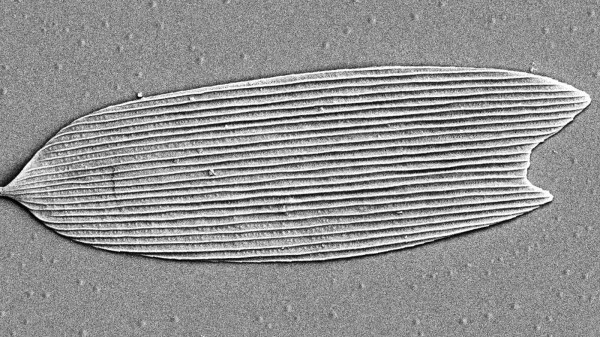
Scientists working to advance the frontier of knowledge frequently also need to invent their tools along the way. Sometimes these are interesting little hacks to get a job done. Recently some researchers found ancestors of moths and butterflies older than any previously known by analyzing tiny scales found alongside ancient pollen. They needed a tool to manipulate these scales: separating them from surrounding debris, transferring them to microscope slides. The special tool was a needle tipped with a single human nostril hair.

As ancient insects were the published paper‘s focus, their use of nose hair tipped needle was only given a brief mention in the “Materials and Methods” section. Interviews by press quoted researchers’ claim that nose hair has the right mechanical properties for the job, without further details. Not even a picture of the tool itself. What properties of insect scales made them a good match with the properties of nose hair? Was there a comprehensive evaluation of multiple types of hair for the task? Would we regret asking these questions?

Novel approaches to fine-tipped tools would be interesting to examine under other contexts, like the tweezers we use to build surface-mount electronics. As SMD parts continue to shrink in size, will we reach a point where hair-tipped tools are the best DIY alternative to an expensive pick-and-place machine? It would be another creative approach to deal with the challenges of hand-built SMD. From simple but effective mechanical helpers, to handy 3D printed tools, to building hybrid Manual + CNC pick-and-place more affordable than their fully automated counterparts.

[via Washington Post]

Trio Of Tips For A Cetus Printer

Thanks to the holiday gifting cycle, many homes are newly adorned with 3D printers. Some noobs are clearly in the “plug and play” camp, looking for a user experience no more complicated than installing a new 2D printer. But most of us quickly learn that adding a dimension increases the level of difficulty substantially, and tinkering ensues.

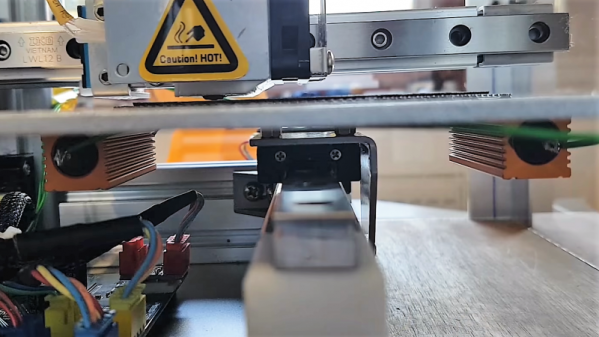
One such tinkerer, [Marco Reps], has been taking his new Cetus 3D printer to new places, and his latest video offers a trio of tips to enhance the user experience of this bare-bones but capable printer. First tip: adding a heated bed. While the company offers a heated aluminum bed for ABS and PETG printing at a very reasonable price, [Marco] rolled his own. He bolted some power resistors to the aluminum platen, built a simple controller, and used the oversized stock power supply to run everything.

To contain the heat, tip two is an enclosure for the printer. Nothing revolutionary here — [Marco] just built a quick cover from aluminum profiles and acrylic.

But the clear case allows for tip number three, the gem of this video: synchronized time-lapse photography. Unhappy with the jerky time-lapse sequences that are standard fare, he wrote a Python program that uses OpenCV to compare webcam frames and save those that are similar to the last saved frame. This results in super smooth time-lapse sequences that make it look like the print is being extruded as a unit. Pretty neat stuff.

Did you find a 3D printer under your Festivus Pole, and now you’re wondering what’s next? Check out [Tom Nardi]’s guide for 3D newbies for more tips.

Continue reading “Trio Of Tips For A Cetus Printer”

Color Organ Dress, A Wearable With Audio Feedback

There is a huge amount of interest among our community in wearable electronics, but it is fair to say that it is a technology that has a way to go at our level in terms of its application. Some twinkly LEDs are all very well, but unless you have the arrived-on-a-spaceship-from-the-future aesthetic of someone like [Naomi Wu] to carry them off they get old rather quickly.

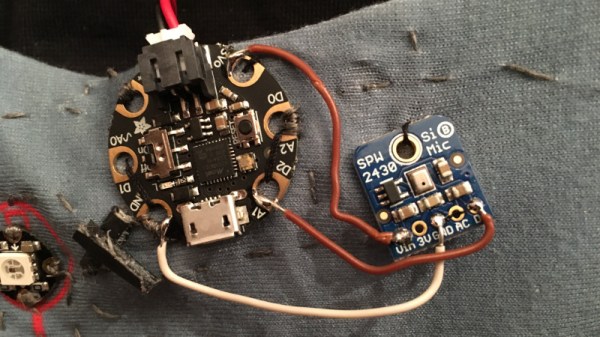
What the sew-on LED sector of wearable electronics is waiting for are some applications, wearable lights that do something rather than just look pretty. And [Moko] has a project that takes them in that direction, with her color organ dress, a garment whose LEDs react to ambient sound with the aid of a MEMS microphone and an Adafruit Gemma M0 microcontroller board. The LEDs form a color wheel which rotates, and stops at a point proportional to the sound level at the time.
The write-up is an interesting one, going into a little detail as it does in the images on the construction of an electronically-enhanced piece of clothing. Wiring everything up is one thing, but there are other considerations such as the incorporation of extra panels to protect them from mechanical stress, and from sweat. From a dressmaker’s perspective it’s a well constructed garment in its own right with an attractive PCB-style pattern (Where did she get that fabric? Or did she print it herself?) and it appears that she’s the fortunate owner of a serger (overlocker).

Well-assembled clothing has made it here before, for example an impressive jellyfish skirt or this laser-cut arcsin dress. And should you wish to make a garment for your next wearable project, you’ll be sure to need a well-stocked textile bench.

Tomu: A Microcontroller For Your USB Port

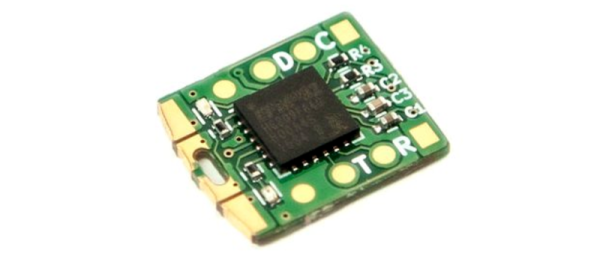
Looking for a ultra tiny development board? Tomu is an ARM Cortex M0+ device that fits inside your USB port. We’ve seen these in person, and they’re tiny.

There’s a few commercial devices in this form factor on the market. For example, the Yubikey Nano emulates a keyboard to provide codes for two-factor authentication. The Yubikey’s tiny hardware does this job well, but the closed-source device isn’t something you can modify.

Tomu is a new device for your USB port. It sports a Silicon Labs EFM32 microcontroller, two buttons, and two LEDs. This particular microcontroller is well suited to the task. It can talk USB without a crystal for timing, and has an internal regulator to generate the core voltage from a 5 V USB supply. Since it supports DFU firmware updates, it can be reprogrammed without any special tools.

Unfortunately, the EFM32 device lacks secure storage options, so the Tomu might not be the best device to keep your secrets on. That being said, it will be interesting to see what applications people come up with. The creators have suggested using the device for media buttons, sleeping and waking a computer, and as a U2F key.

The project is currently available on CrowdSupply, and all design files and source is available on their Github. If you like soldering tiny things, the twelve-part bill of materials should be fairly easy to assemble at home.

Vacuum Tubes: Shipping Through EBay Now Challenging?

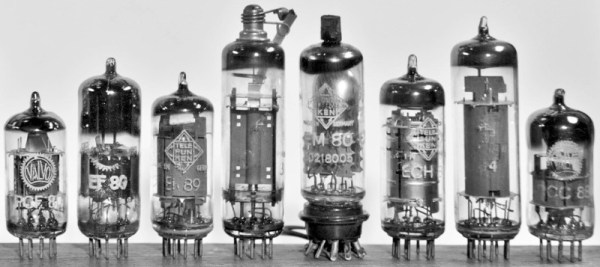
There is disquiet in the world of vacuum electronics, that something as simple as shipping a vacuum tube could now be very difficult to achieve. It’s a concern expressed among other places in a video by [Guitologist] that we’ve included below, and includes tales of vacuum tubes being impounded as either dangerous to ship, or not allowed to be shipped across international borders.

Upon investigation it appears that the common thread in all the stories lies with eBay’s Global Shipping Program, the centralised shipping service operated by the online auction giant. We reached out to eBay’s press office on the subject but have yet to receive a reply. It’s best to ask someone who ships a lot of tubes for comment when you have a tube shipping story, so we also had a conversation with TC Tubes. They’re a small company dealing in tubes, and as you might imagine they ship a lot of them (Their website is likely to detain you for a while if you are a tube-head). [Chelsea] from TC Tubes told us that they have encountered no regulatory barriers to tube shipping, and that their only bad experience has been yet again with eBay’s Global Shipping Program.

So it seems there is no cause for panic if you ship tubes, CE marking or RoHS rules haven’t come for your EL34s and your 6550s. Ebay have evidently got some kind of issue with tubes in their shipping operation, and perhaps you should ship by other means if you wish to avoid your tubes going astray. The consensus here among the Hackaday crew is that it could be as simple as uninformed employees not being aware of what tubes are because they aren’t as common as they used to be. After all, with over a hundred years of history behind them it’s not as though any potential issues with their shipping haven’t been comprehensively explored.

We’d still be interested to hear from eBay on the matter though, if they would care to comment.

Continue reading “Vacuum Tubes: Shipping Through EBay Now Challenging?”