Reverse Engineering A Bitcoin Miner

If you’re brave enough to have dipped your toes into the Wild West that is cryptocurrency, you probably know that people have long since abandoned trying to mine on their desktop computers. Farms of GPUs are all the rage now, but dedicated mining hardware has also enjoyed a following among those who are serious about their fictitious money. The state-of-the-art for such devices is moving just as rapidly as cryptocurrency itself is, which means older mining gear can now be picked up fairly cheap on the second-hand market. This is an excellent opportunity for those who want to experiment with this type of hardware and potentially utilize it for some other purpose, but first you’ve got to figure out how the thing works.

To that end, [Tomasz Wątorowski] wrote in to the tip line to tell us about the progress he’s made reverse engineering the control protocol for the Antminer S1. As is often the case, the documentation didn’t have all the details he needed, but it did have a schematic of the BM1380 chip at the heart of the device.

Performance of the Antminer S1 controlled via UART

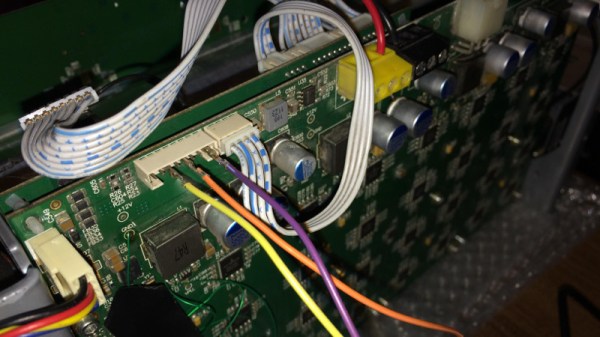
The Antminer S1 contains 64 BM1380 chips on an internal UART bus. With the information from the schematic, [Tomasz] was able to tap into this UART bus with a USB adapter and start listening in on the conversation. He compiled a collection of commands and learned enough to be dangerous (which is always the goal here at Hackaday).

For example, he found that the could set the frequency of the BM1380 as high as he wished without any consideration for thermal overload. This could potentially allow somebody to run  the hardware to the point of destruction, à la Stuxnet.

Once he figured out how to give the hardware hashes to work on over the UART interface, he setup a little head-to-head competition between the software he wrote to command the Antminer S1 and the official control software. No drop in performance was found between his software and the real deal, which sounds like a win in our book.

Even if he can’t improve on the performance of this particular piece of outdated mining hardware, it still beats doing it by hand on a piece of paper.

USB To Quad Serial Port Adapter Offers TTL, Isolated Ports

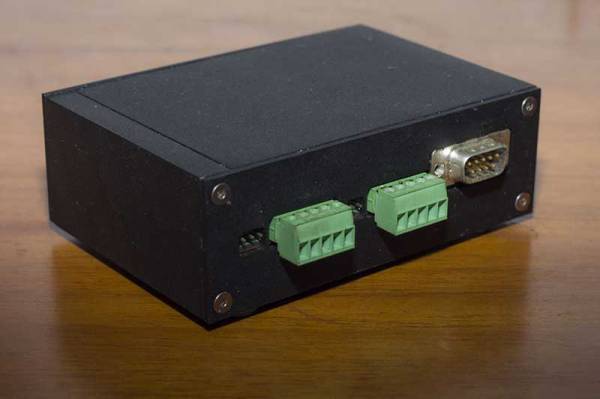
[Felipe Navarro] wanted to add a few serial ports to his computer, but couldn’t find an adapter that suited his needs. So, he built his own.

His Quad Serial device is a nicely designed converter that offers four serial ports, two of which are isolated to avoid blowing up too much stuff if things go wrong. The other two are TTL ports, but with an interesting twist: feed them any voltage between 1.8 V and 5 V, and they will happily work with it, which is a lot easier than messing about with TTL to RS-232 converters.

It’s all built around an FTDI FT4232H chip, which has drivers available for most OSes, so it should work with pretty much anything. And, as [Felipe] notes, this chip has not been cloned, so you won’t have to worry about the FTDI drivers disabling your device without warning.  Well, not at the moment, anyway. We did cover a similar quad serial port adapter last year, but this one is a bit more developed, with both DE-9 and screw terminal connectors available.

Heated DryBox Banishes Filament Moisture For Under $20

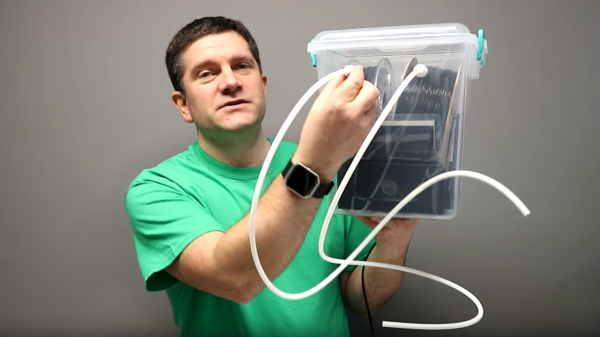
There has been a lot of activity from [Richard Horne] regarding 3D printing filaments lately; most recently he has shared two useful designs for upping one’s filament storage and monitoring game. The first is for a DIY Heated DryBox for 3D printing filament. It keeps filament dry not just by sealing it into a plastic box with some desiccant, but by incorporating a mild and economical heater intended for reptile habitats inside. Desiccant is great, but a gently heated enclosure can do wonders for driving away humidity in the right environment. The DryBox design also incorporates a handy little temperature and humidity sensor to show how well things are working.

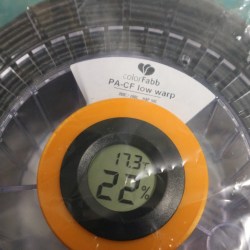
Spool-mounted adapter for temperature and humidity sensor (and desiccant) to monitor storage bag conditions.

The second design is a simple spin-off that we particularly liked: a 3D printed adapter that provides a way to conveniently mount one of the simple temperature and humidity sensors to a filament spool with a desiccant packet. This allows storing a filament spool in a clear plastic bag as usual, but provides a tidy way to monitor the conditions inside the bag at a glance. The designs for everything are on Thingiverse along with the parts for the Heated DryBox itself.

[Richard] kindly shares the magic words to search for on eBay for those seeking the build’s inexpensive key components: “15*28CM Adjustable Temperature Reptile Heating Heater Mat” and “Mini LCD Celsius Digital Thermometer Hygrometer Temperature Humidity Meter Gauge”. There are many vendors selling what are essentially the same parts with minor variations.

Since the DryBox is for dispensing filament as well as storing it, a good spool mounting system is necessary but [Richard] found that the lack of spool standardization made designing a reliable system difficult. He noted that having spool edges roll on bearings is a pretty good solution, but only if one doesn’t intend to use cardboard-sided spools, otherwise it creates troublesome cardboard fluff. In the end, [Richard] went with a fixed stand and 3D printable adapters for the spools themselves. He explains it all in the video, embedded below.

Continue reading “Heated DryBox Banishes Filament Moisture For Under $20”

All The Stuff You Wished You Knew About Fourier Transforms But Were Afraid To Ask

The Fourier transform underpins so much of our technological lives, in most cases probably without our realising it. The ability to mathematically split a waveform into its frequency components and vice versa underpins much of the field of digital signal processing, and DSP has become an essential part of many electronic devices we take for granted.

But while most of us will know what a Fourier transform is, fewer of us will know anything of how one works. They are a function called from a library rather than performed in themselves. Even when they are taught in schools or university courses they remain something that not all students “get”, and woe betide you if (as your scribe did) you have a sub-par maths lecturer.

The video below the break then is very much worth a look if Fourier transforms are a bit of a mystery to you. In it [Grant Sanderson] explains them through a series of simple graphical examples in a style that perhaps may chalk-and-talk mathematics teachers should emulate. You may still only use Foruier transforms through a library, but after watching this video perhaps some of their mysteries will be revealed.

Continue reading “All The Stuff You Wished You Knew About Fourier Transforms But Were Afraid To Ask”

Curing A Parrot’s Amnesia With BLEAH

[Dandu] recently wrote in to tell us how he managed to revive his Parrot Flower Power after the manufacturer told him it couldn’t be repaired. To save you the trouble of opening Google in another tab, the Parrot Flower Power is a Bluetooth Low Energy (BLE) “smart” device for your flower pot. Because of course that’s a thing.

A healthy Flower Power connected

When [Dandu] noticed his Flower Power was no longer being detected by his iOS devices, he contacted support who told him that sadly this was a hardware failure and that he should just throw it away. But he had his doubts about this diagnosis as other devices such as his Raspberry Pi could still communicate with it. Upon closer inspection, he realized that the Flower Power didn’t have a name, and could only be contacted by its MAC address directly. Reasoning the lack of a name might be upsetting the “It Just Works” sensibility of his iGadget, [Dandu] started researching if there was some way to get the device to take a new name remotely.

Luckily for our hero, BLE is kind of broken. Searching for a solution to his problem brought him to a blog post by the creator of BLEAH which demonstrated exactly what [Dandu] was looking to do. Following along, it took only a single command to push a new name to the Flower Power’s BLE configuration. With that, his “broken” device was brought back to life. Why the device lost its name, or how to prevent it from happening in the future are questions for another day. [Dandu] will take the win.

If you’re interested in the popular new technology that’s compromising our security in the name of convenience and improved battery life, the rabbit hole starts here.

Celebrating The Olympics With Flaming Windmills

Like many of us, [Gustav Evertsson] was looking for an excuse to set stuff on fire and spin it around really fast to see what would happen. Luckily for him (and us) the Winter Olympics have started, which ended up being the perfect guise for this particular experiment. With some motors from eBay and some flaming steel wool, he created a particularly terrifying version of the Olympic’s iconic linked rings logo. Even if you won’t be tuning in for the commercials Winter Games, you should at least set aside 6 minutes to watch this build video.

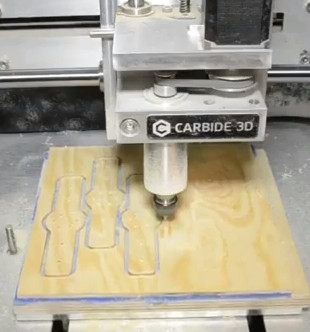
The beginning of the build starts with some mounting brackets getting designed in Fusion 360, and you would be forgiven if you thought some 3D printed parts were coming up next. But [Gustav] actually loads the design up on a Carbide 3D CNC and cuts them out of wood.

A metal hub is attached to each bracket, and then the two pieces are screwed onto a length of thin wood. This assembly is then mounted up to the spindle of a geared motor rated for 300 RPM. The end result looks like a large flat airplane propeller. Five of these “propellers” are created, one for each ring of the Olympic’s logo.

Once the sun sets, [Gustav] takes his collection of spinners outside and lines them up like windmills. At the end of each arm is a small ball of fine-grade steel wool, which will emit sparks for a few seconds when lighted. All you’ve got to do is get the 10 pieces of steel wool alight at the same time, spin up the motors, and let persistence of vision do the rest. If you can manage the timing, you’ll be treated with a spinning and sparking version of the Olympic rings that wouldn’t look out of place in a new Mad Max movie.

Generally speaking, we don’t see much overlap between the hacker community and the Olympics. You’d have to go all the way back to 2012 to find another project celebrating this particular display of athleticism. We would strongly caution you not to combine both of these Olympic hacks at the same time, incidentally.

Continue reading “Celebrating The Olympics With Flaming Windmills”

Custom Parts Feeder Aims To Keep Pace With Pick And Place

When your widgets have proven so successful that building them gets to be a grind, it might be time to consider a little mechanical help in the form of a pick and place machine (PnP). If you’re going to roll your own though, there’s a lot to think about, not the least of which is how to feed your beast with parts.

Managing the appetite of a PnP is the idea behind this custom modular parts feeder, but the interesting part of [Hans Jørgen Grimstad]’s work-in-progress project has more to do with the design process. The feeders are to support a custom PnP being built in parallel, and so the needs of one dictate the specs of the other. Chief among the specs are the usual big three: cheap, fast, and reliable. But size is an issue too insofar that the PnP could be working with dozens of component reels at once. Flexibility was another design criteria, so that reels of varied width can be accommodated.

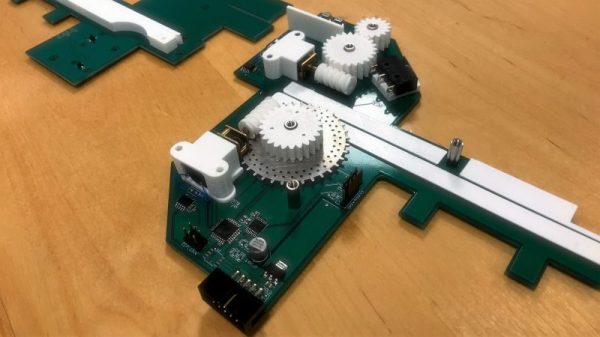
With all that in mind, [Hans] and company came up with a pretty slick design. The frame of the feeder is made out of the PCBs that house the motors for handling the tape, and the ATmega168 that controls everything. Tapes are driven by a laser-cut sprocket driven by 3D-printed worm gears. The boards have fingers that mate up to the aluminum extrusion that the PnP will be built from, and at only a few millimeters wider than the tape, lots of feeders can be nestled together. The video below shows the feeder undergoing some tests.

Alas, this build isn’t quite done, so you’ll have to check back for the final schematics and PCB files if you want to build one for yourself. While you’re waiting, you might want to build your own pick and place.

Continue reading “Custom Parts Feeder Aims To Keep Pace With Pick And Place”