Modifying the Amiga 500 to speed up access to RAM in a memory expansion pack is a well documented procedure, with guides on the process written in the early 1990’s when the hardware was only a few years old. But as they were written for contemporary hardware, they make no concessions for how one should be treating a vintage computer that’s now over 30 years old. In 1993, cutting traces on the Amiga 500 motherboard was just a last ditch effort to eek a few more months of service life out of an outdated desktop computer. But in 2018, it’s kind of like when that old lady tried to “restore” a fresco of Jesus in Spain; it might be done with the best of intentions, but you still screwed the thing up good and proper.
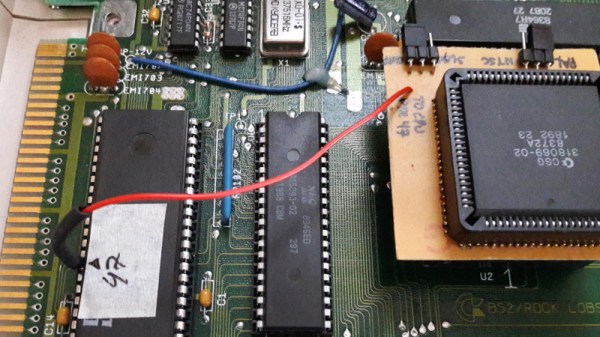
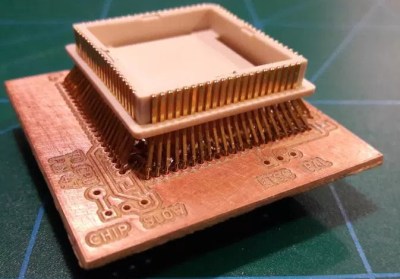 Such things don’t fly over at [Inkoo Vintage Computing]. There you can find a guide that details the impressive lengths one can go to if they want to perform the classic modification without any irreversible changes to the motherboard. To avoid the cut traces and soldered bodge wires, this version of the modification makes use of a novel adapter that breaks out the necessary connections on the 8372A chip.
The adapter is simply a homemade PCB with both male and female plastic leaded chip carrier (PLCC) connectors. The few pins on the chip that needed rerouting are exposed as solder pads on the adapter for easy wiring. There are even a couple jumpers on the adapter to turn the modifications on and off.
Not surprisingly, the trickiest part of building this adapter was sourcing the antiquated PLCC connectors. Assuming you can even find them, you are then left with the challenging task of soldering them together. Judging by the pictures on the [Inkoo Vintage Computing] page, it’s no walk in the park.
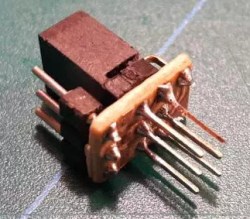 Another similar arrangement is used in the expansion bay of the Amiga, where a pin is virtually “cut” in the connector. A tiny PCB is soldered to a 3×2 header to reroute the signals, and another jumper is used to enable and disable the pin. Luckily, the long pins on the Amiga memory expansion are forgiving enough that the little board can fit in between them without breaking electrical contact.
We’re no stranger to the Amiga 500 around these parts. We’ve covered how to get the 1987-vintage machine online in the 21st century, as well as employing a Raspberry Pi to emulate the original floppy drive. You can even make your own faux-Amiga with a 3D printed case, if you suffer from a sort of existential dread when working on a computer that’s older than you are.

