Rotary Controller Dials In PC Volume

As wonderful as mechanical keyboards are, most of the pre-fab and group buy models out there have zero media controls. If you want rotary encoders and OLED screens to show what function layer you’re working in, you’ll probably have to build your own keyboard from the ground up.

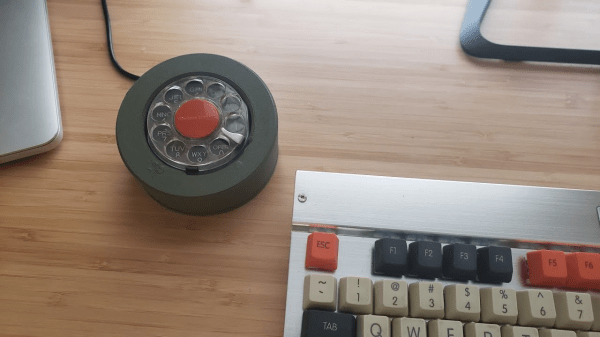
Hackaday alum [Cameron Coward] got around this problem by building an electromechanical buddy for his keyboard that works as a volume control. Now that we don’t rely on them to make phone calls, rotary dials are a fun throwback to a time that seems simpler based on its robust and rudimentary technology. This one is from a lovely burnt orange Bell Trimline phone, which was peak rotary dial and one of the idea’s last gasps before tone dialing took over completely.

Operationally speaking, [Cameron] is reading in the dial’s pulses with an Arduino Nano and using a Python script to monitor the serial connection and translate the pulses to volume control. We like that this is isn’t a volume knob in the traditional sense — it’s a game of percentages. Dialing ‘2’ gives 20% volume across all programs, and ‘8’ raises it to 80% of maximum. Need to mute? Just dial ‘0’, and you’ll begin to understand why people wanted to move on from rotary dialing. It won’t take that long, but it’s not instant. Check out the demo after the break.

This isn’t the first time we’ve seen a rotary dial used to control volume, but that’s one of the minor selling points of this rotary cell phone.

Continue reading “Rotary Controller Dials In PC Volume”

Art of 3D printer in the middle of printing a Hackaday Jolly Wrencher logo

3D Printering: Sticky Resin Prints And How To Fix Them

After going through all the trouble of printing a part in resin, discovering it feels sticky or tacky to the touch is pretty unwelcome. Giving the model some extra ultraviolet (UV) curing seems like it should fix the problem, but it probably does not. So, what can be done?

The best thing to do with a sticky print is to immediately re-wash it in clean isopropyl alcohol (IPA) before the UV present in ambient light cures stray resin. If the part remains sticky after it is dry, more aggressive steps can be taken.

We’ll get into those more extreme procedures shortly, but first let’s understand a bit more about how resin works, then look at how that applies to preventing and removing tacky surfaces on finished prints. Continue reading “3D Printering: Sticky Resin Prints And How To Fix Them”

A Pocket Retro Computer Anyone Can Build

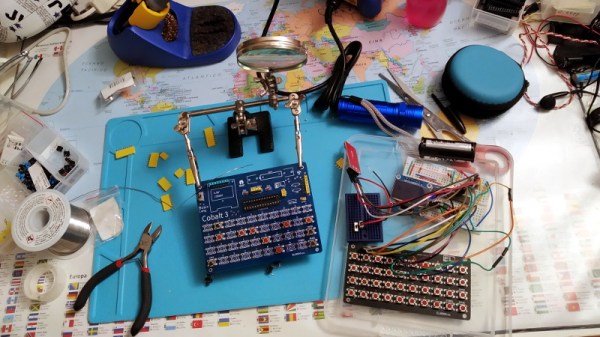
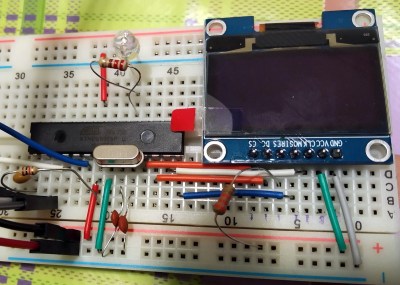
Not satisfied with any of the DIY retro computer kits on the market, [Leonardo Leoni] decided to make his own. Built using only the finest through-hole technology and powered by the ATmega328 microcontroller, his diminutive 8-bit computer is easy to build and even easier to develop for. Whether you’re looking to hone your BASIC skills or play some Zork on the bus, this little computer looks like a great project for anyone who has a soft spot for computing’s simpler days.

All things considered, using this tiny machine looks like it would be relatively pleasant. [Leonardo] is using a common SH1106 OLED display, and there’s a full QWERTY keyboard (with number row) done up with tactile momentary buttons. There’s very few passive components involved in the build, which is sure to be appealing to new players; especially after they’ve finished soldering all those switches to the board.

On the software side, [Leonardo] says he leaned heavily on open source projects to get his machine up and running. Beyond the hardware drivers for things like the display, he specifically calls out the Tiny Basic and Tiny Lisp Computer projects for their code. If small-scale programming isn’t your style, the machine is compatible with the Arduino IDE so you can easily throw something else on it. If you’ve ever dreamed of a QWERTY Arduboy, this might be your chance.

From the way [Leonardo] describes the computer, which he calls the Cobalt 3, we get the impression a commercial kit might be in the cards. We hope the community shows enough interest to make it happen. After all, not everyone was able to make it to Hackaday Belgrade 2018 to get their own pocket retro computer.

Adding WiFi To Black Magic For Wireless GDB Action

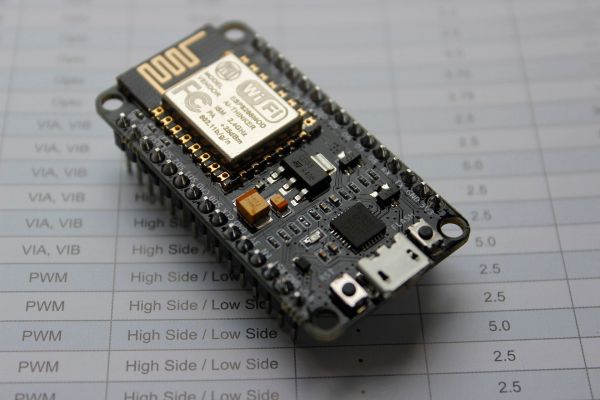
[Thoquz] wrote to us about an interesting GitHub project by [Valmantas Palikša] involving the porting of the Black Magic firmware to ESP8266. For those who are unaware, Black Magic Probe is firmware along with a range of official and third-party boards that targets the debugging of Cortex-M and Cortex-A MCUs and SoCs.

With this blackmagic-espidf project, one can use any ESP8266 board that has at least 2 MB of Flash program storage, though 1 MB should be possible if OTA updated are disabled. After flashing the firmware to the ESP8266 board, the GDB server can be reached on TCP port 2022 and UDP 2023, with a serial port available via TCP/23, UDP2323, or via the physical TX0/RX0 pins on the ESP8266.

The target board to be debugged  is hooked up by default to GPIO0 (SWDIO) and GPIO2 (SWCLK) for Serial Wire Debugging, though JTAG is also said to be supported. If set up properly, next one should be able to pop into a fresh remote GDB session:

gdb connection

If you don’t want the WiFi, you can buy a wired one, or just roll your own from any STM32 board that you’ve got kicking around.

Tiny Laser Cutter Puts Micro Steppers To Work

The influx of cheap laser cutters from China has been a boon to the maker movement, if at the cost of a lot of tinkering to just get the thing to work. So some people just prefer to roll their own, figuring that starting from scratch means you get exactly what you want. And apparently what [Mike Rankin] wanted was a really, really small laser cutter.

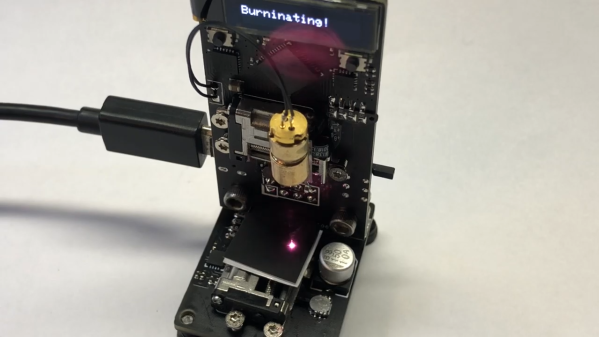
The ESP32 Burninator, as [Mike] lovingly calls his creation, is small enough to be in danger of being misplaced accidentally. The stage relies on tiny stepper-actuated linear drives, available on the cheap from AliExpress. The entire mechanical structure is two PCBs — a vertical piece that holds the ESP32, an OLED display, the X-axis motor, and the driver for the laser, which comes from an old DVD burner; a smaller bottom board holds the Y-axis and the stage. “Stage” is actually a rather grand term for the postage-stamp-sized working area of this cutter, but the video below shows that it does indeed cut black paper.

The cuts are a bit wonky, but this is surely to be expected given the running gear, and we like it regardless. It sort of reminds us of that resin 3D-printer small enough to fit in a Christmas ornament that [Sean Hodgins] did a while back. We’d suggest not trying to hang this on a tree, though.

Continue reading “Tiny Laser Cutter Puts Micro Steppers To Work”

Machine Learning Takes The Embarrassment Out Of Videoconference Wardrobe Malfunctions

Telecommuters: tired of the constant embarrassment of showing up to video conferences wearing nothing but your underwear? Save the humiliation and all those pesky trips down to HR with Safe Meeting, the new system that uses the power of artificial intelligence to turn off your camera if you forget that casual Friday isn’t supposed to be that casual.

The following infomercial is brought to you by [Nick Bild], who says the whole thing is tongue-in-cheek but we sense a certain degree of “necessity is the mother of invention” here. It’s true that the sudden throng of remote-work newbies certainly increases the chance of videoconference mishaps and the resulting mortification, so whatever the impetus, Safe Meeting seems like a great idea. It uses a Pi cam connected to a Jetson Nano to capture images of you during videoconferences, which are conducted over another camera. The stream is classified by a convolutional neural net (CNN) that determines whether it can see your underwear. If it can, it makes a REST API call to the conferencing app to turn off the camera. The video below shows it in action, and that it douses the camera quickly enough to spare your modesty.

We shudder to think about how [Nick] developed an underwear-specific training set, but we applaud him for doing so and coming up with a neat application for machine learning. He’s been doing some fun work in this space lately, from monitoring where surfaces have been touched to a 6502-based gesture recognition system.

Continue reading “Machine Learning Takes The Embarrassment Out Of Videoconference Wardrobe Malfunctions”

Fighter Jet’s Gyro Stays Upright Before It Self-Destructs

Aviation instruments are highly interesting pieces of engineering, and it is quite satisfying to watch the often over-engineered mechanisms behind them. If you are into that sort of thing it is worthwhile to check out [Erik Baigar]’s video where he explains the working principle of the attitude indicator from a Tornado jet.

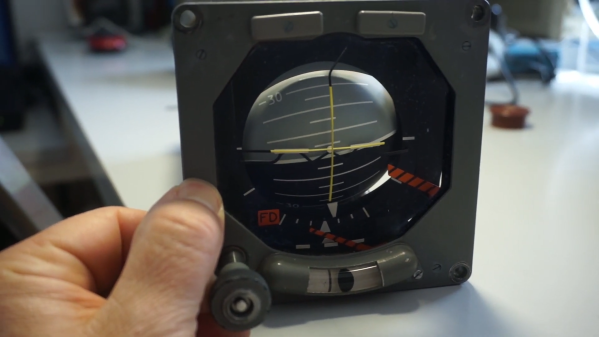
The attitude indicator or artificial horizon of an airplane is one of the most important instruments, especially during poor sight. The ADI42-124 used in the Tornado jet is completely standalone and only needs a DC power supply which is why [Erik Baigar] can show it off while standing on his balcony. At the heart of this instrument is a gyroscope which consists of a spinning disc attached to a gimbal mount. Due to the conservation of angular momentum, the spin axis will always keep its orientation when the instrument is rotated. However, mechanical gyroscopes tend to drift over time and therefore include a mechanism to keep the spin axis upright with respect to the direction of gravity. The ADI42-124 uses an entirely mechanical mechanism for this based on free swiveling weights. Forget everything we said earlier about overengineering as [Erik Baigar] also uncovers a fatal design flaw which leads to the instrument’s self-destruction as shown in the picture here. Unfortunately, this will render most of the units you can buy on eBay useless.

Be sure to check out [Erik Baigar]’s webpage which is nerd paradise for vintage computer and avionics fans or watch another gyroscope teardown.

Video after the break.

Continue reading “Fighter Jet’s Gyro Stays Upright Before It Self-Destructs”