For All Their Expense, Electric Cars Are Still The Cheapest

A criticism that we have leveled at the move from internal combustion vehicles to electric ones is that their expense can put them well beyond the range of the not-so-well-heeled motorist. Many of the electric vehicles we’ve seen thus far have been niche models marketed as luxury accessories, and thus come with a specification and list price to match. It’s interesting then to see a European report from LeasePlan looking at vehicle ownership costs which reveals that the total yearly cost of ownership (TCO) for an electric car has is now cheaper that comparable internal combustion vehicles across the whole continent in all but the fiercely competitive sub-compact segment.

TCO includes depreciation, taxes and insurance, fuel, and maintenance. Perhaps the most interesting story lies in electric cars progressing from being a high-depreciation, risky purchase to something you can sell on the second-hand market, even if they cost more up front. For example, the electric VW ID3 costs around $11,000 more than the comparable gas-powered VW Golf up front, but the higher resale price later offsets this and helps keep the TCO lower.

We’ve been following electric vehicles for a while now in the hope that an electric people’s car would surface, and have at times vented our frustration on the matter. It’s encouraging to see this particular trend as we believe it will encourage manufacturers to produce more accessible electric vehicles, especially given that we’ve just complained that driving electric seems like more of a rich man’s game.

(via Heise)

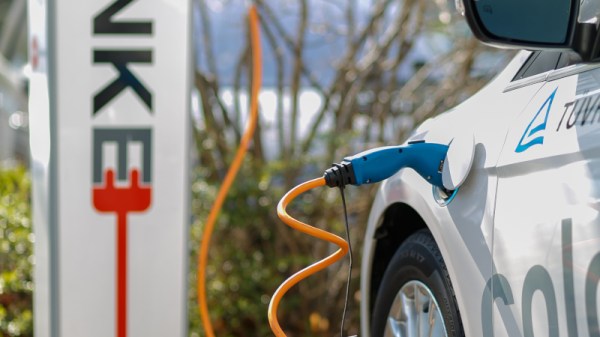
Header image: CEphoto, Uwe Aranas / CC-BY-SA-3.0.

Making Your Own Touchpad With PWM And Rust

The modern touchpads are incredible feats of engineering, with everything from complex signal processing for noise and tremendous economies of scale driving prices low. So [Kevin] decided to see if he could make his own touchpad. Partially out of curiosity of what makes one touchpad better than another, but also because he was curious if he could. Using an STM32 and a custom PCB, he was off to the races in an incredibly cost-effective way.

After writing some quick firmware in Rust, he was reporting the values read by the PWM channels. Using python, he could get a good idea of the raw values that were being written over USB and visualized. So rather than implement filtering in hardware or firmware, he elected to do the filtering and processing on the host computer side in Python. We suspect this gave him much shorter iteration cycles.

If you like the idea of making your own touchpad but perhaps are dreaming a little bigger, why not make a tablecloth-sized touchpad?

Pluto Spectrum Analyzer Uses Command Line

If you don’t care about shortwave frequencies, the PlutoSDR is a great deal. The device is supposed to be an evaluation board for Analog Device’s radio chips, but it does great as a software-defined radio that can receive and transmit and it even runs Linux internally. [SignalsEverywhere] shows how to use it as a spectrum analyzer that works from the command line in the video you can see below.

The software used is Retrogram. Despite the ASCII graphics, the program has many features. You can use simple keystrokes to change the center frequency, the sampling rate, the bandwidth, and more. You can run the software on a Linux host or compile a binary on the box or cross-compile using tools on the Raspberry Pi.

Continue reading “Pluto Spectrum Analyzer Uses Command Line”

Machine Learning Shushes Stressed Dogs

If there’s one demographic that has benefited from people being stuck at home during Covid lockdowns, it would be dogs. Having their humans around 24/7 meant more belly rubs, more table scraps, and more attention. Of course, for many dogs, especially those who found their homes during quarantine, this has led to attachment issues as their human counterparts have begin to return to work and school.

[Clairette] has had a particularly difficult time adapting to her friends leaving every day, but thankfully her human [Nathaniel Felleke] was able to come up with a clever solution. He trained a TinyML neural net to detect when she barked and used and Arduino to play a sound byte to sooth her. The sound bytes in question are recordings of [Nathaniel]’s mom either praising or scolding [Clairette], and as you can see from the video below, they seem to work quite well. To train the network, [Nathaniel] worked with several datasets to avoid overfitting, including one he created himself using actual recordings of barks and ambient sounds within his own house. He used Eon Tuner, a tool by Edge Impulse, to help find the best model to use and perform the training. He uploaded the trained network to an Arduino Nano 33 BLE Sense running Mbed OS, and a second Arduino handled playing sound bytes via an Adafruit Music Maker Featherwing.

While machine learning may sound like a bit of an extreme solution to curb your dog’s barking, it’s certainly innovative, and even appears to have been successful. Paired with this web-connected treat dispenser, you could keep a dog entertained for hours.

Continue reading “Machine Learning Shushes Stressed Dogs”

Designing Electronics That Work

[Hunter Scott] who has graced these pages a fair few times, has been working on electronics startups for the past ten years or so, and has picked up a fair bit of experience with designing and building hardware. Those of us in this business seem to learn the same lessons, quite often the hard way; we call it experience. Wouldn’t it be nice to get up that learning curve a little quicker, get our hardware out there working sooner with less pain, due to not falling into the same old traps those before us already know about? The problem with the less experienced engineer is not their lack of talent, how quickly they can learn, nor how much work they can get done in a day, but simply that they don’t know what they don’t know. There’s no shame in that, it’s just a fact of life. [Hunter] presents for us, the Guide to Designing Electronics that Work.

The book starts at the beginning. The beginning of the engineering process that is; requirements capturing, specifications, test planning and schedule prediction. This part is hard to do right, and this is where the real experience shows. The next section moves onto component selection and prototyping advice, with some great practical advice to sidestep some annoying production issues. Next there’s the obvious section on schematic and layout with plenty of handy tips to help you to that all important final layout. Do not underestimate how hard this latter part is, there is plenty of difficulty in getting a good performing, minimal sized layout, especially if RF applications are involved.

The last few sections cover costing, fabrication and testing. These are difficult topics to learn, if up till now all you’ve done is build prototypes and one-offs. These are the areas where many a kickstarter engineer has fallen flat.

Designing Electronics That Work doesn’t profess to be totally complete, nor have the answer to everything, but as the basis for deeper learning and getting the young engineer on their way to a manufacturable product, it is a very good starting point in our opinion.

The book has been around a little while, and the latest version is available for download right now, on a pay what-you-want basis, so give it a read and you might learn a thing or two, we’re pretty confident it won’t be time wasted!

Battery pack of e-bike being welded

Extending An E-Bike Range From Good To Wheelie Good

It may not look like it in some parts of the world, but electric vehicles are gaining more and more market share over traditional forms of transportation. The fastest-growing segment is the e-bike, which some say are growing at 16x the rate of conventional bikes (which have grown at 15% during the pandemic). [Jacques Mattheij] rides an S-Pedelec, which is a sort of cross between a moped and an e-bike. There were a few downsides, and one of those was the pitiful range, which needed to be significantly upgraded.

The S-Pedelec that [Jacques] purchased is technically considered a moped, which means it needs to ride in traffic. The 500 watt-hour battery would only take him 45km (~28 miles) on a good day, which isn’t too bad but a problem if your battery runs down while in traffic, struggling to pedal a big heavy bicycle-like thing at car speed. You can swap batteries quickly, but carrying large unsecured extra batteries is a pain, and you need to stop to change them.

There were a few challenges to adding more batteries. The onboard BMS (battery management system) was incredibly picky with DRM and fussy about how many extra cells he could add. The solution that [Jacques] went with was to add an external balancer. This allowed him to add as many cells as he wanted while keeping the BMS happy. The battery geometry is a little wonky as he wanted to keep the pack within the frame. Putting it over the rear wheel would shift the center of gravity higher, changing the bike’s handling. After significant research and preparation, [Jacques] welded his custom battery back together with a spot welder. The final capacity came in at 2150wh (much better than the initial 500wh). An added benefit of the extra range is the higher speed, as the bike stays in the higher voltage domain for much longer. In eco mode, it can do 500km or 180km at full power.

It’s awe-inspiring, and we’re looking forward to seeing more e-bikes in the future. Maybe one day we’ll have tesla coil wireless e-bikes, but until then, we need to make do with battery packs.

Circuit Sculpture Lamp Is A Colorful Cube Companion

Circuit sculpture is engineering and art all at play together. One must combine the functional with the aesthetically appealing. [EdwardA61] did just that with this enchanting lamp build.

Like many other circuit sculptures, the build relies on the aesthetic qualities of brass, though [EdwardA61] notes that copper wire can be used as well. Four WS2812B LEDs, in their bare PCB-mount form, are soldered into a circuit using the brass to carry the power and data signals as needed.

A Seeduino Xiao microcontroller is responsible for controlling the show, though relies on a typical PCB rather than a circuit sculpture in and of itself. It does provide for easy powering and programming however, with the benefit of its USB-C connector.

It’s a simple skeleton design, as so many circuit sculptures are, but it’s a form that we’ve come to love and appreciate. [EdwardA61] did a great job of photographing the build, too, showing how the colors on each LED interplay with each other as they’re cast on the table.

It’s a lamp we’d love to build ourselves, and we hope that [EdwardA61] follows through on plans to cast a similar design in clear resin, as well. If you’ve built your own artistically electrical sculptures, be sure to let us know!