Big Brother Or Dumb Brother? Bus Drivers In Beijing Are Forced To Wear “Emotional Monitors”

Humans aren’t always great at respecting each other’s privacy. However, common sense says there’s a clear boundary when it comes to the thoughts in one’s own head and the feelings in one’s heart.

For bus drivers in Beijing though, it seems that’s no longer the case. These professional drivers are now being asked to wear emotional monitors while on the job, raising concerns from both legal and privacy advocates. But the devices aren’t really anything more than workout monitors, and whether they can actually make good on their Orwellian promise remains to be seen.

In Your Head, In Your Head!

The monitoring wristbands have been rolled out to some of Beijing’s long-distance bus drivers. Credit: Cypp0847, CC-BY-SA-4.0

When George Orwell wrote 1984, it was only 1949. However, he was able to foresee a world in which surveillance was omnipresent and inescapable. He also envsioned the concept of thoughtcrime, where simply contemplating the wrong things could get you in serious trouble with the authorities.

As we all know, Orwell was way off – these predictions didn’t become reality until well into the 2000s. In the latest horrifying development, technologies now exist that claim to be able to monitor one’s emotional state. Now, China’s transportation sector is rushing to push them on their workforces.

Long-distance bus drivers in Beijing are now being told to wear electronic wristbands when on the job. These wristbands claim to be able to capture the wearer’s emotional state, monitoring it on behalf of the employer. The scheme was the idea of the Beijing Public Transport Holding Group. The state-run organization claims the technology is intended for the safety of the public, and a trial of the wristbands began in July this year. Continue reading “Big Brother Or Dumb Brother? Bus Drivers In Beijing Are Forced To Wear “Emotional Monitors””

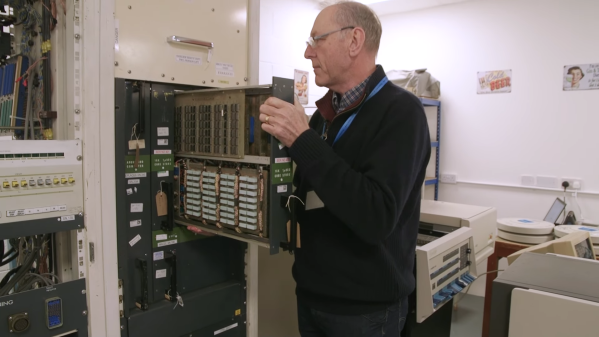
A man removing a module from a 1960s computer

Ancient Nuclear Plant Computer Finds New Home In Bletchley Museum

Although technology keeps advancing every year, safety-critical systems in factories and power plants typically stay with the technology that was available when they were built, in the spirit of “don’t fix it if it ain’t broke”. When it comes to safety, there are probably few systems more critical than nuclear power plants, and as a result one power station in Dungeness, in the south-east of England, was controlled by the same Ferranti Argus 500 computer from the early 1970s until the reactor was shut down in 2018.

The national Museum of Computing in Bletchley was lucky enough to be allowed to scavenge the old computer from the decommissioned plant, and volunteers at the museum have managed to get it running again in its new home. They describe the process in the video embedded below, and demonstrate a few features of this rather unique piece of 1970s technology.

The computer consists of several large cabinets that house enormous PCBs full of diode-transistor logic (DTL) chips, made by Ferranti itself. It comes with 32 kilo-words, or 96 kilobytes, of magnetic core memory, and was designed to run programs stored on punched tape. However, the paper tape reader was removed at some point in the computer’s life and replaced with a PC-based system that emulates the tape reader’s output through its parallel port. This was probably sometime during the 1990s, judging from the fact that the https://hackaday.com/tag/magnetic-core-memory/PC runs OS/2.

Setting up the computer in its new home was complicated by the fact that hundred of cables had to be disconnected in order to move the system out of the power plant. With the help of decades-old documentation, and the experience of one volunteer who used to be a Ferranti engineer, they eventually got it into a state where it could run programs again.

Ultimately, the Argus 500 will be turned into a live exhibit that will simulate a power station alongside another computer that was rescued from a different nuclear plant. Depending on the availability of some parts that are still missing, this might happen later this year, or perhaps next year. In any case, the museum already has a collection that’s well worth visiting if you’re in the area. The story of how they rescued a neglected IBM 360 also makes for fascinating reading. Continue reading “Ancient Nuclear Plant Computer Finds New Home In Bletchley Museum”

Lithium-Ion Batteries Are Easy To Find

In the first article, I’ve given you an overview of Lithium-Ion batteries and cells as building blocks for our projects, and described how hackers should treat their Lithium-Ion cells. But what if you don’t have any LiIon cells yet? Where do you get LiIon cells for your project?

Taking laptop batteries apart,  whether the regular 18650 or the modern pouch cell-based ones, remains a good avenue – many hackers take this road and the topic is extensively covered by a number of people. However, a 18650 cell might not fit your project size-wise, and thin batteries haven’t quite flooded the market yet. Let’s see what your options are beyond laptops. Continue reading “Lithium-Ion Batteries Are Easy To Find”

An Automated Digitizer For 35mm Slides

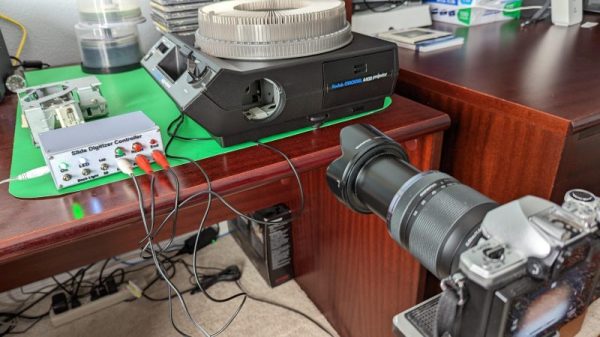
Slides make for great old-timey fun, but it’s awesome to have a digital backup of your old photos, too. An automatic digitizer can make quick work of your collection, and this build from [rbwood53] will do just that.

The digitizizer is based on a Kodak carousel slide projector. It’s fitted with LED strips instead of the original light source, which are used to illuminate the slides themselves. An Arduino Nano is used to command a camera to take photos, via a hacked-up shutter release remote. The camera is set up with a zoom lens and relies on auto-focus to get crisp, clear images of the slides. The Arduino is also charged with telling the carousel system to advance to the next slide as required. It keeps count as the slides go by, so it stops when the entire carousel has been imaged.

Overall, it’s a straightforward build that automatically imaged over 40 boxes of slides for [rbwood53] without issue. If you’ve got a smaller collection to digitize, you might find this simple 3D-printed adapter to be useful, too!

Homebrew LED Strips That Are HomeKit-Compatible

Google, Amazon and Apple are all duking it out for supremacy in the smart home space. As you’ve probably noticed, cheaper smart lights and the like typically don’t offer connectivity with Apple’s HomeKit system. However, if you want some smart lighting that works in that ecosystem without breaking the bank, you can always build your own!

This simple build uses an ESP8266-01S as the brains of the operation. It’s a cut-down board that only has two GPIO pins available, but for this job, that’s enough. It’s paired with a simple relay for switching a single-color LED strip on and off, and an MP2307 buck converter for power. The code loaded onto the ESP8266 is simple, and allows it to connect to Wi-Fi and link up with Apple HomeKit for control.

Let’s say you’re a real fancy-pants, though, and you want RGB-addressable LEDs for your HomeKit setup. No problem, you can do that too! It’s as straightforward as hooking up an ESP8266 to some WS2812B LED strip and flashing the right firmware that emulates an Elgato EVE LED strip. You can even activate special lighting effects on the via the EVE app if you so desire, to take advantage of the fully-addressable nature of the strip.

There are plenty of off-the-shelf solutions in this space, but many of them are quite expensive for what you actually get in the box. Sometimes building your own is more fun, too. Alternatively, if you don’t like Apple’s smart home solutions, you can always try a more open alternative. Video after the break.

Continue reading “Homebrew LED Strips That Are HomeKit-Compatible”

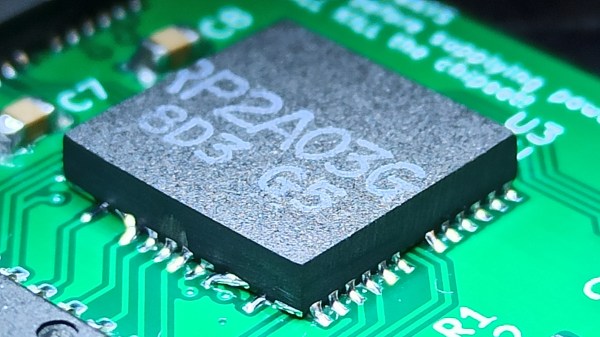
Picture showing the way the cut-down piece of chip is soldered onto the mainboard - looking, indeed, like a QFN package.

Making A Handheld NES By Turning DIP Chips Into…QFN?

You can achieve a lot with a Dremel. For instance, apparently you can slim the original NES down into the hand-held form-factor. Both the CPU and the PPU (Picture Processing Unit) are 40-pin DIP chips, which makes NES minification a bit tricky. [Redherring32] wasn’t one to be stopped by this, however, and turned these DIP chips into QFN-style-mounted dies (Nitter) using little more than a Dremel cutting wheel. Why? To bring his TinyTendo handheld game console project to fruition, of course.

DIP chip contacts go out from the die using a web of metal pins called the leadframe. [Redherring32] cuts into that leadframe and leaves only the useful part of the chip on, with the leadframe pieces remaining as QFN-like contact pads. Then, the chip is mounted onto a tailored footprint on the TinyTendo PCB, connected to all the other components that are, thankfully, possible to acquire in SMD form nowadays.

This trick works consistently, and we’re no doubt going to see the TinyTendo being released as a standalone project soon. Just a year ago, we saw [Redherring32] cut into these chips, and wondered what the purpose could’ve been. Now, we know: it’s a logical continuation of his OpenTendo project, a mainboard reverse-engineering and redesign of the original NES, an effort no doubt appreciated by many a NES enthusiast out there. Usually, people don’t cut the actual chips down to a small size – instead, they cut into the mainboards in a practice called ‘trimming’, and this practice has brought us many miniature original-hardware-based game console builds over these years.

Continue reading “Making A Handheld NES By Turning DIP Chips Into…QFN?”

In A Way, 3D Scanning Is Over A Century Old

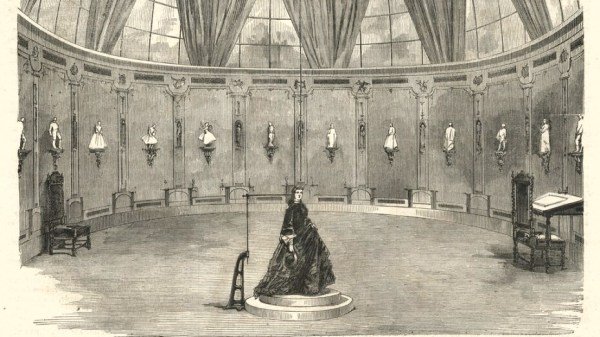
In France during the mid-to-late 1800s, one could go into François Willème’s studio, sit for a photo session consisting of 24 cameras arranged in a circle around the subject, and in a matter of days obtain a photosculpture. A photosculpture was essentially a sculpture representing, with a high degree of exactitude, the photographed subject. The kicker was that it was both much faster and far cheaper than traditional sculpting, and the process was remarkably similar in principle to 3D scanning. Not bad for well over a century ago.

This article takes a look at François’ method for using the technology and materials of the time to create 3D reproductions of photographed subjects. The article draws a connection between photosculpture and 3D printing, but we think the commonality with 3D scanning is much clearer.

Continue reading “In A Way, 3D Scanning Is Over A Century Old”