Fixing A Multimeter’s Serial Interface

[Shane] bought a multimeter with the idea of using its serial output as a source for data logging. A multimeter with a serial port is a blessing, but it’s still RS-232 with bipolar voltage levels. Some modifications to the meter were required to get it working with a microcontroller, and a few bits of Python needed to be written, but [Shane] is getting useful data out of his meter.

The meter in question is a Tenma 72-7735, a lower end model that still somehow has an opto-isolated serial output. Converting the bipolar logic to TTL logic was as easy as desoldering the photodiode from the circuit and tapping the serial data out from that.

With normal logic levels, the only thing left to do was to figure out how to read the data the meter was sending. It’s a poorly documented system, but [Shane] was able to find some documentation for this meter. Having a meter output something sane, like the freaking numbers displayed on the meter would be far too simple for the designers of this tool. Instead, the serial port outputs the segments of the LCD displayed. It’s all described in a hard to read table, but [Shane] was able to whip up a little bit of Python to parse the serial stream.

It’s only a work in progress – [Shane] plans to do data logging with a microcontroller some time in the future, but at least now he has a complete understanding on how this meter works. He can read the data straight off the screen, and all the code to have a tiny micro parse this data.
MicroDMA And LEDs

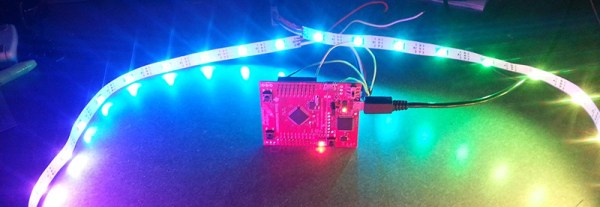
[Jordan] has been playing around with WS2812b RGB LED strips with TI’s Tiva and Stellaris Launchpads. He’s been using the SPI lines to drive data to the LED strip, but this method means the processor is spending a lot of time grabbing data from a memory location and shuffling it out the SPI output register. It’s a great opportunity to learn about the μDMA available on these chips, and to write a library that uses DMA to control larger numbers of LEDs than a SPI peripheral could handle with a naive bit of code.

DMA is a powerful tool – instead of wasting processor cycles on moving bits back and forth between memory and a peripheral, the DMA controller does the same thing all by its lonesome, freeing up the CPU to do real work. TI’s Tiva C series and Stellaris LaunchPads have a μDMA controller with 32 channels, each of which has four unique hardware peripherals it can interact with or used for DMA transfer.

[Jordan] wrote a simple library that can be used to control a chain of WS2812b LEDs using the SPI peripheral. It’s much faster than transferring bits to the SPI peripheral with the CPU, and updating the frames for the LED strip are easier; new frames of a LED animation can be called from the main loop, or the DMA can just start again, without wasting precious CPU cycles updating some LEDs.

Generating Laser Cut Boxes In C

[Mike] is a laser cutting newbie and has never had the opportunity to create a file and send it off to a laser for cutting. He knew he didn’t want to squint at a CAD package, nudging lines by tenths of a millimeter, only to screw something up and have to do it all over again. His solution, like so many other automation tasks, was to create a program that would generate a box of any size in .SVG format.

[Mike]’s program runs in C, and only requires a few variables set in the program to create a box of any size. There’s no argc or argv for the program – the one thing that would turn this into a command line utility that simply creates SVG boxes. Perhaps another time.

The rest of [Mike]’s hackerspace, Fab Lab xChc, was impressed the program worked the first time. With this small bit of C code, [Mike] has an easy, simple tool to generate laser cut boxes. The only remotely complicated bit of C this program uses is printf(), so even an Arduino can spit out the SVG for a laser cut box.

Flash Memory Endurance Testing

[Gene] has a project that writes a lot of settings to a PIC microcontroller’s Flash memory. Flash has limited read/erase cycles, and although the obvious problem can be mitigated with error correction codes, it’s a good idea to figure out how Flash fails before picking a certain ECC. This now became a problem of banging on PICs until they puked, and mapping out the failure pattern of the Flash memory in these chips.

The chip on the chopping block for this experiment was a PIC32MX150, with 128K of NOR Flash and 3K of extra Flash for a bootloader. There’s hardware support for erasing all the Flash, erasing one page, programming one row, and programming one word. Because [Gene] expected one bit to work after it had failed and vice versa, the testing protocol used RAM buffers to compare the last state and new state for each bit tested in the Flash. 2K of RAM was tested at a time, with a total of 16K of Flash testable. The code basically cycles through a loop that erases all the pages (should set all bits to ‘1’), read the pages to check if all bits were ‘1’, writes ‘0’ to all pages, and reads pages to check if all bits were ‘0’. The output of the test was a 4.6 GB text file that looked something like this:
Continue reading “Flash Memory Endurance Testing”

Cutting Glass With CNC

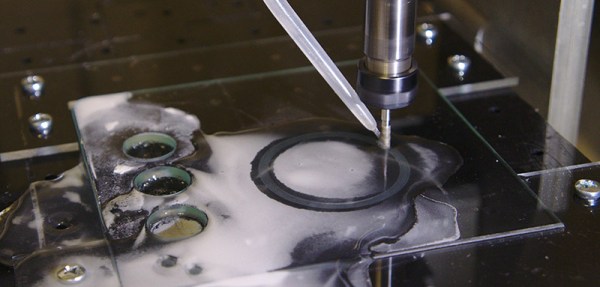
Breaking a pane of glass in half is easy – just score it, break it, and after practicing a few times, you’ll eventually get it right. What about cuts that are impossible with a normal glass cutter, like radiused corners and holes? For that, you’ll need CNC. Yes, you can cut glass on a CNC machine. All you need is a diamond burr or glass drilling bit, high speeds, low feeds, and lots and lots of coolant.

Cutting glass on a CNC machine doesn’t require any spectacularly specialist equipment. [Peter] is using an $800 Chinese mini CNC engraver for this project, but that’s not the only tool that was required. A fixture for holding a glass plate was also needed, but [Peter] quickly fabricated one out of acrylic.

Cutting glass with a CNC is something we’ve seen before. [Ben Krasnow] has been using diamond burrs, high speeds, low feeds, and lots of coolant to cut mirrors so expensive you don’t even want to guess.

While [Peter] isn’t getting the perfect finish [Ben] got a few years ago, he’s still milling holes and slots in glass. He’s wondering if it could be possible to mill an aspheric lens using this technique and a special spherical burr, something that would be very interesting to see, and could be a pretty good way to rough out telescope blanks.

Serial Camera, Courtesy Of The STM32F4

Look around for a small, embedded camera module, and you’ll find your options are rather limited. You have the serial JPEG cameras, but they’re rather expensive and only have VGA resolution. A Raspi, webcam, and power supply is a false economy. GoPros are great, but you’re still looking at some Benjamins used.

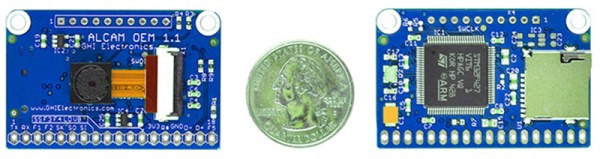
The guys at GHI Electronics are taking a different tack. They’re using image sensors you would normally find in cellphones and webcams, adding a powerful ARM processor, and are still able to sell it for about $50. It’s called the ALCAM, and they’ve stumbled upon a need that hasn’t been met by any manufacturer until now.

On board the ALCAM is an OV3640 3-Megapixel image sensor. On the back of the board is a STM32F4 and a microSD card slot. The board can be set up for time-lapse videos, stop motion animation, or all the usual serial board camera functions, including getting images over a serial connection.

The ALCAM operates either connected to a PC though a 3.3V serial adapter cable, through a standalone mode with pins connected to a button or sensor, to the SPI bus on a microcontroller, or a serial to Bluetooth or WiFi bridge. Images can be saved to the uSD card, or sent down the serial stream.

It’s a pretty cool board, and if you’re thinking it looks familiar, you’re right: there’s a similar DSI camera/STM32F4 board that was an entry to The Hackaday Prize. Either way, just what we need to get better cameras cheaper into projects.

Fixing An NES For Good

Sometime in the late 80s, the vast collective consciousness of 8-year-olds discovered a Nintendo Entertainment System could be fixed merely by blowing on the cartridge connector. No one knows how this was independently discovered, no one knows the original discoverer, but one fact remains true: dirty pins probably weren’t the problem.

The problem with a NES that just won’t read a cartridge is the ZIF socket inside the console. Pins get bent, and that spring-loaded, VCR-like front loader assembly is the main point of failure of these consoles, even 30 years later. You can get replacement ZIF sockets for a few bucks, and replace the old one using only a screwdriver, but this only delays the inevitable. That ZIF socket will fail again a few years down the line. Finally, there is a solution.

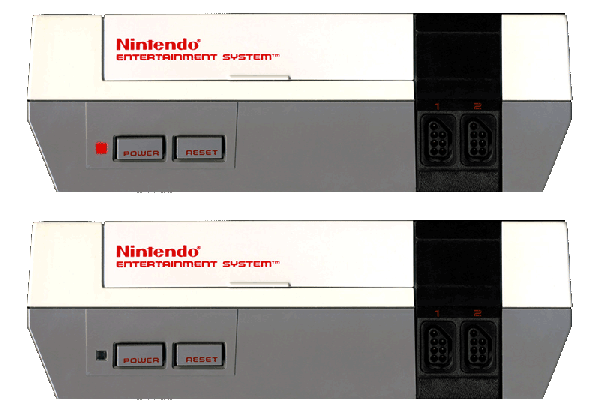
The Blinking Light Win, as this project is called, replaces the ZIF connector with two card-edge slots. One slot connects to the NES main board, the other to the cartridge connector. There’s a plastic adapter that replaces the spring-loaded push down mechanism created for the original ZIF connector, and installation is exactly as easy as installing a reproduction NES ZIF connector.

If you’re wondering why consoles like the SNES, Genesis, and even the top-loader NES never had problems that required blowing into the cartridge connector, it’s because the mere insertion of the cartridge into the slot performed a scrubbing action against the pins. Since the ZIF socket in the O.G. NES didn’t have this, it was prone to failure. Replacing the ZIF with a true card-edge slot does away with all the problems of dirty contacts, and now turns the NES into something that’s at least as reliable as other cartridge-based consoles.