Getting freshwater supplied across cities and towns in a reliable and safe way is no simple task. Not only is a natural freshwater reservoir or other supply needed, but making sure the water is safe to drink and then shipping it out over a dense network of pumps and pipes can cost a surprising amount of time and money. It also hinges on a reliable power grid, which is something Texas resident [Suburban Biology] doesn’t have. But since fresh water literally falls out of the sky for free, he decided to take this matter into his own hands.
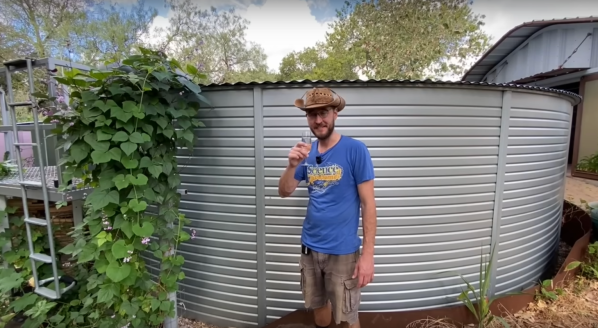
The main strategy with a system like this is to keep the rainwater as clean as possible before storage so that expensive treatment systems are less necessary. That means no asphalt shingles, a way to divert the first bit of rain that washes dust and other contaminants off the roof away, and a safe tank. This install uses a 30,000 gallon tank placed above ground for storage, but that’s not the only thing that goes into a big rainwater catchment system like this. A system of PVC pipes are needed both for sending rainwater from the roofs of the buildings into the tank and for pumping it into the home for use. With all of that in place it’s both a hedge against climate change, unstable electric grids, and even separates the user from the local aquifer which may or may not have its own major issues depending on where you live.
While Texas legally protects the rights of citizens to collect and store rainwater, the same isn’t true for all areas. For example, Colorado only just passed a law allowing the collection and storage of a meager 110 gallons of rainwater and forbade it entirely beforehand. There are some other considerations for a project like this too, largely that above-ground systems generally won’t work in cold climates. On the other hand, large systems like these are really only needed where rainfall is infrequent; in more tropical areas like south Florida a much smaller storage system can be used