Fully autonomous vehicles seem to perennially be just a few years away, sort of like the automotive equivalent of fusion power. But just because robotic vehicles haven’t made much progress on our roadways doesn’t mean we can’t play with the technology at the hobbyist level. You can embark on your own experimentation right now with this open source self-driving Python library.
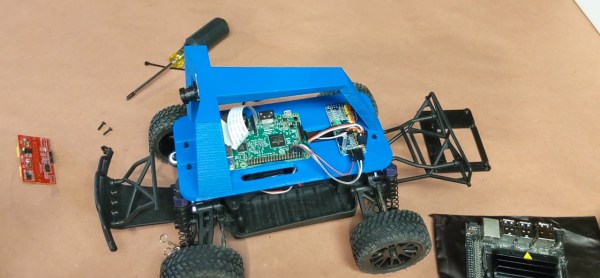
Granted, this is a library built for much smaller vehicles, but it’s still quite full-featured. Known as Donkey Car, it’s mostly intended for what would otherwise be remote-controlled cars or robotics platforms. The library is built to be as minimalist as possible with modularity as a design principle, and includes the ability to self-drive with computer vision using machine-learning algorithms. It is capable of logging sensor data and interfacing with various controllers as well, either physical devices or through something like a browser.
To build a complete platform costs around $250 in parts, but most things needed for a Donkey Car compatible build are easily sourced and it won’t be too long before your own RC vehicle has more “full self-driving” capabilities than a Tesla, and potentially less risk of having a major security vulnerability as well.