Finding Noise With An Antenna

[K5ACL], aka [SignalSearch], recently brought his active receive loop antenna in off the roof to give it a checkup and perform any necessary maintenance. While it was in the shack, he took the opportunity to discuss how well it would perform indoors. The verdict? Not ideal. He’d mount it 50 feet away from the house if the HOA would let him.

Houses, and subsequently most ham shacks, are filled with noise sources that interfere badly with HF. So after spending a minute or so listening on an SDR, [K5ACL] demonstrates another use for this type of tightly-tuned antenna—as a noise detector.

The main culprit in [K5ACL]’s house is the ceiling light that’s right there in the shack. You can see the noise striping the waterfall as he turns it on and off. But the noise from the light is small potatoes compared to some other common household items, like those power line adapters that turn house wiring into networking cable. Those produce so much noise that even an active loop is really no match. Stay tuned after the break to watch [K5ACL] work the bands through the noise.

Loop antennas are great if you’re stuck in an apartment building or a congested city. They’re easy enough to make, whether you want a portable loop or a permanent installation.
Continue reading “Finding Noise With An Antenna” →

Pinging The Depths Of A Rain Barrel

Rain barrels are a great way to go green, as long as your neighborhood doesn’t frown upon them. [NikonUser]’s barrel sits up high enough that he has to climb up on an old BBQ and half-dangle from the pipe to check the water level, all the while at the risk of encountering Australian spiders.

Arachnophobia, it turns out, is a great motivator. At first, [NikonUser] dreamed up a solar-powered IoT doodad that would check the level and report the result on a web page. He battled the Feature Creep and decided to build a handheld device that pings the water level with an ultrasonic sensor and displays it on a 7-segment.

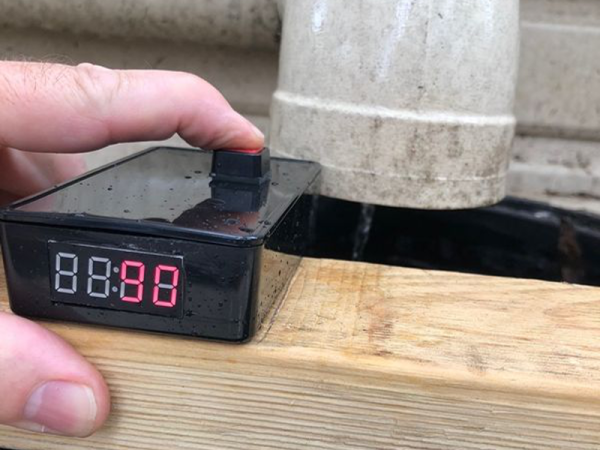
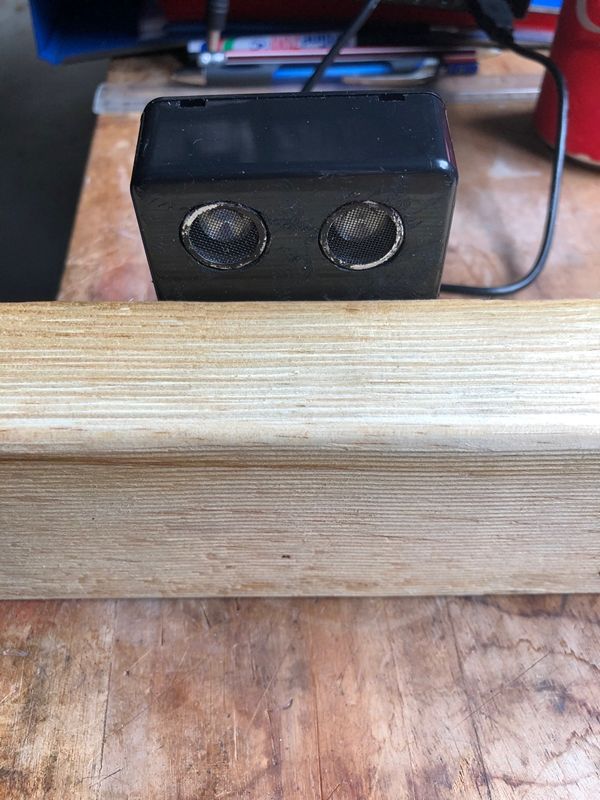
Everything is contained in a water-resistant box and driven by an Arduino Pro. The box is mounted on a piece of scrap lumber that lays across the top of the barrel. This allows the HC-SR04’s eyes to peer over the edge and send pings toward the bottom. It also helps to keep the readings consistent and the electronics from taking a swim.

Operation is simple: [NikonUser] reaches up, sets the plank across the barrel, and pushes the momentary. This activates the Arduino, which prompts the HC-SR04 to take several readings. The code averages these readings, does a little math, and displays the percentage of water remaining in the barrel.

Interested in harvesting rain water, but not sure what to do with it? You can use it for laundry, pour it in the toilet tank instead of flushing, or make an automated watering system for your garden.

Mechanisms: The Reed Switch

Just about everywhere you go, there’s a reed switch nearby that’s quietly going about its work. Reed switches are so ubiquitous that you’re probably never more than a few feet away from one at any given time, especially at home or in the car. You might have them on your doors and windows as part of a burglar alarm system. They keep your washing machine from running when the lid is open, and they put your laptop to sleep when you close the lid. They know if the car has enough brake fluid and whether or not your seat belt is fastened.

Reed switches are interesting devices with a ton of domestic and industrial applications. We call them switches, but they’re also sensors. In fact, they only do the work of a switch while they can sense a magnetic field. They are capable of switching AC or DC at low and high voltages, but they don’t need electricity to work. Since they’re sealed in glass, they are impervious to dirt, dust, corrosion, temperature swings, and explosive environments. They’re cheap, they’re durable, and in low-current applications they can last for about a billion actuations.

Continue reading “Mechanisms: The Reed Switch” →

Repairs You Can Print Contest: Meet The Winners

Six weeks ago, we asked you to show us your best 3D printed repairs for a chance to win $100 in Tindie credit and other prizes. You answered the call with fixes for everything from the stuff everyone has, like zippers and remotes, to the more obscure stuff, like amazing microscopes scavenged from dumpsters.

It was hard to whittle down the entries we received into the top 20 because you came up with so many awesome fixes. A few of them had us thinking hard about the definition of repair, but are brilliant in their own way.

So without further ado, we are pleased to announce the winners of our Repairs You Can Print contest. We also want to give honorable mention to those projects that wowed us with ingenuity.

Continue reading “Repairs You Can Print Contest: Meet The Winners” →

PipeCam: Shallow-Water Exploration With Raspberry Pi

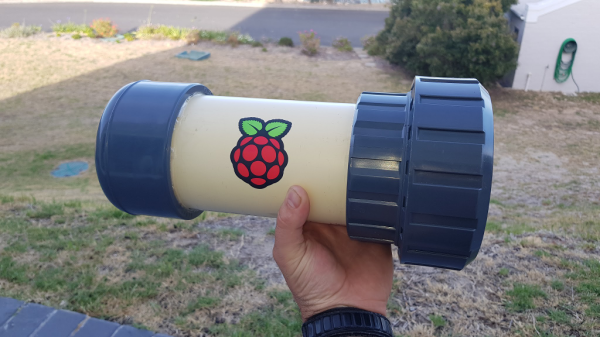
In what began as a personal challenge he issued to himself, [Fred] is in the process of building an underwater camera that’s capable of long-term photography in shallow waters. He’d like it to last about five hours on a charge while taking a photo every five minutes. Ideally, it will be as cheap as possible and constructed from readily available parts. Solving the cheap/available equation would theoretically make the camera easily to replicate, which is the third major requirement.

[Fred] has recently made great strides, both in the circuitry and the capsule design. The latest version uses a Raspberry Pi 3 with a V2 camera module and runs on a 12 V, 2.4 Ah rechargeable lead-acid battery. Everything is mounted on a piece of hardboard that slides into a 110mm piece of PVC. At one end, the camera looks out through a 10mm  acrylic lens fixed into a heavy-duty PVC fitting, and a DS1307 RTC provides a handy clock for shooting time lapses. With a friend’s help, he pressure-tested the housing and found that it can withstand 4 bar without leaking. He is still doing dry tests and trying hard to resist the urge to throw it in the water.

PipeCam is a work in progress, and [Fred] has many ideas for improvements. He’d like to add an Arduino to govern the battery use and provide its vital signs back to the Pi, and add an LDR to decide whether there’s enough light to warrant turning the Pi on to take pictures.

PVC is great for custom capsule building. But if you want to get started with underwater photography a little faster and want to build something instead of just buying a GoPro, try sealing your camera in something that’s already watertight.

Definitive Dog Feeding With Arduino

Some dogs have no sense of self-preservation. Given the opportunity, they will eat until they’re sick. It’s up to us humans to both feed them and remember doing it so they aren’t accidentally overfed. In a busy household with young children, the tricky part is the remembering.

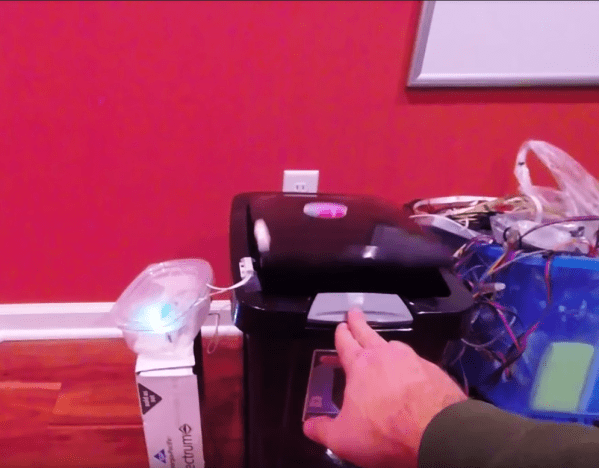
[Bryan]’s family feeds their dog Chloe once a day, in the mornings. She was a rescue who spent a few years scrounging for meals on the street, so some part of her is always interested in finding food, even if she just ate. Each morning, the flurry of activity throughout the house is compounded by Chloe’s repeated requests for food, so [Bryan] got his kids involved and built a simple circuit that lets everyone know—at a glance—whether Chloe was fed.

Chloe’s kibble is kept in a touch-top wastebasket that flips open at the press of a button. [Bryan]’s dog-fed detector uses a reed switch and an Arduino clone to detect when the lid is opened. When the reed switch goes, low, the Arduino lights up an LED. The light stays on for two hours and then shuts off automatically to get ready for the next day. You don’t have to beg for a demo video, because it’s waiting for you after the break.

Since Chloe devours a bowl of food in about two minutes flat, maybe the next project for [Bryan]’s family could teach her to slow down a bit.

Continue reading “Definitive Dog Feeding With Arduino” →

DIY Peristaltic Pump Keeps The Booze Flowing

A few months ago we showed you a bar bot built by [GreatScott] that uses peristaltic pumps to food-safely move the various spirits and mixers around behind the curtain. The bar bot uses three of them, and at $30 each for pumps with decent flow rate, they added a lot to the parts bill. These pumps are pretty much the ideal choice for a bar bot, so what do you do? [GreatScott] decided to see if it was worth it to make them instead.

Peristaltic pumps are simple devices that pump liquids without touching them. A motor turns a set of rollers that push a flexible tube against a wall. As the motor turns, the rollers move liquid through the tube by squeezing it flat from the outside in turns. Typically, the more you pay for an off-the-shelf peristaltic, the higher the flow rate.

[GreatScott] figured it was cheaper to buy the motor and the control circuitry. He chose a NEMA-17 for their reputation and ubiquity and a DRV8825 controller to go with it. The pump is driven by an Arduino Nano and a pot controls the RPM. After trying to design the mechanical assembly from scratch, he found [Ralf]’s pump model on Thingiverse and modified it to fit a NEMA-17.

The verdict? DIY all the way, assuming you can print the parts. [GreatScott] was trying to beat the purchased pumps’ flow rate of 100mL/minute and ended up with 200mL/minute from his DIY pump. Squeeze past the break for the build video and demonstration.

Is there a bar bot build on your list? No? Is it because you’re more of a single-malt scotch guy? Build a peristaltic pachyderm to pour your potion.

Continue reading “DIY Peristaltic Pump Keeps The Booze Flowing” →