Life On Contract: How To Have A Meeting

Meetings can actually be useful. It’s hard to believe, but they can actually save time if done right. While most of us are in a perpetual state of torture by Kevin in marketing holding another three-hour meeting during lunch hours, there are a few of us who know their hidden power when put in the right hands.

Working as a contractor, wasted meetings mean wasted billable hours. Even wasted meeting time is covered in the cost of the contract it runs the risk of giving the client the impression that you’re not as productive as originally thought. Organized, productive meetings show that you know what you’re doing and that the cost of your services as a whole is a good value. Yeah, some meetings suck but they are necessary and should be productive.

A meeting needs three things to be worth the time spent on it.

  1. A well prepared for, simple, and clear agenda.
  2. A time limit.
  3. Something needs to be written down at the end of it.

I’ll start with the third item as it shapes the rest. The point of a meeting is to have something to write down at the end of the meeting. Any meeting that ends up in anything requiring fallible human memory was a waste of everyone’s time. This includes, verbal agreements, handshake agreements, ideating (pronounced idioting), brainstorming, think tanking, and the like.


Continue reading “Life On Contract: How To Have A Meeting”

Reverse Engineering The Sony PocketStation

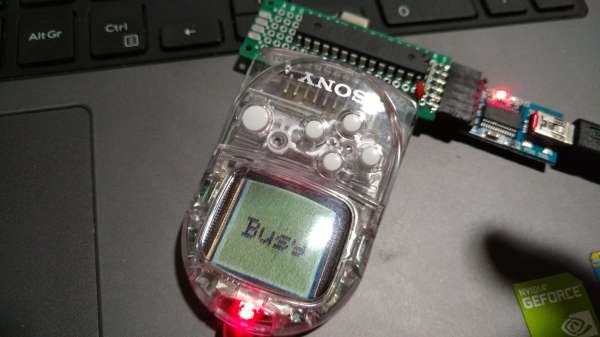
[Robson Couto] never actually owned a PlayStation in his youth, but that doesn’t mean he can’t have a later in life renaissance. In particular a Japan-only accessory called the PocketStation caught his interest.

The item in question resided in the PlayStation’s memory card slot. It’s purpose was to add additional functionality to games and hopefully sell itself. Like the PokeWalker, Kinect, etc. It’s an age old tactic but the PocketStation had some interesting stuff going on (translated).

The biggest was its processor. Despite having a pathetic 32×32 mono screen, it hosted the same processor as the GameBoy Advance. Having acquired a card from an internet auction house [Robson] wanted to load up some of the ROMs for this device and see what it was like.

It took quite a bit of work. Luckily there is a ton of documentation floating around the internet thanks to the emulation scene and it wasn’t long before he convinced a microcontroller to pretend to be the memory card slot. Now anyone with some skill and a small piece of gaming history can play around with the rare ROM dump for the PocketStation.

Hackaday Prize Entry: Making A Book Reader That Can Survive Kindergarten

[atomicthomas] is a dedicated teacher. One only has to look at the work he’s been putting into book readers for for the past sixteen years. With hardware like the Pi Zero threatening cheap computers just over the supply chain horizon, he’s begun to set his sights higher.

It all started with headphones and audio tapes. For all of us who got to use tapes and school headphones, we know the flaws with this plan. Nothing lasted the sticky and violent hands of children for long. When video recordings of book became available, DVD players suffered similar fates.

So, he began to rip his tapes and DVDs to his computer. However, the mouse has a warning about small parts on it for a reason, and didn’t last long either. So, he built a computer with arcade buttons and a Raspberry Pi. This one ran a heavily simplified version of a media manager and worked well. Even the special needs children had no problem navigating. A second exploration with an iMac and a Nintendo controller worked even better. Apparently all five year olds instinctively understand how to use a Nintendo controller.

Using the user test data, in his most recent iteration he’s working on a sub-twenty-dollar reading computer in a Nintendo controller. It’s not the most technically in depth hack we’ve ever covered, but it certainly ranks up there for harsh environments.

The Art Of Making A Nixie Tube

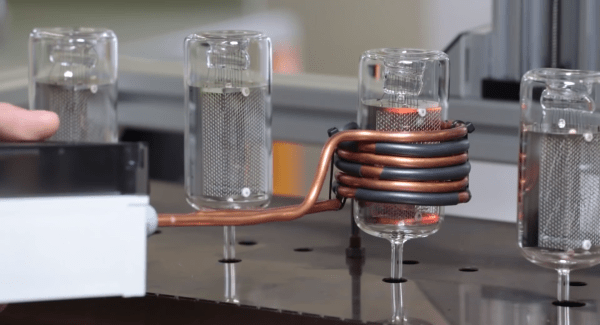
Three years ago we covered [Dalibor Farnby]’s adventures in making his own Nixie tubes. Back then it was just a hobby, a kind of exploration into the past. He didn’t stop, and it soon became his primary occupation. In this video he shows the striking process of making one of his Nixie tubes.

Each of his tubes get an astounding amount of love and attention. An evolution of the process he has been working on for five years now. The video starts with the cleaning process for the newly etched metal parts. Each one is washed and dried before being taken for storage inside a clean hood. The metal parts are carefully hand bent. Little ceramic pins are carefully glued and bonded. These are used to hold the numbers apart from each other. The assembly is spot welded together.

In a separate cut work begins on the glass. The first part to make is the bottom which holds the wire leads. These are joined and then annealed. Inspection is performed on a polariscope and a leak detector before they are set aside for assembly. Back to the workbench the leads are spot welded to the frame holding the numbers.

It continues with amazing attention to detail. So much effort goes into each step. In the end a very beautiful nixie tube sits on a test rack, working through enough cycles to be certified ready for sale. The numbers crisp, clear, and beautiful. Great work keeping this loved part of history alive in the modern age.

Continue reading “The Art Of Making A Nixie Tube”

How To Have An Above Average Time With A Cheap Horizontal Bandsaw

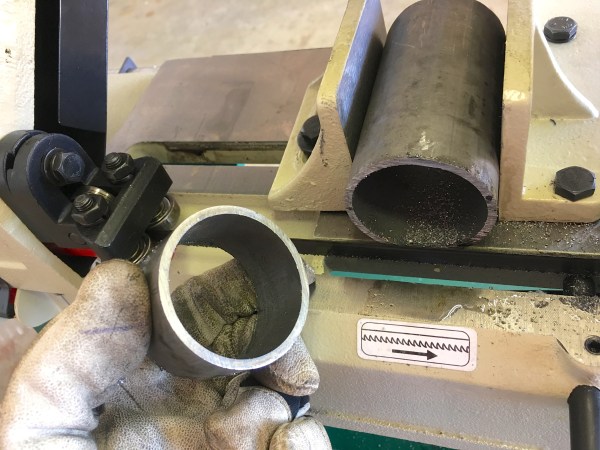
[Quinn Dunki] has brought yet another wayward import tool into her garage. This one, all covered in cosmoline and radiating formaldehyde fumes, is a horizontal bandsaw.

Now, many of us have all have some experience with this particular model of horizontal saw. It waits for us at our work’s machine shop, daring us to rely on it during crunch time. It lingers in the corner of our hackerspace’s metalworking area, permanently stuck in the vertical position; at least until someone finally removes that stripped screw. Either that or it’s been cannibalized for its motor, the castings moldering in a corner of the boneyard.

This article follows on the heels of [Quinn]’s other work, a treatise on the calibration of a drill press, and it outlines all the steps one has to take to bring one of these misunderstood tools into consistent and reliable operation. It starts with cultivating a healthy distrust of the factory’s assurances that this device is, “calibrated,” and needs, “no further attention.” It is not, and it does. Guides have to be percussively maintained out of the blade’s way. Screws have to be loosened and adjusted. It takes some effort to get the machine running right and compromises will have to be made.

In the end though, with a high quality blade on, the machine performs quite well. Producing clean and quality cuts in a variety of materials. A welcome addition to the shop.

Portable Lightweight Foundry

[Makercise] is getting ready for Maker Faire. One of the things he’d really like to do is some casting demonstrations. However, he has no desire to take his expensive and heavy electric kiln based foundry to Maker Faire. So, he made his own.

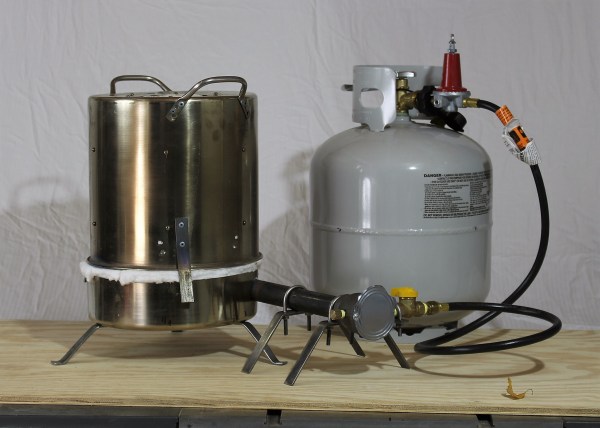
He got into metal casting during his excellent work on his Gingery lathe series. He started off by modeling his plan in Fusion 360. He’d use a 16qt cook pot turned upside down as the body for his foundry. The top would be lined with ceramic fiber insulation and the lid made out of foundry cement. He uses a Reil style burner, which he also modeled as an exercise. This design is light and even better, allows him to lift the top of foundry off, leaving the crucible completely exposed for easy removal.

All went well with the first iteration. He moved the handles from the top to the bottom of the pot and filled it with insulation. He built legs for the lid and made a nice refractory cement bowl on the bottom. However, when he fired it up the bowl completely cracked along with his crucible. The bowl from design flaw, the crucible from age.

A bit put off, but determined to continue, he moved forward in a different direction. The ceramic insulation was doing so well for the top of the foundry that he decided to get rid of the cement altogether and line the bottom with it as well. The lid, however, would be pretty bad for this, so he purchased another pot and cut the top portion of it off, giving him a steel bowl that matched the top.

The foundry fires up and has worked well through multiple pours. He made some interesting objects to hopefully sell at Makerfaire and to test the demonstrations he has planned. The final foundry weighs in at a mere 15lbs not including the fuel cylinder, which is pretty dang light. Video after the break.

Continue reading “Portable Lightweight Foundry”

Making An Espresso Pot In The Machine Shop

[This Old Tony] was cleaning up his metal shop after his yearly flirtation with woodworking when he found himself hankering for a nice coffee. He was, however, completely without a coffee making apparatus. We imagine there was a hasty round of consulting with his inanimate friends [Optimus Prime] and [Stefan Gotteswinter Brush] before he decided the only logical option was to make his own.

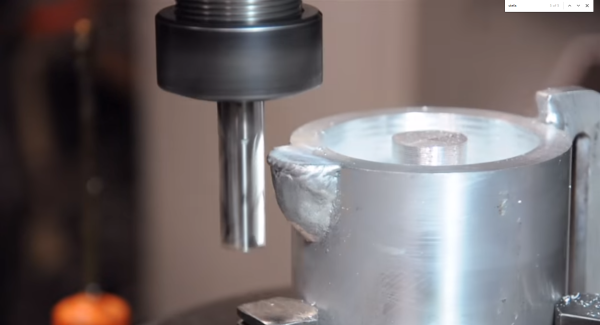
So, he brought out two chunks of aluminum from somewhere in his shop, modeled up his plan in SolidWorks, and got to work.  It was designed to be a moka style espresso pot sized around both the size of stock he had, and three purchased parts: the gasket, funnel, and filter. The base and top were cut on a combination of lathe and mill. He had some good tips on working with deep thin walled parts. He also used his CNC to cut out some parts, like the lid and handle. The spout was interesting, as it was made by building up a glob of metal using a welder and then shaped afterward.

As usual the video is of [This Old Tony]’s exceptional quality. After quite a lot of work he rinsed out most of the metal chips and WD40, packed it with coffee, and put it on the stove. Success! It wasn’t long before the black stuff was bubbling into the top chamber ready for consumption.