In VR, a blink can be a window of opportunity to improve the user’s experience. We’ll explain how in a moment, but blinks are tough to capitalize on because they are unpredictable and don’t last very long. That’s why researchers spent time figuring out how to induce eye blinks on demand in VR (video) and the details are available in a full PDF report. Turns out there are some novel, VR-based ways to reliably induce blinks. If an application can induce them, it makes it easier to use them to fudge details in helpful ways.
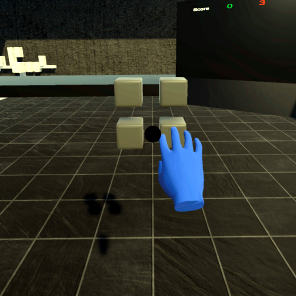 It turns out that humans experience a form of change blindness during blinks, and this can be used to sneak small changes into a scene in useful ways. Two examples are hand redirection (HR), and redirected walking (RDW). Both are ways to subtly break the implicit one-to-one mapping of physical and virtual motions. Redirected walking can nudge a user to stay inside a physical boundary without realizing it, leading the user to feel the area is larger than it actually is. Hand redirection can be used to improve haptics and ergonomics. For example, VR experiences that use physical controls (like a steering wheel in a driving simulator, or maybe a starship simulator project like this one) rely on physical and virtual controls overlapping each other perfectly. Hand redirection can improve the process by covering up mismatches in a way that is imperceptible to the user.
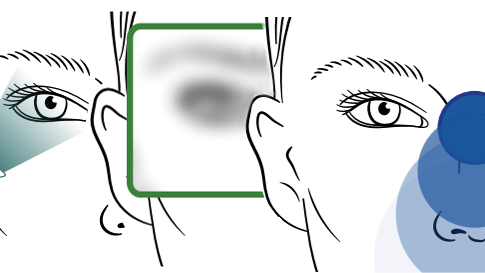
There are several known ways to induce a blink reflex, but it turns out that one novel method is particularly suited to implementing in VR: triggering the menace reflex by simulating a fast-approaching object. In VR, a small shadow appears in the field of view and rapidly seems to approach one’s eyes. This very brief event is hardly noticeable, yet reliably triggers a blink. There are other approaches as well such as flashes, sudden noise, or simulating the gradual blurring of vision, but to be useful a method must be unobtrusive and reliable.
We’ve already seen saccadic movement of the eyes used to implement redirected walking, but it turns out that leveraging eye blinks allows for even larger adjustments and changes to go unnoticed by the user. Who knew blinks could be so useful to exploit?
Continue reading “Blinks Are Useful In VR, But Triggering Blinks Is Tricky”