Featured Image

Go Go Camera Slider

Are your arms getting tired from pushing your camera back and forth across your camera slider? That must be the case with [Max Maker], which led him to convert his manual slider into a motorized one.

The electronics are minimal — an Arduino Micro, a few toggle switches, A4988 Stepper Driver, 12V battery pack, and the ever popular NEMA 17 stepper motor. If you’re wondering why we said ‘switches’ instead of ‘switch’, it’s because 4 of the switches are used to select a time frame. The time frame being how long it takes for the slider to move from one end to the other.

Fabrication shown off in the video below will net you a few new tricks. Our favorite is how he makes a template for the NEMA motor using masking tape. After completely covering the face of the motor with tape, he clearly marks the mounting holes and colors in the shape of the motor plate as if he were doing frottage. Then just pull the tape off as one and stick it onto the slider rack.

Not including the cost of the slider itself, the parts list came out to be around $75. Even if you don’t yet own a slider, this a great first adventure into building a CNC machine. It is one degree of freedom and the hard parts have already been taken care of by the manufacturer of the slider. Get used to using belts and programming for stepper motors and you’ll be whipping up your own 3D printer with a fancy belt scheme for the Z-axis.

Continue reading “Go Go Camera Slider”

Featured Image

A Cold Press Juicer For The Price Of A Few Trips To Jamba Juice

Do you enjoy drinking juice but hate the cleanup after making it? Yeah, we do too. So does [Max Maker], which led to the design and birth of the $40 cold-press juicer. If you’ve been thinking about buying a juicer but the cost has been keeping you from pulling the trigger, you should definitely check it out. This build will save you some serious cash and looks relatively simple to replicate.

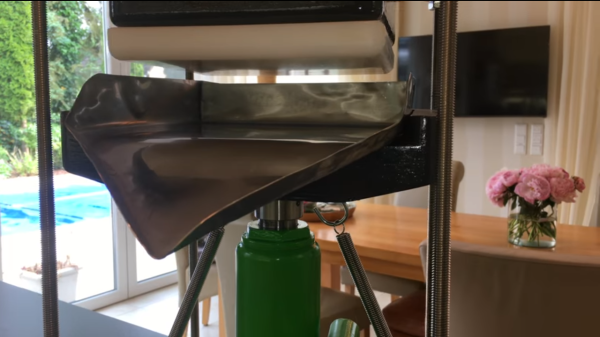
[Max] designed this juice press while keeping us common folk in mind who don’t have expensive tools in our humble garage or workshop. For example, to make the tray, we are shown how to perform the initial bends in the sheet of stainless steel using only some plywood and clamps. Then we’re shown how to bend the corners, and finally the ‘funnel’ part of the tray with just a few more basic tools – a bench vise, hammer, and pliers. No metal brake required!

The press is easy to use – wrap your fruit or vegetables in some cheesecloth, put it on the tray, and pump the handle of the jack. Clean-up (which has been a notorious pain-in-the-rear when it comes to commercial juicers) is quick and simple too – just rinse the tray!

Build video after the break.

Continue reading “A Cold Press Juicer For The Price Of A Few Trips To Jamba Juice”

Featured Image

Giving A Camera Mount A Little (Magnetic) Attractiveness

It’s probably safe to say that most hackers and makers don’t really want to fuss around with the details of making video documentation of their work. They would rather spend their time and energy on the actual project at hand…you know — the fun stuff.

[Daniel Reetz] has been wanting more mounting options for his camera mount to make it easier and quicker to set up.  One end of his existing camera mount is a clamp. This has been working for [Daniel] so far, but he wanted more options. Realizing that he has plenty of ferrous metal surfaces around his shop, he had an idea — make a magnetic base add-on for his camera mount.

In the video, [Daniel] walks us through the process of creating this magnetic camera mount add-on, starting with the actual base. It is called a switchable magnetic base (or mag-base as he calls it) and looks like a handy little device. This was surely the most expensive part of the build, but looks like it should last a very long time. Basically, it’s a metal box with magnets on the inside and a rotating switch on the outside. When the switch is in one position, the box’s bottom is magnetic. Rotate the switch to the other position, and the bottom is no longer magnetic. These switchable magnetic bases come with a stud on top for attaching other things to it, which it looks like [Daniel] has already done. From there on out though, he explains and shows the rest of the build.

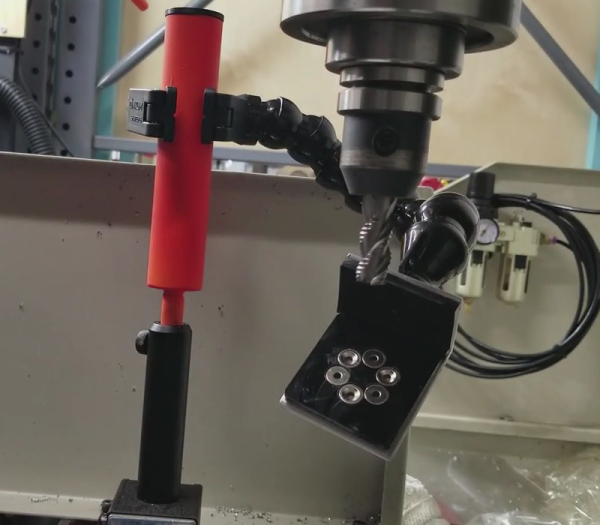
Some mild steel rod was cut and modified to slip into the pipe. The rod is held in place by a set screw which allows for easy adjustment of the mount’s height. Then he welds the rod to a washer which is, in turn, welded to a tube. After the welding, he takes the whole thing to a deburring wheel to clean it up. After that, the final touches are made with some spray paint and a custom 3D printed cap.

Sprinkled throughout the video are some useful tips, one of them being how he strips the zinc off of the washer with acid prior to welding. The reason for this is that you don’t want to weld over zinc because it produces neurotoxins.

Now [Daniel] can attach his camera mount quickly just about anywhere in his shop with the help of his new magnetic base.

There’s no shortage of camera mount hacks that we’ve covered. Here’s another one involving a magnet, but also has an automatic panning feature. Do you need a sliding camera mount? How about a motorized sliding camera mount — enjoy.

Continue reading “Giving A Camera Mount A Little (Magnetic) Attractiveness”

ESP8266 MQTT Remote Gate Entry

Do you live in an area where you (or your car) are locked in by a gate? If so, you may know how [Alexander Else] feels about letting his guests in and out constantly with a remote control — it’s just not convenient. [Alexander] could have just purchased some extra remote controls and passed them out, but they aren’t exactly as cheap as party favors. Not to mention it wouldn’t make sense to hand one out to every single visitor anyway. Because the gate is a community gate, hacking the actual gate system was not an option. There was only one thing he could do — hack the remote control!

Like just about every other hacker, [Alexander] had a spare ESP8266-based board lying around. [Alexander] also had a couple of spare relays which he used to control the two buttons on his designated ‘sacrifice’ remote — one relay per button. After throwing these parts together with a couple of supporting bits of electronics, the hardware was done.  Now [Alexander] can just set up HTTP Request Shortcuts on each trusted visitor’s smartphone. From there on out they can open/close the gates themselves!

Originally, he was using IFTTT to trigger the string of events that make it all happen, but there was a delay of about 8 seconds (from trigger to relay action). [Alexander] was not having this so he turned to the HTTP Request Shortcuts app. When he made this change, the delay disappeared. Continue reading “ESP8266 MQTT Remote Gate Entry”

Featured Image

Ever Hear Of The Ford Cylon?

OK, we haven’t heard of a Ford Cylon either. However, there is now a Mustang Cobra out there that has been given a famous Cylon characteristic. [Monta Elkins] picked himself up an aftermarket third brake light assembly, hacked it, and installed it on said Mustang.

The brake light assembly contains 12 LEDs, which unfortunately, are not individually addressable. Additionally, by the looks of it, the brake light housing was not meant to be opened up. That didn’t get [Monta] down though. There’s more than one way to skin a cat, but he chose to use a hot knife to open the assembly, which worked quite well. A rotary cutter tool was used to cut the traces between the LEDs allowing them to be individually controlled with an Arduino. A Bluetooth module allows him to control the new brake light from his smartphone. There are different modes (including a special mode that he shows off at the end of the video) that can be selected via a Bluetooth Terminal app.

There is no schematic or code link in the video itself or the description, but [Monta] did hit the high points. Therefore, it shouldn’t be too hard to replicate.

This isn’t the first brake light hack we’ve featured. This one goes way beyond just animated lightsThis one requires no programming. Rather wear your brake light? We’ve got your back(pack).

Flamethrower skateboard

Light A Fire Under Your…Skateboard?

Kids, please don’t try this at home. Or at least make sure there’s nothing flammable around.

With that out of the way, we have to ask — who doesn’t love playing with fire? We’re betting that many of you also have enjoyed a little skateboarding at some point in your lives. [mikeasaurus] has married the two beloved activities and made a flame throwing skateboard! The parts count is fairly low, and it looks like everything can be purchased from Amazon if you can’t source all of the items locally.

[mikeasaurus] gives a few useful tips such as how he bent one of the two pipes on the fuel tank cap to prevent fuel from pouring out. Also, he used an adapter to bring down the diameter of the tubes from 1/4″ to 1/8″ which makes for a better performing fuel stream.

Instead of making this little foot cooker more complicated with additional electronics and wires to be operated by a hand-held remote control, [mikeasaurus] decided to build the controls directly into the skateboard with just a couple of foot-activated switches. This keeps his hands free to wave at all of the onlookers watching him speed by. Or better yet, to carry a fire extinguisher.

Admittedly, it appears from the video that the flame doesn’t really get ‘thrown’ too far, and [mikeasaurus] himself says:

“As long as you’re moving forward when the flames are activated, you’re good to go!”

Because of this, you probably don’t want to use your favorite board, as it’s going to be subject to direct flames.

You’ll see this when you watch the video after the break.

Continue reading “Light A Fire Under Your…Skateboard?”

Featured image

Keep The Burglars Away With Some Pi

Ten years ago, we never imagined we would be able to ward off burglars with Pi. However, that is exactly what [Nick] is doing with his Raspberry Pi home security system.

We like how, instead of using a standard siren, [Nick] utilized his existing stereo system to play a custom audio file that he created. (Oh the possibilities!) How many off the shelf alarm systems can you do that with?

The Pi is the brains of the operation, running an open source software program called Home Assistant. If any of the Z-Wave sensors in his house are triggered while the alarm system is armed, the system begins taking several actions. The stereo system is turned on via IR so that the digital alarm audio file can be played. Lights flash on and off. An IP camera takes several snapshots and emails them to [Nick].

Home Assistant didn’t actually have the ability to send images in an email inline at the time that [Nick] was putting together his system. What did [Nick] do about that? He wrote some code to give it that ability, and submitted it through GitHub. That new code was put into a later version of the program. Ah, the beauty of open source software.

Perhaps the most important part of this project is that there were steps taken to help keep the wife-approval factor of the system on the positive side. For example, he configured one of the scripts so that even if the alarm is tripped multiple times in succession, the alarm won’t play over itself repeatedly.

This isn’t [Nick’s] first time being featured here. Check out another project of his which involves a couple of Pi’s communicating with each other via lasers.