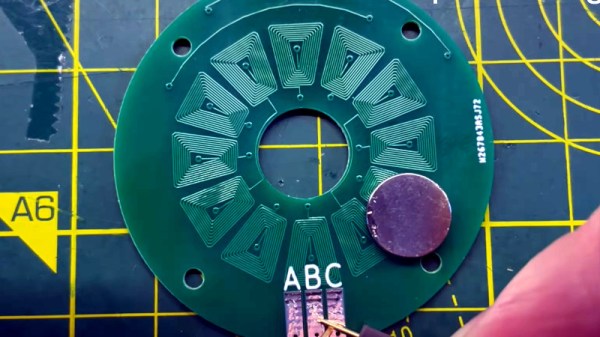
PCB inductors are a subject that has appeared here at Hackaday many times, perhaps most notably in the electromagnetic exploits of [Carl Bugeja]. But there is still much to be learned in the creation of the inductors themselves, and [atomic14] has recently been investigating their automatic creation through scripting.
A simple spiral trace is easy enough to create, but when for example creating a circular array of coils for an electric motor there’s a need for more complex shapes. Drawing a trapezoidal spiral is a surprisingly difficult task for a script, and we’re treated to a variety of algorithms in the path to achieving a usable design.
Having perfected the algorithm, how to bring it into KiCAD? The PCB CAD package has its own Python environment built-in, but it’s not the most flexible in which to develop. The solution is to write a simple JSON interpreter in KiCAD, and leave the spiral generation to an external script that passes a JSON. This also leaves the possibility of using the same code in other PCB packages.
For British kids of a certain age, their first experience of a computer was very likely to have been in front of a Sinclair ZX81. The lesser-known predecessor to the wildly-successful ZX Spectrum, it came in at under £100 and sported a Z80 processor and a whopping 1k of memory. In the long tradition of Sinclair products it had a few compromises to achieve that price point, the most obvious of which was a 40-key membrane keyboard. Those who learned to code on its frustrating lack of tactile feedback may be surprised to see an Arduino project presenting it as the perfect way to easily hook up a keyboard to an Arduino.
Like many retrocomputing parts, the ZX81 ‘board has been re-manufactured, to the joy of many a Sinclair enthusiast. It’s thus readily available and relatively cheap (we think they can be found for less than the stated 20 euros!), so surprisingly it’s a reasonable choice for an Arduino project. The task of trying to define by touch the imperceptible difference in thickness of a ZX81 key will bring a true retrocomputing experience to a new generation. Perhaps if it can be done on an Mbed then someone might even make a ZX81 emulator on the Arduino.
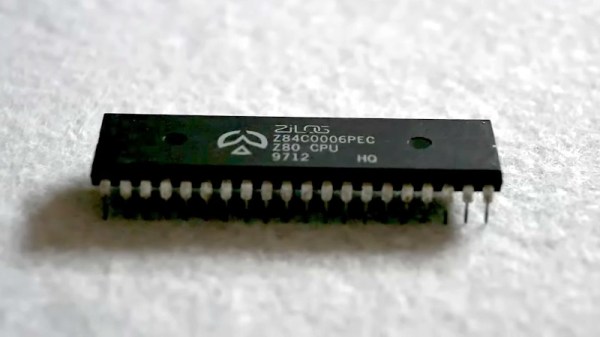
The microprocessor feature which probably most enables the computing experience we take for granted today is protected mode. A chip with the required hardware can run individual software processes in their own environments, enabling multitasking and isolation between processes. Older CPUs lacked this feature, meaning that all the resources were available to all software. [Andy Hu] has done the seemingly impossible with a Zilog Z80, enabling a protected mode on the chip for the first time in over four decades. Has he found an elusive undocumented piece of silicon missed by every other researcher? Not quite, but it is a clever hack.
The Z80 has two address spaces, one for memory and the other for I/O. He’s taken the I/O request line and fed it through a flip-flop and some logic to call a hardware interrupt the first time an I/O call is made or when a RST instruction is executed. Coupled with a small piece of memory for register contents, and he’s made a Z80 with a fully-functional protected mode, for the cost of a few logic chips. It’s explained in the video below the break, and we hope you agree that it’s rather elegant given the resources in hand. It’s too late for the commercial 8-bit machines of the past, but it would be interesting to see what today’s retrocomputer designers make of it.
For over a century now, radio amateurs have made tuned circuits using a coil of wire and a variable capacitor. In recent decades the supply of variable capacitors has dwindled, as SDR technology has supplanted the traditional tuning capacitor. No more tuned circuits for the radio amateurs? Not quite, as [Bill Meara N2CQR] shows us in the video below the break by making variable inductors using permeability tuning. This is hardly high-tech, the major component is as simple as a glue stick.
A permeability tuned inductor has a core that is moved in and out of its center by means of a screw. A glue stick has a glue core on a lead screw from a knob at its end, so an old glue stick with the glue replaced by a ferrite ring makes a reasonable permeability tuned former. The coil is wound on its outside, and when assembled into an oscillator it gives a useful tuning range. This is hardly a new idea as permeability tuning could be found in car radios and TV tuners among other applications back in the day, but it’s still a good trick to bear in mind.
We’ve featured plenty of Bill’s videos before here at Hackaday, most recently tracking down an unusual early TV.
Seasoned Hackaday readers may have noticed over the years, that some of us who toil under the sign of the Jolly Wrencher have a penchant for older tech. After all, what’s not to like in a dirt cheap piece of consumer electronics from decades past that’s just begging for a bit of hardware hacking? For me at the moment this is manifesting itself in a selection of 8mm movie cameras, as I pursue a project that will eventually deliver a decent quality digital film cartridge.
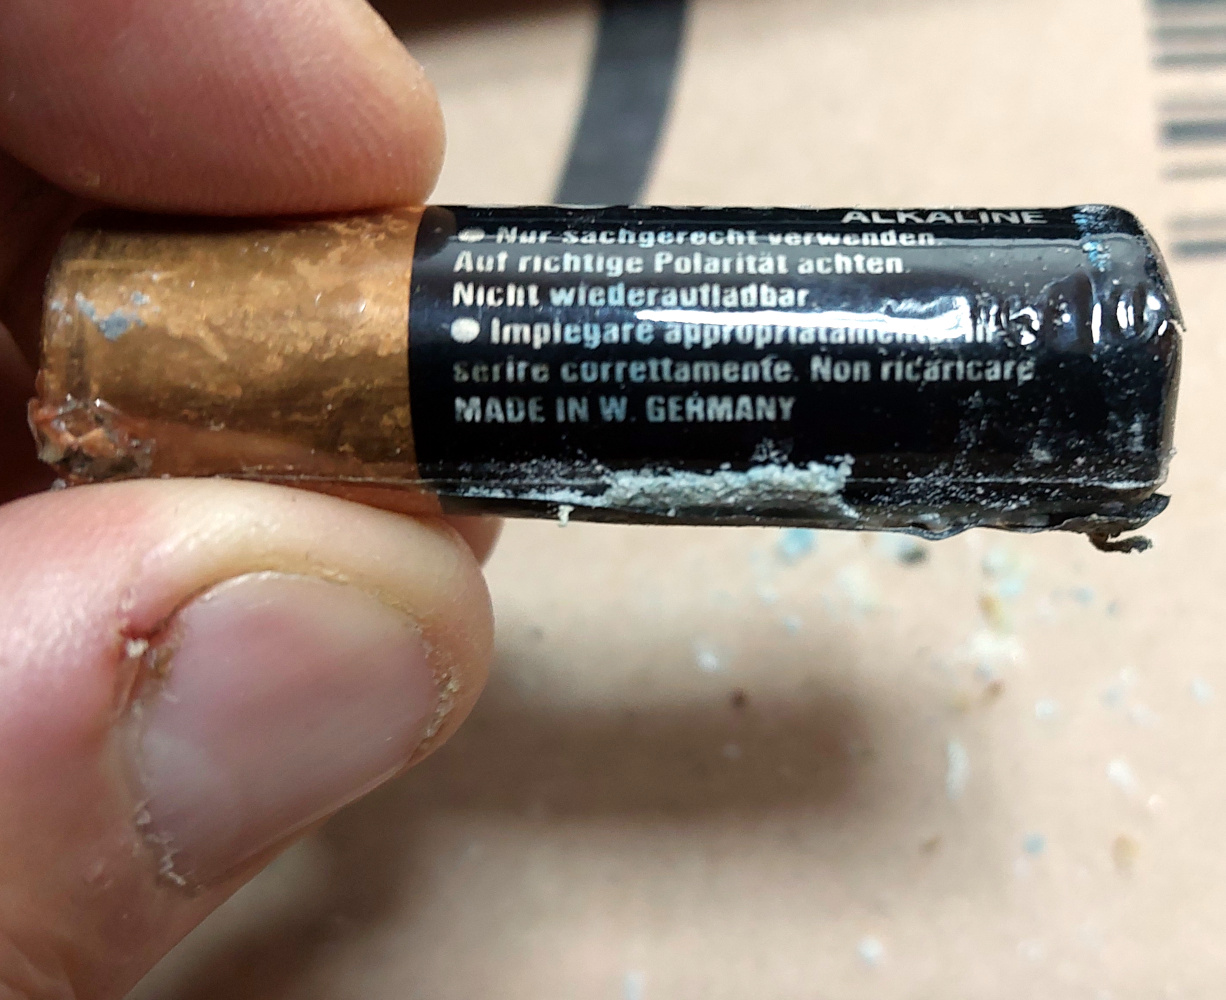
When A Cell Is From West Germany, You Know It’s Old
“Made in West Germany”
The trouble with scouring junk shops for a technology superseded four decades ago is that the cameras I find have in most cases been sitting in a drawer since the early 1980s. They were a valuable item back in the day so of course they were hung on to, then they were forgotten about until one day the grown-ups who were once the kids featured in the home movies are clearing the house, and they start their journey to my bench.
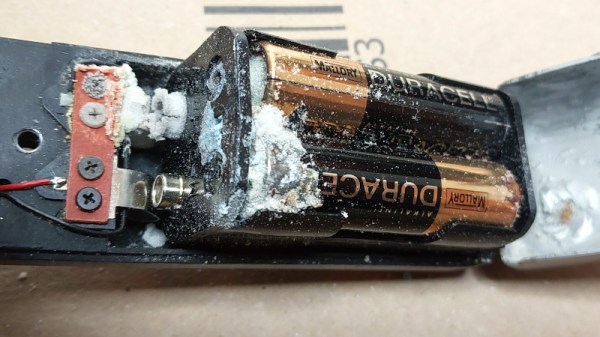
The problem is that very few owners of 8mm cameras had the good sense to remove their batteries before putting them away, so I inevitably end up with a battery compartment full of crusty 1980s Duracells and rusted contacts. This has left me curious, just what has happened here and how can I fix it?
What’s The Leaky Stuff?
Construction of a zinc-manganese “alkaline” cell. Tympanus, Public domain.
Non-rechargeable cells come in a variety of chemistries, but the commercial ones we’re most familiar with are zinc-carbon “dry cells”, and “Alkaline” zinc-manganese dioxide cells. The zinc-carbon variety are becoming less common here in 2022 and have an acidic zinc chloride or ammonium chloride electrolyte, while the alkaline cells have a higher capacity and a basic potassium hydroxide electrolyte. They both have different failure modes that result in the leaky cells, so it’s worth taking a look at each one.
The failure mode of a zinc-carbon cell is a chemical one, the acidic electrolyte reacts with the zinc can anode, and eventually eats through it. The leaking electrolyte then attacks the surrounding circuitry and battery clips. It’s hardly a concentrated acid, but it’s enough to do plenty of damage over the years.
Meanwhile an alkaline cell has a build-up of hydrogen as it degrades. It incorporates a vent which allows the hydrogen to escape, however the hydrogen pressure can instead force the electrolyte out through this vent. The electrolyte will then corrode the battery terminals and any other electronics it touches. A feature of alkaline cell leakage is a white crust, this is potassium carbonate formed from the reaction between the potassium hydroxide electrolyte and carbon dioxide in the air.
The Global Parts Bin To The Rescue
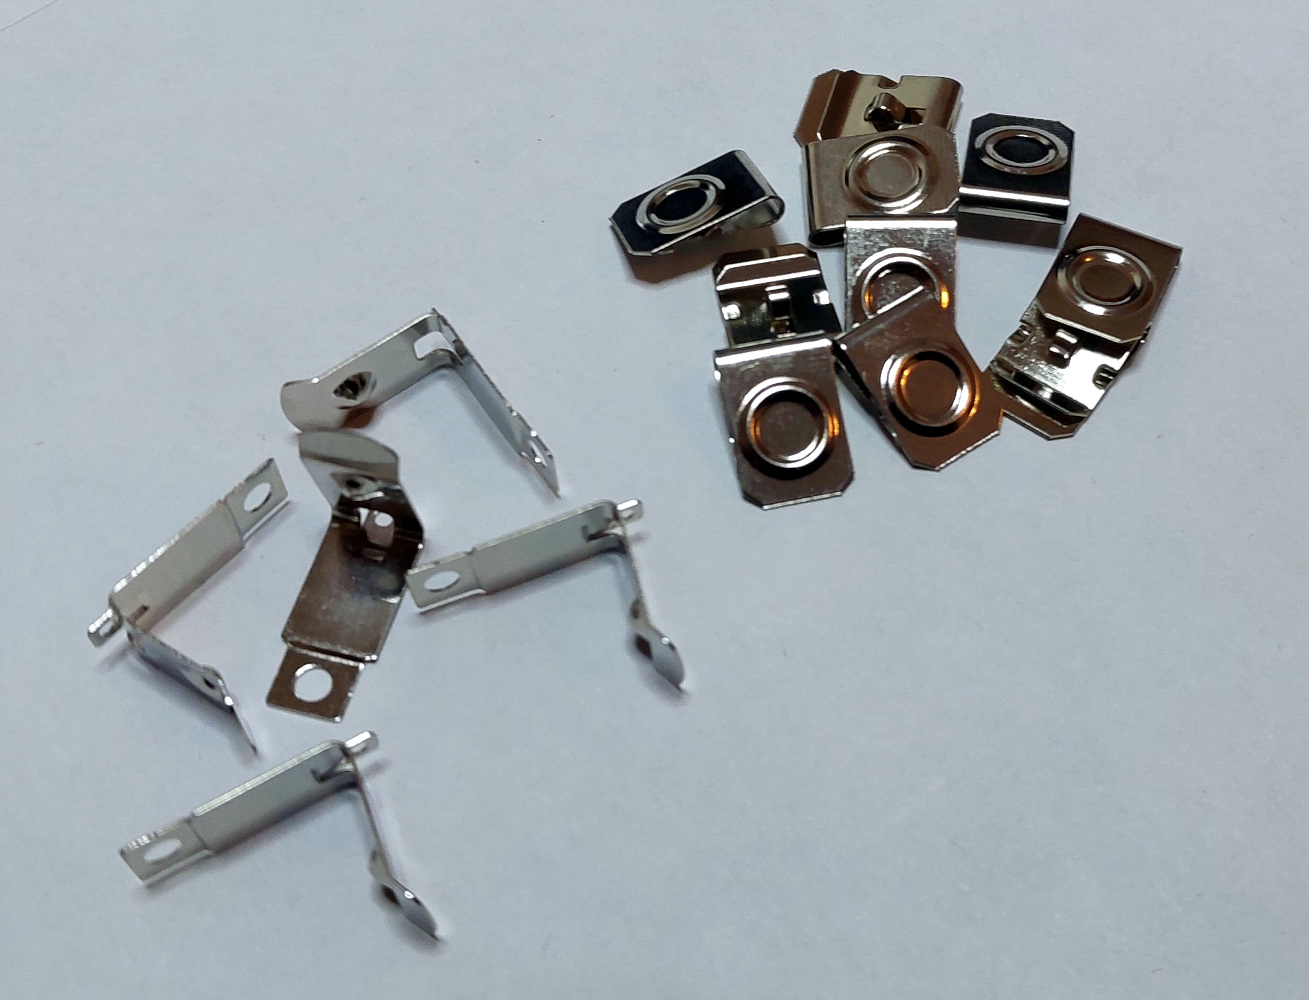
Fresh and new battery clips for AA holders
How much damage has been done is usually a function of how long the leaking batteries have been in the device. Sometimes one is lucky and the battery contacts are salvageable, otherwise they are too far gone and a replacement has to be found. A past me tried all sorts of home-made solutions using stiff copper wire and other materials, but today thanks to the miracle of international commerce it’s usually possible to find a contact the same as or very similar to the old one. A quick AliExpress search on terms such as “AA battery spring” will return numerous options, and it’s simply a case then of paging through to find the one you need on the terms you like.
So those of you who like retro tech will find something familiar in the last few paragraphs, but there’s a lesson to be found in dealing with ancient batteries. Here in 2022 we’re more likely to have lithium polymer cells in our consumer devices and so the need to keep a pile of Duracells at hand is reduced. But the thought of today’s equivalent of a Super 8 camera lying forgotten in a drawer for decades with a cheap li-po pouch cell inside it is far more frightening than something with some crusty manganese cells. Have we just found the root cause of house fires in the 2040s?
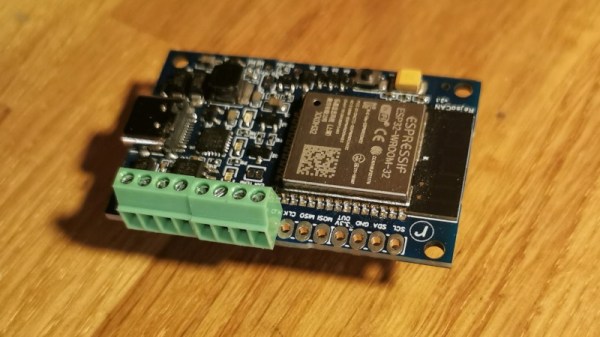
Since modern cars use the CAN bus for so many of their functions, it’s unsurprising that it’s a frequent object of interest for those in our community. Some people go no further than commercial plug-in analysers, while others build their own CAN devices. This is what [Magnus Thomé] has done, with his RejsaCAN microcontroller board.
It’s a small PCB with an onboard CAN interface from an ESP32-S3 and a car-friendly power supply circuit, and perhaps most importantly, it has an auto-shutdown feature to prevent battery drain. Software-wise it’s a blank piece of paper for the user to roll their own application, but since the ESP32 is supported by the Arduino ecosystem, there are libraries that make talking CAN as easy as it can be.
[Magnus] has a list of potential applications for the board, many of which take advantage of the ESP’s wireless capabilities. So far, [Magnus] has hooked it up to an LCD display, but we can see so many other useful things coming out powered by something like this.
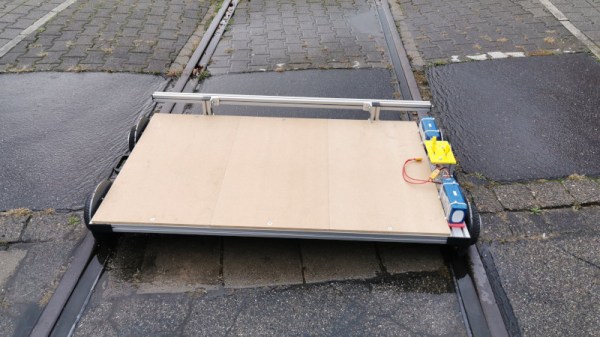
For those who live in countries where there are plenty of abandoned railways, a popular way to explore them has been by means of home made rail carts. These are usually rudimentary rail trolleys with a small internal combustion engine, and a host of fascinating videos of them can be found online. Such a trolley has one disadvantage though — it’s not the most compact of devices. [Cato] has come up with a rail cart that’s extremely portable by replacing the engine with the guts of a pair of hoverboards.
The chassis of the machine is made from aluminium extrusion, and its deck from plywood. The wheels are the stock hoverboard wheels with flat flanges applied, which while they don’t have the ideal flange profile of a rail wheel are good enough to keep the thing on track. Finally to control the thing a rather stylish little 3D printed single-axis joystick serves as a combined throttle and brake.
Those of us who hail from places where abandoned railways have their track speedily ripped up can only gaze in envy and imagine speeding along the rails on one of these. The build starts with a warning never to use one of these on an active track, but should you wish to drive a real train there are plenty of places to do that.