3D Print For Extreme Temperatures (But Only If You’re NASA)

At the level pursued by many Hackaday readers, the advent of affordable 3D printing has revolutionised prototyping, as long as the resolution of a desktop printer is adequate and the part can be made in a thermoplastic or resin, it can be in your hands without too long a wait. The same has happened at a much higher level, but for those with extremely deep pockets it extends into exotic high-performance materials which owners of a desktop FDM machine can only dream of.

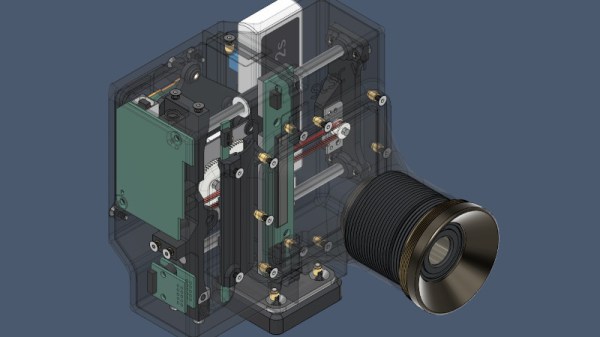
NASA for example are reporting their new 3D printable nickel-cobalt-chromium alloy that can produce extra-durable laser-sintered metal parts that van withstand up to 2000 Fahrenheit, or 1033 Celcius for non-Americans. This has obvious applications for an organisation producing spacecraft, so naturally they are excited about it.

The alloy receives some of its properties because of its oxide-dispersion-strengthened composition, in which grains of metal oxide are dispersed among its structure. We’re not metallurgists here at Hackaday, but we understand that the inconsistencies in the layers of metal atoms caused by the oxides in the crystal structure of the alloy leads to a higher energy required for the structure to shear.

While these particular materials might never be affordable for us mere mortals to play with, NASA’s did previously look into how it could greatly reduce the cost of high-temperature 3D printing by modifying an existing open source machine.

Half Crystal Radio, Half Regenerative Radio

A rite of passage in decades past for the electronics experimenter was the crystal radio. Using very few components and a long wire antenna, such a radio could pick up AM stations with no batteries needed, something important in the days when a zinc-carbon cell cost a lot of pocket money. The days of AM broadcasting may be on the wane, but it’s still possible to make a crystal set that will resolve stations on the FM band. [Andrea Console] has done just that, with a VHF crystal set that whose circuit also doubles as a regenerative receiver when power is applied.

The key to a VHF crystal set lies in the highest quality tuned circuit components to achieve that elusive “Q” factor. In this radio that is coupled to a small-signal zero voltage threshold FET that acts as a detector when no power is applied, and the active component in a regenerative radio when it has power. The regenerative radio increases sensitivity and selectivity by operating at almost the point of oscillation, resulting in a surprisingly good receiver for so few parts. Everyone should make a regenerative radio receiver once in their life!

Op Amp Contest: Go Down An Octave, No FFT, No PLL, No Oscillator!

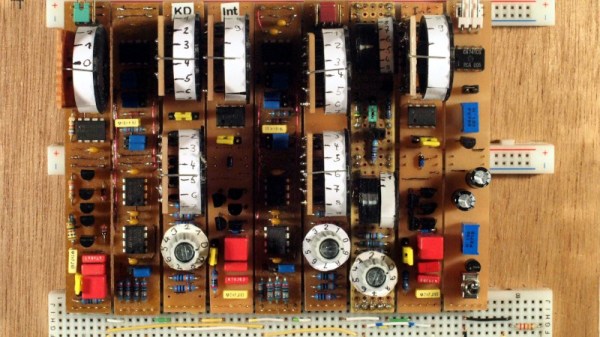
We like a project that makes us think, and that was certainly the case with [MS-BOSS]’s octave downshifter that’s an entry in our current op-amp contest. Instead of resorting to an FFT, or a PLL, it uses a technique best described as a custom analogue computer to implement the maths of octave downshifting. It’s an extremely clever approach, and we don’t mind admitting took us more than one read to understand how it works.

Just as you would with any mathematical problem, he’s split the job of halving the frequency into its constituent mathematical functions. The square root calculation circuit is probably the one that most required the dredging up of dimly-remembered analogue circuitry undergraduate courses for us.

The result is a fascinating read that’s well worth taking the time to understand if you have any interest in analogue electronics. It’s by no means the easiest way to make this particular effect in 2023, as we’re much more used to seeing our community make digital effects, but if you fancy yourself as any kind of op-amp designer, you really need to give it a look.

Shake Your PCB Etching, With An Old Optical Drive

Easy PCB fabrication in China has revolutionised electronic construction at our level, but there are still times when it makes sense to etch your own boards. It’s a messy business that can also be a slow one, but at least a project from [earldanielph] takes away one chore. It agitates the etchant solution round the board, by moving the tank backwards and forwards on the drawer of an old optical drive.

The first part of the build is simply removing all parts of the drive except the drawer mechanism and its motor. This is still, in most cases, a DC motor, so an Arduino can easily drive it with a motor control shield. It’s worth a moment to reflect on how little there is to a modern optical drive.

The Arduino receives a sketch that moves the tray backward and forward, and a piece of ply is attached to the tray. This becomes a stand for a plastic tub containing the etchant and board, and the liquid is soon swishing back and forwards over the surface. You can see the result in the video below the break. Definitely a saving over manual agitation. It’s an inventive machine, but it’s not the first PCB agitator we’ve seen.

Continue reading “Shake Your PCB Etching, With An Old Optical Drive”

Run Linux By Emulating RISC-V On A RISC-V Microcontroller

For years it was a given that it was impossible to run a Linux based operating system on a less powerful computer whose architecture lacked a memory management unit. There were projects such as uCLinux which sought to provide some tidbits to low computing power Linux users, but ultimately they came to naught. It is achievable after a fashion though, by using the limited architecture to emulate a more powerful one. It’s been done on AVR chips emulating ARM, on ARM chips, and now someone’s done it on an ESP32-C3 microcontroller, a RISC-V part running a RISC-V emulator. What’s going on?

RISC-V is an architecture specification that can be implemented at many levels from a simple microcontroller or even a pile of 74 logic to a full-fat application processor. The ESP32-C3 lies towards the less complicated end of this curve, though that’s not the whole reason for the emulation. The PSRAM storage is used by the C3 as data storage and can’t be used to run software, so to access all that memory capacity an emulator is required that in turn can use the PSRAM as its program memory. It’s a necessary trick for Espressif’s implementation of the architecture.

Surprisingly it’s not as slow as might be expected, with a boot-up time under two minutes. It’s not what we’d expect from our desktop powerhouses, but it’s not so long ago that certain lower-power full-fat processors could be just as lethargic. For past glories, see the AVR running Linux, and the RP2040.

NFC Antennas Have Other Uses

As NFC chips proliferate, so do the antennas they require for operation, and since many NFC-enabled items are single-use, this means there’s an opportunity to put them to other uses. It’s an avenue pursued by [Brother-live], as he strips the antennas from spent metro tickets and gets experimenting.

The antenna in an NFC-enabled card is a flexible PCB laminated between the plastic outer layers, with the tracks forming a coil round the outside of it. Using some solvent the cards can be easily separated and the antennas retrieved. Once the chip has been removed they can be cleaned up and soldered to, allowing wires to be connected.

What can you do with an NFC antenna? Not a huge amount as you can see in the (Russian language, English subtitles) video below the break, but he tries it as a not-very-good heating pad, a power harvesting antenna from NFC readers, and perhaps most promisingly, as the coil of a moving-coil speaker. We’re not sure how much effort would be worth making on that last front, but we think with a bit of care there might be room for audible improvement.

If you’ve ever been tempted to have a look at an NFC card, it’s a subject we’ve covered before.

Continue reading “NFC Antennas Have Other Uses”

A High Precision ADC That You Can Understand!

In a world where an analogue to digital converter is all too often an integrated peripheral buried inside a microcontroller, it’s easy to forget how simple these devices can be when built from first principles. An entry in our Op-Amp Challenge from [NNNI] demonstrates this perfectly, it’s a high resolution multi-slope ADC for instrumentation purposes, constructed using a mixture of op-amps, logic chips, and a Raspberry Pi Pico. Best of all, it’s easy to understand, so there’s little of that analogue mystique to worry about.

This type of ADC measures an analogue value by counting how long it takes to charge a capacitor to that voltage. A simple version that measures charge time has a few drawbacks, so this project goes from single slope to multi slope by measuring both charge and discharge times compared to the voltage. Pay attention to component matching and reference stability, and such a design can offer a very high resolution measurement.

The value in this project lies not only in the design itself, but also in the extremely comprehensive description of its operation, which should teach most readers a thing or two. That curvy-line PCB is rather nice, too. We used single slope ADCs to read analogue joysticks back in the day, but we certainly learned something here. Want to see another? This isn’t the first dual slope ADC we’ve seen.