Scratch That SDR!

When you think of a software defined radio, what language might you consider reaching for to create the software part of the equation? C? C++, maybe?

How about Scratch?

“What, Scratch as in the visual programming language aimed at young people?”, we hear you cry incredulously. It’s not exactly the answer you’d expect for an SDR, but thanks to [Andrew Back]’s work there is now ScratchRadio, a set of Scratch extensions for software defined radio. Why on earth do this? The aim is to lower the barrier to entry for software defined radio as far as possible, and to place it in a learning environment such as Scratch seems an ideal way to achieve that.

Of course, Scratch itself isn’t powerful enough for the heaviest of heavy lifting, so in reality this is a Scratch wrapper for a LuaRadio backend. It was created with the LimeSDR Mini in mind, but given that LuaRadio is not specific to that hardware we’d expect it to work with other SDRs such as the ever-popular RTL chipset TV sticks. It gives an owner of a Raspberry Pi 3 the ability to experiment with SDR coding without the need for a huge level of experience, and that to our mind can only be a good thing.

If you fancy trying ScratchRadio, you can find the code in its GitHub repository, and take it from there. Meanwhile we covered LuaRadio last year, so if Scratch is a little basic for you and GNU Radio too advanced, give it a try.

Radio icon: [Sakurambo], (CC BY-SA 3.0).

Scratch cat logo: MIT Media Lab.
Is It A MagLite Or A MagnaStat?

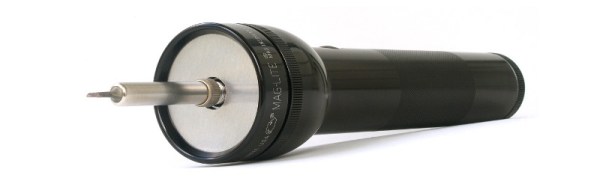
[David Schneider]’s love affair with Weller temperature controlled soldering irons began many years ago, but when he came to the point of needing a cordless iron he had problems finding one that replicated his trusty mains-powered soldering station. His solution was simple, to build his own, and in a stroke of genius he did so with an odd combination of a Weller MagnaStat element and bit, and a repurposed MagLite flashlight.

The Weller parts are all available off-the-shelf as spares, and the MagLite was easy to source. But its D cells would never give the required 24 V for the iron, so he had to incorporate a set of 14500 Li-ion cells with built-in electronic protection. The element protrudes from the front of the flashlight, giving an iron that seems to do the business but to our eyes looks rather unwieldy. Still, it does the job, and provides a far more sturdy and reliable iron than any cordless one we’ve yet seen, so we think that’s a result.

We’ve reviewed a Weller MagnaStat in the past,with a special look at availability of bits for older models.

LoRa Is The Network

We’ve become used to seeing LoRa appearing in projects on these pages, doing its job as a low-bandwidth wireless data link with a significant range. Usually these LoRa projects take the form of a client that talks to a central Internet connected node, allowing a remote wireless-connected device to connect through that node to the Internet.

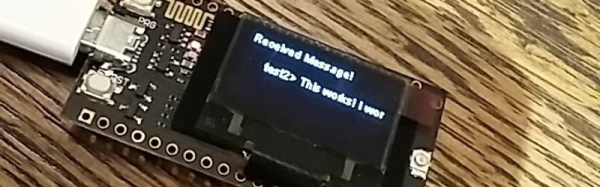
It’s interesting then to see a modest application from [Mark C], a chat application designed to use a set of LoRa nodes as a peer-to-peer network. In effect LoRa becomes the network, instead of simply being a tool to access it. He optimistically describes peer-to-peer LoRa networks as the new FidoNet in his tip email to us, which might be a bold statement, but we can certainly see some parallel. It’s important to note that the application is merely a demonstrable proof-of-concept as it stands, however we’d agree that it has some potential.

The hardware used for the project is the Heltec ESP32-based LoRa board, which comes with a handy OLED screen on which the messages appear. As it stands a PC connection is required to provide text input via serial, however it’s not impossible to imagine other more stand-alone interfaces. If it interests you the code can be downloaded from the GitHub repository, so maybe this can become the seed for wider peer-to-peer LoRa networks.

There have been no shortage of LoRa projects featured here over the years. Recent ones include a handy local LoRa packet sniffer, and news of an extreme distance record from a LoRa node on a balloon.

Reverse Polish Notation And Its Mildly Confusing Elegance

The best rummage sale purchase I ever made was a piece of hardware that used Reverse Polish Notation. I know what you’re thinking… RPN sounds like a sales gimmick and I got taken for a fool. But I assure you it’s not only real, but a true gem in the evolution of computing.

Best rummage sale find ever!

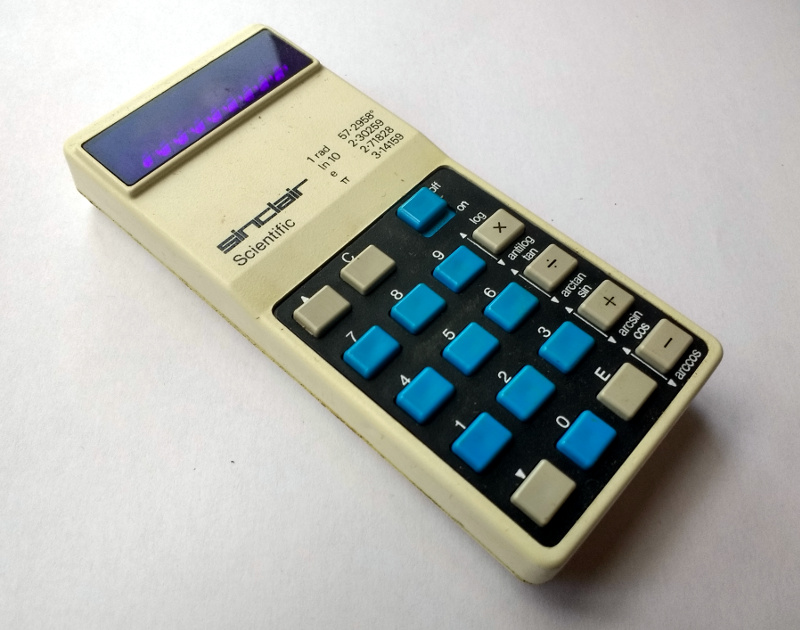
Sometime in the 1980s when I was a spotty teen, I picked up a calculator at a rummage sale. Protected by a smart plastic case, it was a pretty good condition Sinclair Scientific that turned out when I got it home to have 1975 date codes on its chips, and since anything with a Sinclair badge was worth having it became mine for a trifling amount of money. It had a set of corroded batteries that had damaged one of its terminals, but with the application of a bit of copper strip I had a working calculator.

And what a calculator! It didn’t have many buttons at a time when you judged how cool a scientific calculator was by the prolific nature of its keyboard. This one looked more akin to a run-of-the-mill arithmetic calculator, but had button modes for trigonometric functions and oddly an enter key rather than an equals sign. The handy sticker inside the case explained the mystery, this machine used so-called Reverse Polish Notation, or RPN. It spent several years on my bench before being reverently placed in a storage box of Sinclair curios which I’ve spent half a day turning the house over to find as I write this article.

Continue reading “Reverse Polish Notation And Its Mildly Confusing Elegance” →

One Chip, Sixteen Times The RAM

Have you ever upgraded your computer’s memory sixteen-fold, with a single chip? Tynemouth Software did for a classic Sinclair micro.

For owners of home computers in the early 1980s, one of the most important selling points was how much RAM their device would have. Sometimes though there just wasn’t much choice but to live with what you could afford, so buyers of Sinclair’s budget ZX81 computer had to put up with only 1 kiB of memory. The system bytes took up (by this writer’s memory) around 300 bytes, so user programs were left with only around 700 bytes for their BASIC code. They were aided by Sinclair’s BASIC keywords stored as single bytes, but still that was a limit that imposed coding economy over verbosity.

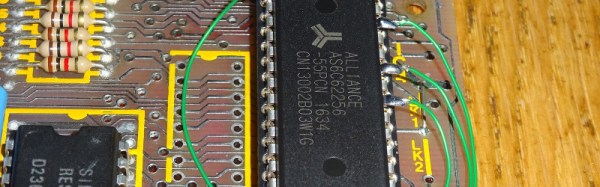
Sinclair sold a 16 kiB upgrade, the so-called “Rampack”, which located on the ’81’s edge connector and was notorious for being susceptible to the slightest vibration. Meanwhile the mainboard had provision for a 2 kiB chip as a drop-in that was never sold in the UK, and enterprising users could fit larger capacities with soldered combinations of other chips piggybacking the original. And this is what the Tynemouth people have done, they’ve replaced their machine’s dual 1 kiB x 4 chips with a single 62256, and with a bit of pin-bending they’ve managed to do it without the track-cutting that normally accompanies this mod.

Adding chips to a 36-year-old home computer for which there are plenty of available Rampacks might seem a bit of a niche, but in doing so they’ve made a standalone ’81 that’s just a little bit more useable. They’ve also brought a few other components up-to-date, with a composite video mod, switching regulator, and heatsink for the rare ULA chip. If you are of a Certain Generation, it might just bring a tear to your eye to see a ZX81 being given some love.

Did you lose your ZX81 along the way? How about emulating one in mbed?

FoTW: LED Strips Make Awful Servo Drivers

We must all have at some time or another spotted a hack that seems like an incredible idea and which just has to be tried, but turns out to have been stretching the bounds of what is possible just a little too far. A chunk of our time has disappeared without trace, and we sheepishly end up buying the proper part for the job in hand.

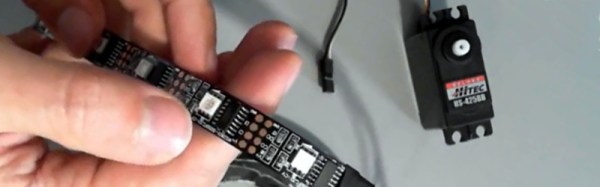
[Orionrobots] had a conversation with a YouTube follower about LED strips. An LED strip contains a length of ready-made PWM drivers, they mused. Wouldn’t it be great then, if each of the drivers on a strip could be connected to a servo, making the strip a ready-made single-stop SPI servo driver. With a large multi-servo robot to build, he set to work on a strip of WS2801s.

If you are in the Soldering Zone and have elite skills at the iron, then soldering a wire to a surface mount driver chip is something entirely possible. For mere mortals though it’s a bit of a challenge, and he notes just how much extra time it’s added to the project. The fun starts though when the servo is hooked up, the best that can be said is that it vibrates a bit. On paper, the LED drivers should be able to drive a servo, because they can create the correct waveform. But in practice the servo is designed to accept a logic level input while the driver is designed to sit in series with an LED and control its current. In practice therefore the voltages required for a logic transition can’t quite be achieved.

He concludes by recommending that viewers splash out on a servo driver board rather than trying an LED strip. We applaud him for the effort, after all it’s a hack any of us might have thought of trying for ourselves.

Continue reading “FoTW: LED Strips Make Awful Servo Drivers” →

Hackaday Prize Entry: Unlock Your PC The RFID Way

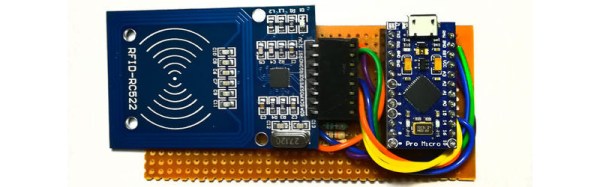
Sometimes we see projects whose name describes very well what is being achieved, without conveying the extra useful dimension they also deliver. So it is with [Prasanth KS]’s Windows PC Lock/Unlock Using RFID. On the face of it this is a project for unlocking a Windows PC, but when you sit down and read through it you discover a rather useful primer for complete RFID newbies on how to put together an RFID project. Even the target doesn’t do it justice, there is no reason why this couldn’t be used with any other of the popular PC operating systems besides Windows.

The project takes an MRFC-522 RFID module and explains how to interface it to an Arduino. In this case the Arduino in question is an Arduino Pro Micro chosen for its ability to be a USB host. The supplied code behaves as a keyboard, sending the keystroke sequence to the computer required to unlock it. The whole is mounted in what seems to be a 3D printed enclosure, and for ease of use the guts of the RFID tag have been mounted in a ring.

As we said above though, the point of this project stretches beyond a mere PC unlocker. Any straightforward RFID task could use this as a basis, and if USB is not a requirement then it could easily use a more run-of-the-mill Arduino. If you’re an RFID newbie, give it a read.

Plenty of RFID projects have made it here before, such as this door lock. And we’ve had another tag in a ring, too.