Hackaday Links: August 25, 2013

hackaday-links-chain

[Adrian] came across a treasure trove of 507 mechanical device designs. It didn’t seem quite right for a Retrotechtacular post, but we wanted to share it as it’s a great place to come up with ideas for your next Rube Goldberg machine.

Biking with headphones is dangerous. That’s why [J.R.] built a handlebar enclosure for his Jambox Bluetooth speaker.

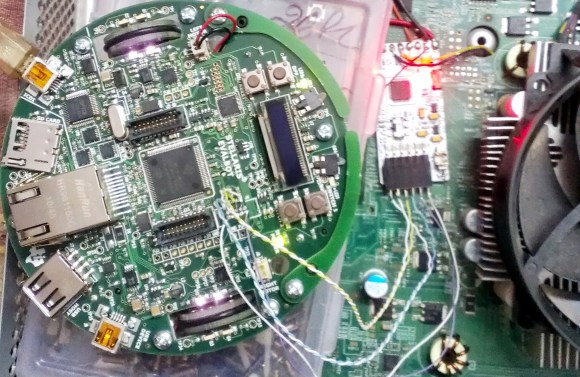
While dumpster diving [Mike] found a Macbook pro. It was missing a few things, like a keyboard, touchpad, battery, ram, and storage. He borrowed a power supply to test it out but without the keyboard there’s no power button. He figured out the traces on the motherboard which turn it on when shorted.

[Mateusz] want to let us know about the Hercules LaunchPad. Like the other TI Launchpad offerings it’s an all-in-one dev board. The Hercules line features a couple of flavors of dual-core ARM chips. Can you believe the dev boards you can get for under $20 these days?

After seeing the ammo can sound system about a month ago [Ilpo] was inspired to share his ammo can PC case with us.

And finally, here’s a way to display your Bitcoin mining rig for all to see. This system was laid out in an antique frame and hung on the wall.

The Straddler Makes AVR Breadboarding Truly Plug And Play

the_straddler_avr_programmer

It’s not that breadboarding AVR circuits is difficult. But you have to admit that it takes some time to set everything up. We don’t label the top of our DIP chips so that you know what each pin does just by looking. Which means that wiring up the programmer involves pulling out the datasheet. [Vinnie] found the solution to this problem which is to make one of these interface PCBs for each AVR chip family. The long pins make it easy to drop over the top of your microcontroller, which is where the name comes from.

His first stab at the idea was just a hunk of home etched PCB which broke out the programming pins into the 6-pin ICSP standard. This second rendition uses the 10-pin standard and adds a few extras into the mix. He included decoupling capacitors which need to be used in every circuit anyway. There’s a crystal along with its load capacitors. This clock source is a snap to enable by burning some fuses. If you choose to use the internal oscillator instead this hardware won’t interfere. The LED is used to get you up and running with blinky firmware as quickly as possible. He plans to add jumper in the next revision which can disconnect this components from the I/O pin. Now you just need to add a 10-pin header to that USB keyboard AVR programmer and you’re in business.

Vacuum Pressure Bazooka

This vacuum pressure cannon is a design unlike any we’ve seen before. At first look it seems to have the components you see in a potato gun. But those use a combustion process to launch the projectile. This instead uses the sudden release of a vacuum.

About three minutes into the demo video below we get a look at the “ignition” system. It’s pretty scary in that a couple of really powerful springs are pulling a collar along the barrel toward your face. This is actually meant to dislodge the plug in the back which is holding vacuum in the barrel. The pressure difference causes a sudden inrush of air which shoots the 1.5 inch projectile out the front of the bazooka.

[Mr. Teslonian] built his own hand powered vacuum pump for loading the weapon. This was done with a pair of PVC pipes that fit inside of one another, and a plunger made from wood and leather. The PVC and wood projectile seals in the barrel using a skirt made from duct tape. After breech loading the projectile and plugging the back of the barrel, he layers aluminum foil over the business end and pumps up a high vacuum. His test firing is not from the shoulder, and he only gets one shot because the slug hit the target so hard it was destroyed. This thing really needs to be vehicle mounted!

Continue reading “Vacuum Pressure Bazooka”

Evalbot As A JTAG Programmer

evalbot-as-jtag-programmer

[Adarsh] needed a JTAG programmer to push code to a CPLD dev board he was working with. He knew he didn’t have a dedicated programmer but figured he could come up with something. Pictured above is his hack to use a Stellaris Evalbot as a programmer.

Long time readers will remember the Evalbot coupon code debacle of 2010. The kits were being offered with a $125 discount as part of a conference. We were tipped off about the code not know its restrictions, and the rest is history. We figure there’s a number of readers who have one collecting dust (except for people like [Adam] that used it as a webserver). Here’s your chance to pull it out again and have some fun.

A bit of soldering to test points on the board is all it takes. The connections are made on the J4 footprint which is an unpopulated ICDI header. On the software side [Adarsh] used OpenOCD with stock configuration and board files (specifics in his writeup) to connect to the white CPLD board using JTAG.

Write An Essay, Win A Tektronix Scope

tektronix_scope_giveaway

Want a new scope for your hacking pleasures? How about one that rings in at $3650? That price tag makes us cringe, which is why we’re working on our 1k word essay to win one. The Tektronix MSO2024B pictured above is the top scope in its family and there’s more than enough features to start the drool flowing. Need more motivation? Check out the demo/advertising video below which walks through an overview of what the scope has to offer.

The contest — sponsored by EETimes and Tektronix — seeks to reward the best story about fixing a product that was disappointing on delivery but awesome when you got done hacking on it. Your thousand words or less are due by October 26th along with a fifty word bio about yourself, with the winner announced on Halloween. Be warned, you must register an account to qualify But we hit their daily article viewing limit while writing this post so you may need to log in just to read about the contest. Or clear their cookies… we are a hacking website after all.

They’re only giving away one scope. So don’t put this one off. Start polishing your totally bogus legit story about how you fixed something using mad engineering skills.

Continue reading “Write An Essay, Win A Tektronix Scope”

Hacking McDonald’s Minion Toy To Be An Electric Slidewhistle

mcdonalds_toy_hacking

This is a look at the brain surgery which [Tim] performed on a Happy Meal Toy. The McDonald’s package meal perk comes with one of several different Despicable Me 2 characters. But [Tim] wasn’t a fan of this one since you had to blow in it to make noise. He grabbed a 555 timer and added his own circuit to the toy which turns it up to 11 (seriously, turn your volume down before playing the video).

Disassembly includes removing a screw which needs a 3-sided screwdriver (protip: use a bench grinder and a cheap screw driver to make your own). There’s also some prying to get into the skull and then its time to work on the slide whistle. The blue tube is a regular slide whistle which you blow into from the back and pull on the red goo to change the pitch. [Tim] added a photoresistor to the mouthpiece and an LED on the slide. Moving the light source changes the intensity which is one of the adjustments to make 555 circuit howl.

We love the Happy Meal toy hacks because they seem so visceral. A couple years ago it was parts harvesting from Avatar toys. which in turn inspired a tripwire hack with a Penguin toy.

Continue reading “Hacking McDonald’s Minion Toy To Be An Electric Slidewhistle”

Fail Of The Week: Switched-mode PSU Camera Battery Replacement

We really wanted this week’s Fail to work. [Michael] wanted more juice for his Nikon D3100 camera. The idea he had was to replace the cells of the battery with a Buck converter and add leads for an external battery. This opens up the possibility of running from a wide range of voltage sources; an attractive prospect for devices using specialize batteries. Specifically, he wanted to swap out the stock 7.4V 1030 mAh battery and use an 18 Ah lead acid one instead.

The biggest hurdle to get over in a project like this one is the logic the camera uses to communicate with the battery. For this reason — and for the ease of hitting the right form factor — he scrapped an old battery pack to reuse the logic board and enclosure. His power supply is a free-formed circuit which fits nicely in the allotted space.

The circuit powers up, but only to about 6.4V. This isn’t enough to run the camera, which means this was just an expensive way for [Michael] to practice his soldering. After the jump you can read his recounting of the experience. You’ll also find a few of the build images, and the two hand-drawn schematics he used during development. His Dropbox has the entire collection of images.

Continue reading “Fail Of The Week: Switched-mode PSU Camera Battery Replacement”