Your Arduino SAMD21 ADC Is Lying To You

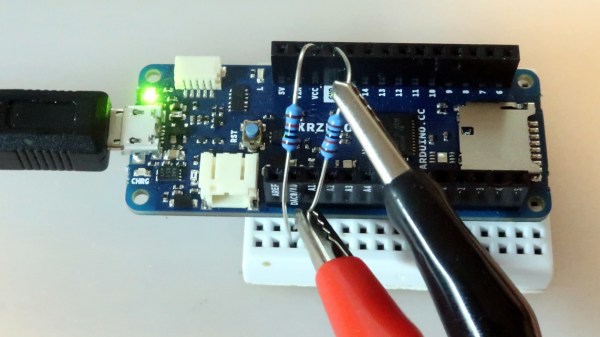
One of the great things about the Arduino environment is that it covers a wide variety of hardware with a common interface. Importantly, this isn’t just about language, but also about abstracting away the gory details of the underlying silicon. The problem is, of course, that someone has to decode often cryptic datasheets to write that interface layer in the first place. In a recent blog post on omzlo.com, [Alain] explains how they found a bug in the Arduino SAMD21 analogRead() code which causes the output to be offset by between 25 mV and 57 mV. For a 12-bit ADC operating with a reference of 3.3 V, this represents a whopping error of up to 70 least-significant-bits!
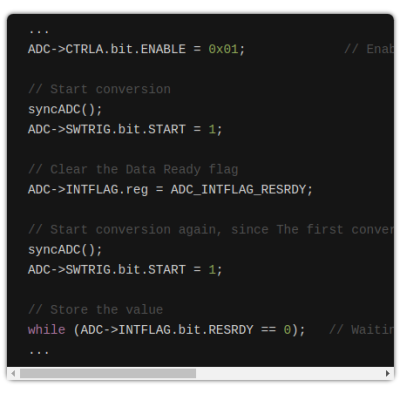
Excerpt from the SAMD wiring_analog.c file in the Arduino Core repo.

While developing a shield that interfaces to 24 V systems, the development team noticed that the ADC readings on a SAMD21-based board were off by a consistent 35 mV; expanding their tests to a number of different analog pins and SAMD21 boards, they saw offsets between 25 mV and 57 mV. It seems like this offset was a known issue; Arduino actually provides code to calibrate the ADC on SAMD boards, which will “fix” the problem with software gain and offset factors, although this can reduce the range of the ADC slightly. Still, having to correct for this level of error on a microcontroller ADC in 2019 — or even 2015 when the code was written — seems really wrong.

After writing their own ADC read routine that produced errors of only between 1 mV and 5 mV (1 to 6 LSB), the team turned their attention to the Arduino code. That code disables the ADC between measurements, and when it is re-enabled for each measurement, the first result needs to be discarded. It turns out that the Arduino code doesn’t wait for the first, garbage, result to finish before starting the next one. That is enough to cause the observed offset issue.

It seems odd to us that such a bug would go unnoticed for so long, but we’ve all seen stranger things happen. There are instructions on the blog page on how to quickly test this bug. We didn’t have a SAMD21-based Arduino available for testing before press time, but if you’ve got one handy and can replicate these experiments to verify the results, definitely let us know in the comments section below.

If you don’t have an Arduino board with a SAMD21 uC, you can find out more about them here.

New Teensy 4.0 Blows Away Benchmarks, Implements Self-Recovery, Returns To Smaller Form

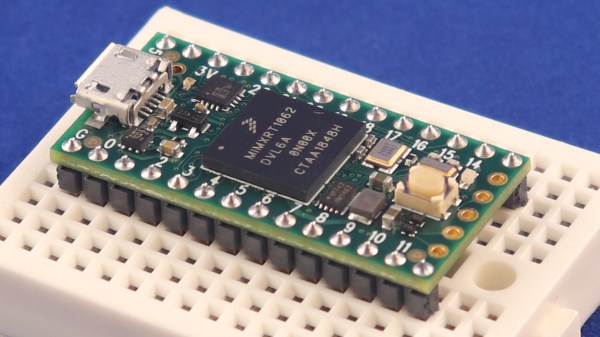
Paul Stoffregen did it again: the Teensy 4.0 has been released. The latest in the Teensy microcontroller development board line, the 4.0 returns to the smaller form-factor last seen with the 3.2, as opposed to the larger 3.5 and 3.6 boards.

Don’t let the smaller size fool you; the 4.0 is based on an ARM Cortex M7 running at 600 MHz (!), the fastest microcontroller you can get in 2019, and testing on real-world examples shows it executing code more than five times faster than the Teensy 3.6, and fifteen times faster than the Teensy 3.2. Of course, the new board is also packed with periperals, including two 480 Mbps USB ports, 3 digital audio interfaces, 3 CAN busses, and multiple SPI/I2C/serial interfaces backed with integrated FIFOs. Programming? Easy: there’s an add-on to the Arduino IDE called Teensyduino that “just works”. And it rings up at an MSRP of just $19.95; a welcomed price point, but not unexpected for a microcontroller breakout board.

The board launches today, but I had a chance to test drive a couple of them in one of the East Coast Hackaday labs over the past few days. So, let’s have a closer look.

Continue reading “New Teensy 4.0 Blows Away Benchmarks, Implements Self-Recovery, Returns To Smaller Form”

Say It With Me: Bandwidth

Bandwidth is one of those technical terms that has been overloaded in popular speech: as an example, an editor might ask if you have the bandwidth to write a Hackaday piece about bandwidth. Besides this colloquial usage, there are several very specific meanings in an engineering context. We might speak about the bandwidth of a signal like the human voice, or of a system like a filter or an oscilloscope — or, we might consider the bandwidth of our internet connection. But, while the latter example might seem fundamentally different from the others, there’s actually a very deep and interesting connection that we’ll uncover before we’re done.

Let’s have a look at what we mean by the term bandwidth in various contexts.

Continue reading “Say It With Me: Bandwidth”

ESP32 Gets Advance Windowed Apps Using This VGA GUI Library

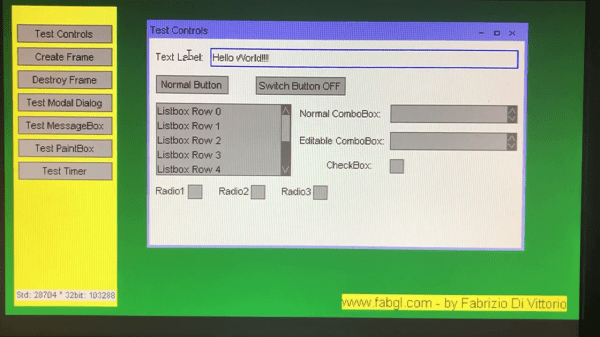
We featured [Fabrizio Di Vittorio]’s FabGL library for the ESP32 back in April of this year. This library allows VGA output using a simple resistor based DAC (3 resistors for 8 colors; 6 resistors for 64 colors), and includes functions for PS/2 mouse and keyboard input, a graphics library, and many of the miscellaneous functions you might need to develop games on the ESP32. Now, a GUI interface library has been added to ease application development.

The GUI, of course, runs on the VGA output. The library includes what you’d expect from a minimal windowing GUI, like keyboard and mouse support, windows with the usual minimize/maximize/close controls, and modal and message dialog boxes. For input controls, there are labels, text boxes, buttons, radio buttons, checkboxes, normal and editable combo boxes, and listboxes — you know, pretty much everything you need to develop a modern GUI application. All the code is open-source (GPL 3.0) and in the GitHub repo.

While the original FabGL had a game-development orientation, the addition of this new GUI functionality opens up a new range of applications. If you want to find out more about using the FabGL library, you can check out our previous coverage of the mostly game-oriented functions.

You can get a look at the new GUI functions in action in the video, after the break.

Continue reading “ESP32 Gets Advance Windowed Apps Using This VGA GUI Library”

Fly A Pi On Your Next Model Rocket

From time to time, we see electronics projects for model rocket instrumentation. Those who have been involved in the hobby for many years may remember when 8-bit microcontrollers like the PIC16F84 were the kind of hardware you might fly on a mission. These days, however, there’s little reason not to send a high-powered processor. This is exactly what [Mohamed Elhariry] has done with his PiX project, which turns a Raspberry Pi Zero W into a neat little flight data recorder.

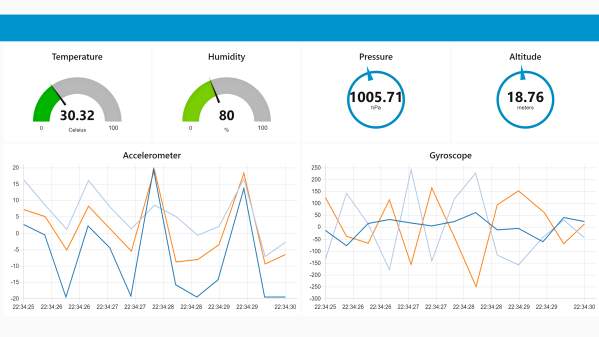
The hardware has what you might expect from a flight recorder, including accelerometer, gyroscope, and pressure sensor. In addition, it carries temperature and humidity sensors, and of course, a camera. A 64 GB microSD card provides the storage, while a LiPo SHIM board allows the whole thing to run from a 150 mAh battery. All of the components are off-the-shelf breakouts, which makes assembly as easy as soldering a few connections and securing the modules with a little tape.

The project is in GitHub, including python code, schematics for the hardware, and detailed instructions. If you ever wanted to get started with instrumenting a model rocket, this looks like a great resource. Also in the repo is a captured video from an actual flight [34 MB GIF] if you just want to see the view from one launch.

Using commercial modules seems pretty convenient, but if custom hardware is more your thing, check out these 22 mm round PCBs designed to fit inside rockets.

Reverse Engineering Cyclic Redundancy Codes

Cyclic redundancy codes (CRC) are a type of checksum commonly used to detect errors in data transmission. For instance, every Ethernet packet that brought you the web page you’re reading now carried with it a frame check sequence that was calculated using a CRC algorithm. Any corrupted packets that failed the check were discarded, and the missing data was detected and re-sent by higher-level protocols. While Ethernet uses a particularly common CRC, there are many, many different possibilities. When you’re reverse-engineering a protocol that contains a CRC, although it’s not intended as a security mechanism, it can throw a wrench in your plans. Luckily, if you know the right tool, you can figure it out from just a few sample messages.

A case in point was discussed recently on the hackaday.io Hack Chat, where [Thomas Flayols] came for help reverse engineering the protocol for some RFID tags used for race timing. Let’s have a look at the CRC, how it is commonly used, and how you can reverse-engineer a protocol that includes one, using [Thomas’] application as an example.

Continue reading “Reverse Engineering Cyclic Redundancy Codes”

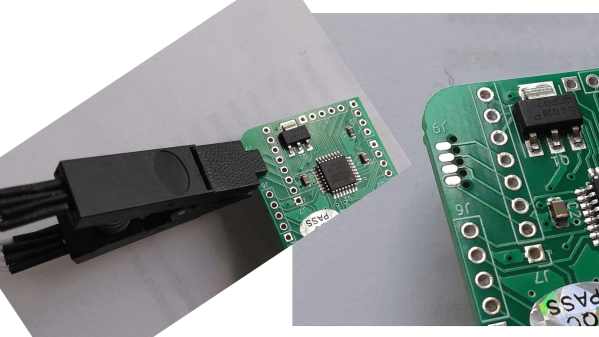
SOICbite: A Program/Debug Connector For An SOIC Test Clip

The problem is well-known: programming and debug headers consume valuable board space and the connectors cost money. Especially troublesome are the ubiquitous 100-mil pin headers, not because they’re expensive, but because they’re huge, especially along the z-axis. If you’re building miniature devices, these things can take up a ridiculous amount of space. With some clever thinking, [Simon Merrett] has found a way to re-use something many of us already have — an SOIC-8 test clip — to connect to a special footprint on the PCB without requiring another connector. He calls the system SOICbite.

The SOIC clip attaches to a footprint consisting of eight pads, four on each side of the PCB, plus five non-plated-through holes, which serve to anchor the clip in place. The idea of mating a PCB footprint directly with a removable connector isn’t entirely new — Tag Connect has been doing this for a while, but the connectors are expensive and single-sourced. On the other hand, SOIC test clips of varying quality are available from a number of vendors, including dirt-cheap deals on your favorite websites. The one disadvantage we can see is that the SOICbite footprint must be at the edge of the PCB to properly mate with the clip. The savings in space and cost may well make up for this, however.

[Simon] has made his KiCAD footprint available in a GitHub repo, and has offered to host footprints for any other CAD package there as well. So, fire up your preferred tool and draw one up for him to get these things widely adopted, because we think this is a great idea.

For the commercial alternative, check out our coverage of Tag Connect back in 2014.