When computers were the sort of thing you ordered from a catalog and soldered together in your garage, swap meets were an invaluable way of exchanging not just hardware and software, but information. As computers became more mainstream and readily available, the social aspect of these events started to take center stage. Once online retail started really picking up steam, it was clear the age of the so-called “computer show” was coming to a close. Why wait months to sell your old hardware at the next swap when you could put it on eBay from the comfort of your own home?
Of course, like-minded computer users never stopped getting together to exchange ideas. They just called these meets something different. By the 2000s, the vestigial remnants of old school computer swap meets could be found in the vendor rooms of hacker cons. The Vintage Computer Festival (VCF) maintained a small consignment area where attendees could unload their surplus gear, but it wasn’t the real draw of the event. Attendees came for the workshops, the talks, and the chance to hang out with people who were passionate about the same things they were.

Then came COVID-19. For more than a year we’ve been forced to cancel major events, suspend local meetups, and in general, avoid one another. Some of the conventions were revamped and presented virtually, and a few of them actually ended up providing a unique and enjoyable experience, but it still wasn’t the same. If you could really capture the heart and soul of these events with a video stream and a chat room, we would’ve done it already.
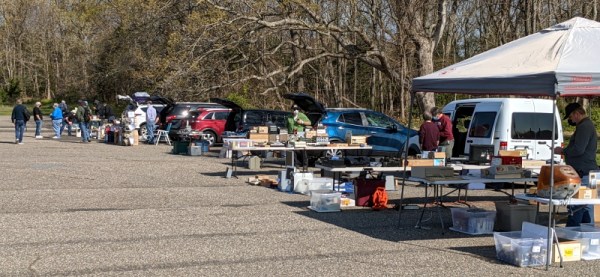
But this past weekend, the folks behind VCF East tried something a little different. As indoor gatherings are still strongly discouraged by New Jersey’s stringent COVID restrictions, they decided to hold a computer swap meet in the large parking lot adjacent to the InfoAge Science and History Museum. There were no formal talks or presentations, but you could at least get within speaking distance of like-minded folks again in an environment were everyone felt comfortable.
Continue reading “VCF Swap Meet Takes Step Back To Move Forward”