We know, we know. Generally speaking, you should try and switch your household devices over to rechargeable cells rather than using disposable alkaline batteries. But while they might seem increasingly quaint in the lithium-ion era, features such as a long shelf life make it worth keeping a pack of disposables around. So which ones should you buy? That’s what [Moragor] wanted to find out with his personal battery analyzer.
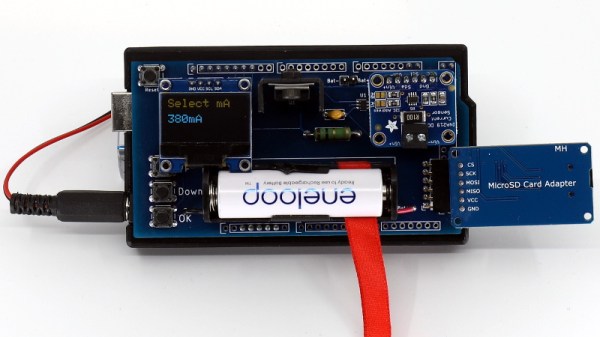
Designed as a shield for the Arduino Mega 2560, the analyzer combines a small programmable electronic load with a INA219 current sensor, OLED display, and SD card reader. The user selects the cutoff voltage and discharge rate before the test begins, and once it’s running, data is collected every second and saved to the SD card for later analysis. Once the battery voltage reaches the predetermined value, the test is over and you’re ready to put a new cell through its paces.
After testing 27 different brands of batteries, [Moragor] tabulated all the data and produced some helpful charts to illustrate the results. With few exceptions, the performance level for most of the batteries was remarkably similar. If anything, the test seemed to show that higher tier batteries from companies like Duracell and Energizer actually performed slightly worse than the mid-range offerings. Perhaps the biggest surprise is that, when the per-cell cost was factored in, the local cheapo batteries provided a better value than anything else in the test.
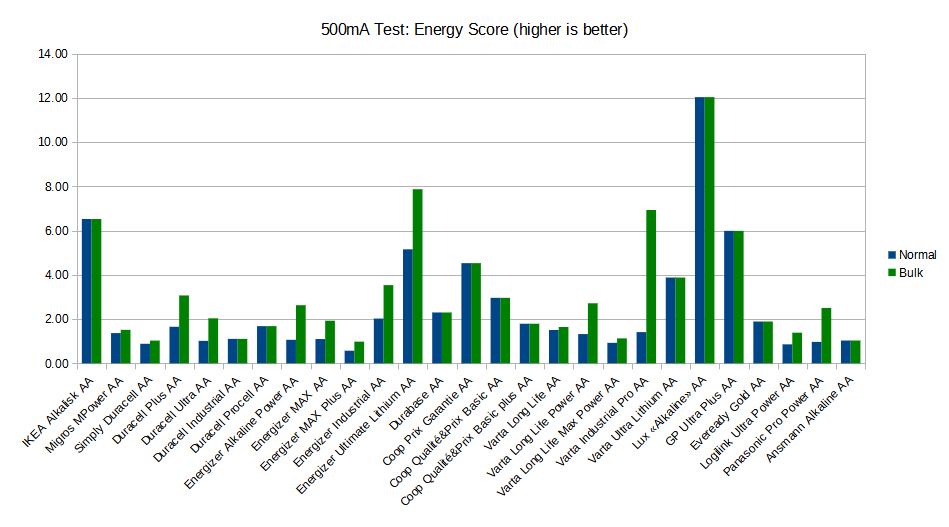
While the selection of battery brands may be different from where you live, the data [Moragor] collected is still a fascinating even if you don’t recognize some of the names on the chart. Of particular note is the confirmation that lithium batteries handily outperformed any of the Alkaline cells tested when it came to high-drain applications. We’d still rather they came in rechargeable form, but at least it’s a step in the right direction.