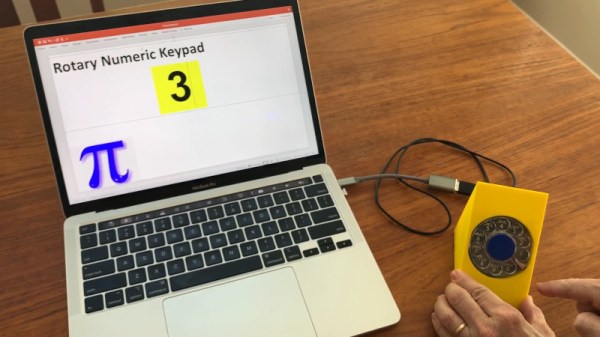
Many laptops eschew the numeric keypad to free up space, and some desktop keyboards have taken on the trend, too. If you want a specialised numeric entry device and have absolutely no interest in speed or ease of use, [jp3141] has just the build for you.
The idea is to use the rotary dial from an old telephone to enter numbers into a computer. It’s slow and cumbersome, but it’s also pretty entertaining. The build uses an old AT&T Trimline dialer, though we’re sure most rotary phones would work. The pulses produced by the dialer are counted by a Teensy microcontroller, which emulates a USB HID keyboard device and enters the relevant keystroke into the computer. There’s also a USB serial interface for debugging, and an LED which flashes along with the pulses from the dialer circuit.
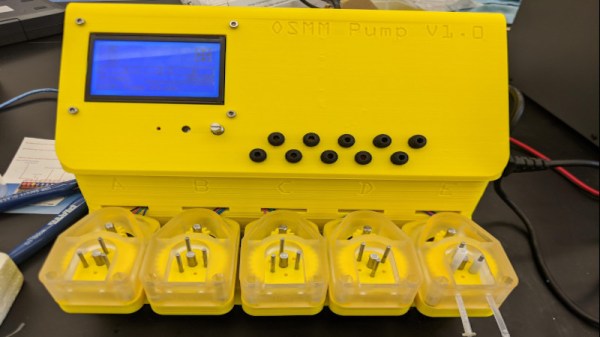
When it comes to research in fields such as chemistry or biology, historically these are things that have taken place in well-financed labs in commercial settings or academic institutions. However, with the wealth of technology available to the average person today, a movement has sprung up of those that run advanced experiments in the comfort of their own home laboratory. For those needing to work with very tiny amounts of liquid, [Josh’s] microfluidics pump may be just the ticket.
Consisting of a series of stepper-motor driven pumps, the hardware is inspired by modern 3D printer designs. The motors used are all common NEMA items, and the whole system is driven by the popular Marlin firmware. The reported performance is impressive, delivering up to 15 mL/min with accuracy to 0.1uL/min. That’s a truly tiny amount of fluid, and the device could prove highly useful to those exploring genetics or biology at home.
The great thing about this build is that it’s open source. [Josh] took the time to ensure that it was easily moddable to work with different tubing and materials, such that others could spin up a copy using whatever was readily available in their area. Performance will naturally vary, but if you’re experienced enough to build a microfluidic pump, you’re experienced enough to calibrate it, too. Design files are on Github for those keen to build their own.
The jet engine has a long and storied history. Its development occurred spontaneously amongst several unrelated groups in the early 20th Century. Frank Whittle submitted a UK patent on a design in 1930, while Hans von Ohain begun exploring the field in Germany in 1935. Leading on from Ohain’s work, the first flight of a jet-powered aircraft was in August 27, 1939. By the end of World War II, a smattering of military jet aircraft had entered service, and the propeller was on the way out as far as high performance aviation is concerned.
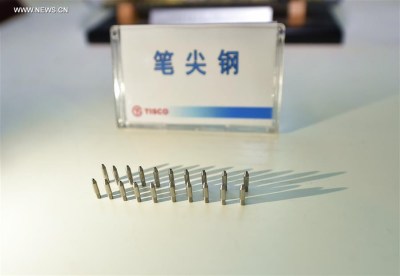
China’s development of ballpoint pen tips was a national news story in 2017. Source: Xinhua
In the age of the Internet and open source, technology moves swiftly around the world. In the consumer space, companies are eager to sell their product to as many customers as possible, shipping their latest wares worldwide lest their competitors do so first. In the case of products more reliant on infrastructure, we see a slower roll out. Hydrogen-powered cars are only available in select regions, while services like media streaming can take time to solve legal issues around rights to exhibit material in different countries. In these cases, we often see a lag of 5-10 years at most, assuming the technology survives to maturity.
In most cases, if there’s a market for a technology, there’ll be someone standing in line to sell it. However, some can prove more tricky than others. The ballpoint pen is one example of a technology that most of us would consider quaint to the point of mediocrity. However, despite producing over 80% of the world’s ballpoint pens, China was unable to produce the entire pen domestically. Chinese manufactured ballpoint tips performed poorly, with scratchy writing as the result. This attracted the notice of government officials, which resulted in a push to improve the indigenous ballpoint technology. In 2017, they succeeded, producing high-quality ballpoint pens for the first time.
The secrets to creating just the right steel, and manipulating it into a smooth rolling ball just right for writing, were complex and manifold. The Japanese, German, and Swiss companies that supplied China with ballpoint tips made a healthy profit from the trade. Sharing the inside knowledge on how it’s done would only seek to destroy their own business. Thus, China had to go it alone, taking 5 years to solve the problem.
There was little drive for pen manufacturers to improve their product; the Chinese consumer was more focused on price than quality. Once the government made it a point of national pride, things shifted. For jet engines, however, it’s somewhat of a different story.
When it comes to cyber security, there’s nothing worse than storing important secret data in plaintext. With even the greenest malicious actors more than capable of loading up a hex editor or decompiler, code can quickly be compromised when proper precautions aren’t taken in the earliest stages of development. To help avoid this, encryption can be used to hide sensitive data from prying eyes. While a simple xor used to be a quick and dirty way to do this, for something really sophisticated, polymorphic encryption is a much better way to go.
A helpful tool to achieve this is StringEncrypt by [PELock]. An extension for Visual Studio Code, it’s capable of encrypting strings and data files in over 10 languages. Using polymorphic encryption techniques, the algorithm used is unique every time, along with the encryption keys themselves. This makes it far more difficult for those reverse engineering a program to decrypt important strings or data.
While the free demo is limited in scope, the price for the full version is quite reasonable, and we expect many out there could find it a useful addition to their development toolkit. We’ve discussed similar techniques before, often used to make harder-to-detect malware.
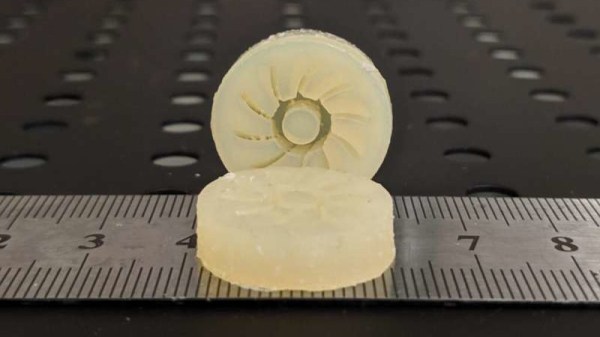
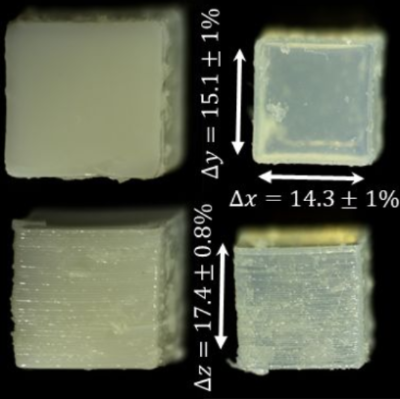
For those getting started with 3D printers, thermoplastics such as ABS and PLA are the norm. For those looking to produce parts with some give, materials like Ninjaflex are most commonly chosen, using thermoplastic polyeurethane. Until recently, it hasn’t been possible to 3D print latex rubber. However, a team at Virginia Tech have managed the feat through the combination of advanced printer hardware and some serious chemistry.
Sample cubes printed with the new process. Note the clarity of the sample at the top right.
The work was primarily a collaboration between [Phil Scott] and [Viswanath Meenakshisundaram]. After initial experiments to formulate a custom liquid latex failed, [Scott] looked to modify a commercially available product to suit the project. Liquid latexes are difficult to work with, with even slight alterations to the formula leading the solution to become unstable. Through the use of a molecular scaffold, it became possible to modify the liquid latex to become photocurable, and thus 3D printable using UV exposure techniques.
The printer side of things took plenty of work, too. After creating a high-resolution UV printer, [Meenakshisundaram] had to contend with the liquid latex resin scattering light, causing parts to be misshapen. To solve this, a camera was added to the system, which visualises the exposure process and self-corrects the exposure patterns to account for the scattering.
It’s an incredibly advanced project that has produced latex rubber parts with advanced geometries and impressive mechanical properties. We suspect this technology could be developed quickly in the coming years to produce custom rubber parts with significant strength. In the meantime, replicating flexible parts is still possible with available filaments on the market.
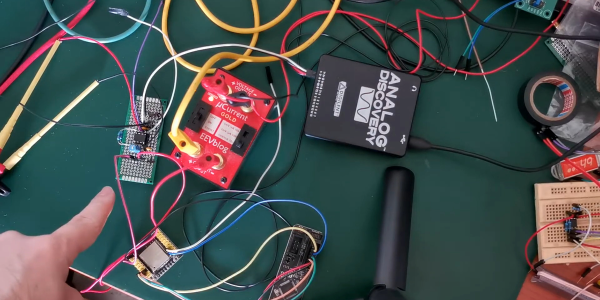
When it comes to the Internet of Things, many devices run off batteries, solar power, or other limited sources of electricity. This means that low power consumption is key to success. However, often these circuits draw relatively small currents that are difficult to measure, with plenty of transient current draw from their RF circuits. To effectively measure these low current draws, [Refik Hadzialic] built a cheap but accurate current probe.
The probe consists of a low value resistor of just 0.1 Ω, acting as a current shunt in series with the desired load. By measuring the voltage drop across this known resistor, it’s possible to calculate the current draw of the circuit.
However, the voltage drop is incredibly small for low current draws, so some amplification is needed. [Refik] does a great job of explaining his selection process, going deep into the maths involved to get the gain and part choice just right. The INA128P instrumentation amplifier from Texas Instruments was chosen, thanks to its good Common Mode Rejection Ratio (CMRR) and gain bandwidth.
The final circuit performs well, competing admirably with the popular uCurrent Gold measurement tool. While less feature-packed, [Refik]’s circuit appears to perform better in the noise stakes, likely due to the great CMRR rating of the TI part. It’s a great example of how the DIY approach can net solid results over and above simply buying something off the shelf.
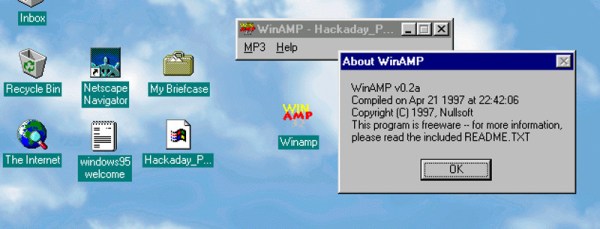
In the streaming era, music is accessed from a variety of online services, ephemeral in nature and never living on board the device. However, the online audio revolution really kicked off with the development of one very special format. The subject of bitter raps and groundbreaking lawsuits, this development from Germany transformed the music industry as we know it. Twenty-five years on from the date the famous “.mp3” filename was chosen, we take a look back at how it came to be, and why it took over the world.