Creating A Touch Pad Without Dedicated Hardware

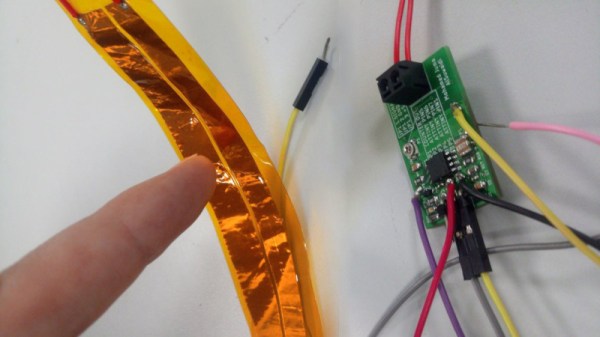
Year on year, microcontrollers and development platforms are shipping with ever-increasing feature sets. In the distant past, if you wanted an analog to digital converter or a PWM driver, you had to tack extra ICs on to your design. Nowadays, it’s all baked in at the factory. Of course, you may still find yourself working with a platform that lacks capacitive touch inputs. That’s no problem, though – you can do it all without dedicated hardware anyway!

Capacitive touch sensing works by creating an RC oscillator, and allowing the user to affect the capacitance in the circuit through touch or proximity. By sensing the changes in the frequency of the oscillator, it’s possible to determine whether the object or pad is being touched or not. As the capacitance changes can be small, sometimes it’s desired to use a high frequency oscillator, and then pass the output through a frequency divider, which allows changes to be measured more easily by a slower microcontroller.

[Gabriel] does a great job of both explaining the theory involved, as well as presenting a practical way to achieve this with basic hardware. If you need to add touch sensitivity to an existing or otherwise limited platform, this is an easy way to go about doing it. There are definitely some interesting things you can do with the technology, after all.
Marvelously Machined Clutch Masters Musical Marble Machine Mayhem

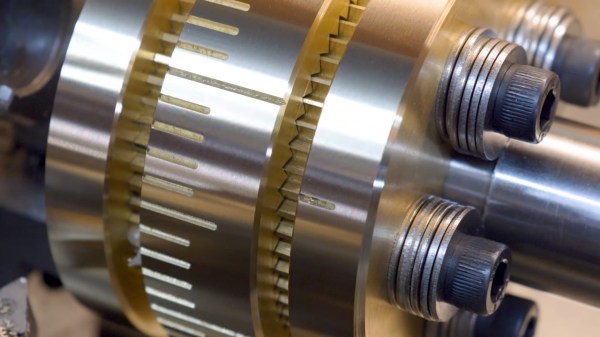
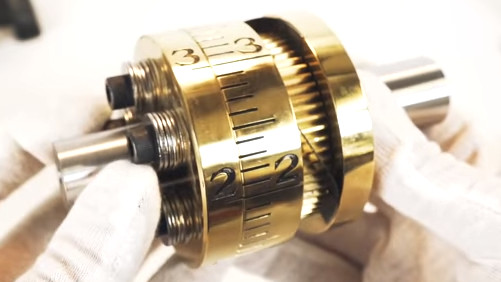
As far as marble runs go, few can hope to compete with [Wintergatan]’s amazing musical works. While undertaking the build of the Marble Machine X, timing problems became apparent. You can crank the machine faster or slower to alter the tempo, but the time it took marbles to drop due to gravity and hit an awaiting drum remains constant. You can’t control gravity, so you look to a mechanical solution in adjusting marble drops. In music, as in a jewel heist, timing is everything. Thankfully, [Machine Thinking] was on hand to collaborate, and a solution was found in the form of a beautifully machine indexable clutch.

The duo came together and designed a clutch, that would allow the timing relationship between various parts of the Marble Machine X to be varied. At 7:10 into the Wintergatan video below he gets down to brass tacks on how this brass music timing clutch actually works. At 90 BMP, the clutch allows the synchronization of the machine to be altered in approximately 10ms increments. Without this vital addition, drum beats would tend to slip out of time.

It’s a part that would challenge the novice, requiring the cutting of teeth and the inscription of accurate markings to allow it to do its job. However, it’s no trouble for [Machine Thinking], who shared a video of the machining process, including the outsourcing of the hand-engraved dial numbers.

Such a piece takes significant work to produce, and yet it is just one part of a much larger machine. We can’t wait to see the Marble Machine X finished, but if you’re unfamiliar with [Wintergatan]’s earlier works — you’re in for a treat.

Continue reading “Marvelously Machined Clutch Masters Musical Marble Machine Mayhem” →

Creating A Contest-Winning Amiga Demo Soundtrack

The Amiga platform took the world by storm in the 1980s. Developed by a crack team and brought to market by Commodore, the OCS chipset brought high-quality graphics and sound into the home computer market in a way never seen before. These capabilities cemented the Amiga’s place in the demoscene, and it maintains an active development community to this day. [Hoffman] is one such member of that community, and has shared some of the hacks that go into pulling off a banging soundtrack in a cutting-edge A500 demo.

The Amiga has 512 KB of so-called chip RAM, accessible by the custom chips and CPU for all tasks. There’s also commonly an additional 512 KB in a trapdoor under the machine, though it is limited in the ways it can be used. With these limits in place, [Hoffman] was overjoyed when the rest of the team allocated him a full 200 KB of memory for the soundtrack. In order to make the most of this precious resource, hacking ensued.

[Hoffman] does a great job of explaining all the tricks involved in creating a compelling 5 minute soundtrack in just 200 KB of RAM. There’s discussion of compression, sample sizes, and the vagaries of the ProTracker format. Smart hacks such as prioritized sample loading and pre-rendering drum loops also help to get the project over the line.

It’s a great write-up, which clearly explains the strategies used to help build a world-class demo soundtrack. [Hoffman] promises that the tricks used by the rest of the crew are equally as impressive, which we’re sure helped Eon to win the Amiga Demo Compo at Revision 2019. We’ve featured Revision winners here before, too. Demo video after the break.

Continue reading “Creating A Contest-Winning Amiga Demo Soundtrack” →

Scratch Built Smartwatch Looks Pretty Darn Sharp With 3D Printed Case And Round LCD

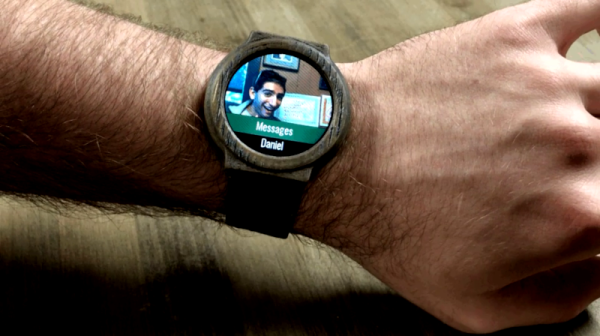
These days, if you want a smart watch, you’re spoiled for choice. The major smartphone players all have devices on the market, and there’s plenty of third party manufacturers vying for your dollar, too. You might think it’s impossible achieve the same finish with a 3D printer and a reflow oven, but you’re wrong. [Samson March] didn’t quite fancy something off the shelf, though, and instead build an amazing smartwatch of his own.

The beautiful case is printed in a woodfilled PLA — consisting of 70% plastic and 30% sawdust. This allows it to be sanded and stained for an attractive final product. Printing artifacts actually add to the look here, creating somewhat of a woodgrain effect. There’s a round LCD for a more classical watch look, which displays various graphics and even contact photos for incoming messages. Like most smartwatches on the market, it uses Bluetooth Low Energy for communication, and has a rechargeable lithium battery inside. Estimated battery life is approximately one week, depending on the frequency of use, and the recharging base he fabricated is as beautiful as the watch itself.

It’s a tidy build that shows off [Samson]’s design skills, and files are available on GitHub if you’d like to make your own. Laying out the full design in Fusion 360 prior to the build enabled the watch to be optimized for size constraints, creating an attractive and comfortable piece. With that said, if you’re a fan of a more hardcore electronic aesthetic, perhaps something 8-bit might be more your speed.

[via reddit, thanks to Aliasmk for the tip!]

Parasite ATtiny Resets Your ESP32 For You

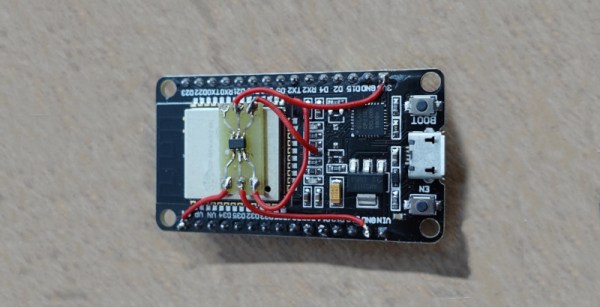
Embedded development can be a tough process. Between weird electrical gremlins, obscure bugs and our own mistakes, it can be a real struggle at times. To keep cognitive loads to a minimum, it’s best to make sure your tools are as simple and easy to use as possible. [tech] got tired of having to push a button to prepare the ESP32 for programming, and decided to solve the problem.

The solution comes via another microcontroller, in this case an ATtiny9. The small device listens in on the ESP32’s serial receiving pin. When it detects the Arduino IDE’s boot sequence on the line, it switches the BOOT0 and RESET lines on the ESP32, emulating the button presses to force it into programming mode.

Once you’ve become accustomed to one-click programming your ESP boards, you’re not going to want to go back. We could imagine this hack being replicated in a tidy piggyback format so it could be moved from board to board as workflow dictates.

If you’ve got an ESP32 lying around and don’t know what to do with it, you could always consider getting into game development.


3D Printing A Water Jet Drive

[Ivan Miranda] is always experimenting with 3D printing, and recently has been taking his work on the water. His latest creation is a racing paddle boat, but its performance left [Ivan] with a need for speed. Cue the development of the 3D printed water jet engine (YouTube link, embedded below).

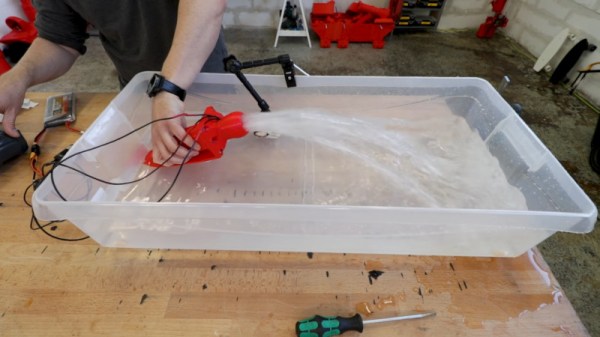
The basic principle of operation is simple. Water is sucked through an inlet, where it is accelerated by a turbine driven by a brushless motor. This turbine, in combination with stator fins, forces the water through the outlet, propelling the boat forwards in the process.

The first prototype is printed in PLA. Tolerances are good, thanks largely to [Ivan]’s experience and well-calibrated printers. After assembly, the engine is fired up, to great results. After sourcing a series of larger tubs in which to test the device, the engine is finally run up to full throttle and appears more than capable of shifting a serious amount of water.

We’d love to see a proper instrumented thrust test, particularly one that compares the device to other water jet drives on the market. Brushless motors make a great drive solution for RC boats, so we’re sure [Ivan] will be tearing up the lake real soon. Video after the break.

Continue reading “3D Printing A Water Jet Drive” →

Hacking A Cheap EBay Frequency Counter

eBay is a wondrous land, full of Star Wars memorabilia in poor condition, old game consoles at insane markups, and a surprising amount of DIY electronics. [TheHWCave] found himself tinkering with a common frequency counter kit, and decided to make a few choice improvements along the way (Youtube link, embedded below).

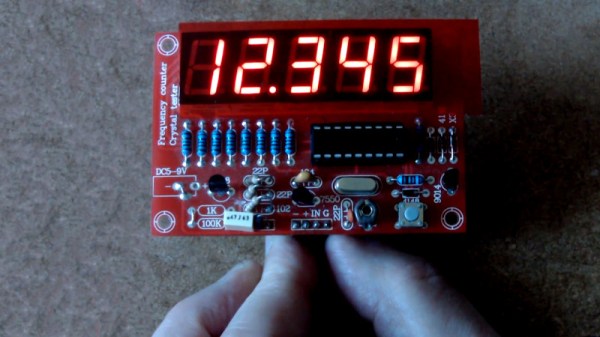
The frequency counter in question is a common clone version of [Wolfgang “Wolf” Büscher]’s minimalist PIC design. Using little more than a PIC16F628 and some seven-segment displays, it’s a competent frequency counter for general use. Clone versions often add a crystal oscillator tester and are available on eBay for a fairly low price.

[TheHWCave] found that the modifications were less than useful, and developed a way to turn the tester components into a more useful signal preamp instead. Not content to stop there, custom firmware was developed to both improve the resolution and also add a tachometer feature. This allows the device to display its output in revolutions per minute as opposed to simply displaying in hertz. By combining this with an optical pickup or other RPM signal, it makes a handy display for rotational speed. If you’re unfamiliar with the theory, read up on our phototachometer primer. If you’re looking to modify your own kit, modified firmware is available on Github.

We’ve seen other eBay kit specials modified before. Being cheap and using commodity microcontrollers makes them a ripe platform for hacking, whether you just want to make a few tweaks or completely repurpose the device.

[Thanks to Acesoft for the tip!]

Continue reading “Hacking A Cheap EBay Frequency Counter” →