3D Printing A Lifting Body Aircraft

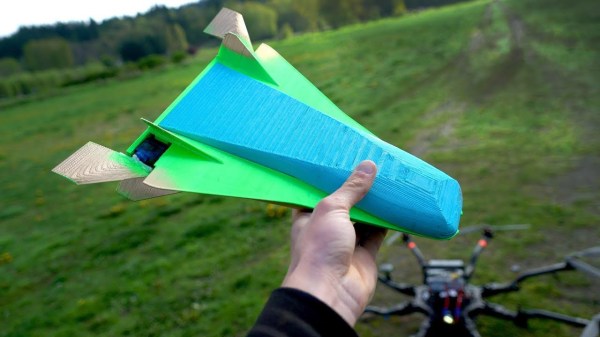
When you think of unconventional aircraft, flying wings have had plenty of time in the sun over the last few decades. With striking designs like the B-2 Spirit and F-117A Nighthawk on the flight line, it’s no surprise. The lifting body never really caught on, however, and it languishes in ignominy to this day. Despite their obscurity, [rctestflight] decided to 3D print a few lifting bodies for himself and take them out for a field test (YouTube video, embedded below).

Most aircraft have a body designed with low drag, and wings designed to provide lift. Lifting body aircraft focus the body design on providing that lift and often have no real wing to the design, needing only control surfaces to compliment the body. For this project, several different designs were constructed, with the craft being drop-launched from a multirotor at significant altitude. Initial tests were hamstrung by stability problems, both due to center of gravity issues and uncertain aerodynamic phenomena. The early designs were particularly prone to suddenly entering an unrecoverable flat spin. Later modifications included the addition of further stabilizers, which helped performance somewhat.

3D printing is a great way to experiment with aerodynamic phenomena, as it’s easy to create all manner of complicated geometries to tinker with. [rctestflight] has done solid work developing a basic craft, and we’d love to see the work continue with powered tests and more development. If flying wings are more your jam, though, you can 3D print those too. Video after the break.
Continue reading “3D Printing A Lifting Body Aircraft” →

Build A Plotter Using Scrap DVD Drives

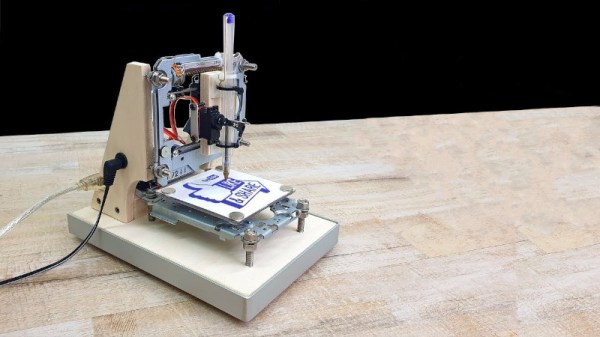
Building your own CNC machine can present a series of varied challenges. There are the software considerations, but also the mechanical side of things – motors, shafts, screws and slides all need to be addressed in a working design. Of course, you can always outsource some of the work – and that’s precisely what [Daniele Tartaglia] did with this pen plotter build (Youtube link, embedded below).

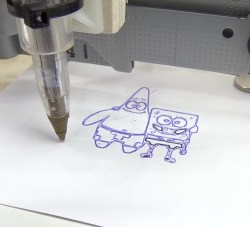
It’s a capable plotter, able to nicely reproduce both graphics and text.

The build gains X and Y axes by virtue of two salvaged DVD drives. The tray mechanisms come ready to go with stepper motors and lead screws already assembled, and make a great basis for a compact plotter. A wooden frame is constructed to hold everything together. The pen is held against the paper with a rubber band which helps the ballpoint to draw a nice dark line, with a servo used as a pen retract mechanism. An Arduino Uno with a stepper driver shield is then employed to run the show.

It’s a tidy build, with neat cable management and smart design choices giving it a pleasing aesthetic. The CNC fundamentals are good, too – with minimal backlash and slop, the plotter is able to draw quite effectively. Old optical drives are a popular choice for plotter builds, as it turns out. Video after the break.

Continue reading “Build A Plotter Using Scrap DVD Drives” →

Flying Sticks Are Now A Thing

Fixed-wing planes and helicopters are no longer the darling of the RC world. Even quadcopters and other multirotors are starting to look old hat, as the community looks to ever more outrageous designs. [rctestflight] has slimmed things down to the extreme with this coaxial bicopter build, also known as the Flying Stick (Youtube video, embedded below).

The initial design consists of two brushless outrunner motors fitted with props, rotating in opposite directions to cancel out their respective torques. Each is mounted on a gimbal, setup to provide control authority. iNav is used as a flight controller, chosen due to its versatile motor mixing settings. The craft was built to test its ability at recovery from freefall, as a follow-on from earlier attempts at building a brushless “rocket” craft.

Performance is surprisingly good for what is fundamentally two props on a stick. Initial tests didn’t quite manage a successful recovery, but the repaired single-gimbal version almost achieves the feat. Multirotors in general struggle with freefall recovery, so more research in this area is definitely worthwhile. Video after the break.

Continue reading “Flying Sticks Are Now A Thing” →

Mowerbot Keeping The Lawn In Check Since 1998

Mowing the lawn is a chore that serves as an excellent character building excercise for a growing child. However, children are expensive and the maintenance requirements can be prohibitive. Many instead turn to robots to lend a hand, and [Rue Mohr] is no exception.

[Rue]’s creation goes by the name Mowerbot, and was first built way back in 1998. Steel angle and brushed DC motors are the order of the day, helping the ‘bot get around the garden and chop the grass down to size. Being of such a vintage, there’s no Raspberry Pi or Arduino running the show here. No, this rig runs on the venerable 386, chosen primarily as it can run off just 5 V. The original build ran off a 5 1/4″ floppy, though it was later upgraded to CF card storage instead.

It’s not the first robot mower we’ve seen, but is likely one of the longest serving. It’s still in use today, though [Rue] reports it’s due for some new batteries. Given it’s been chewing up the grass for over two decades now, that’s fairly impressive performance. We hope to see this 386-driven beast still cutting away long into the future.

Get Your Acrylic Bends Just Right

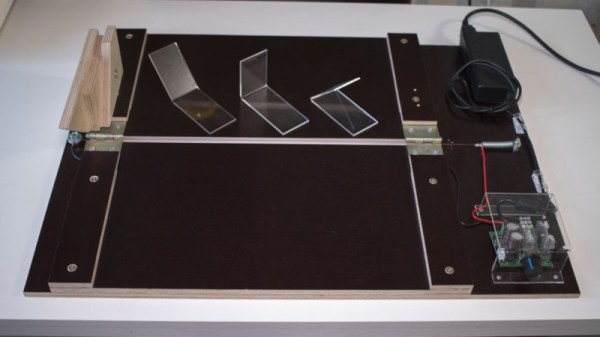
Acrylic is a popular material. It’s easy to find, attractive, and available in all manner of colors, thicknesses, and grades. Being a thermoplastic, it’s also simple to apply heat and form it in various different ways. If you’re wanting to build parts out of sheet acrylic, you might find a purpose-built bender useful. [DIY Perspective] built just such a tool to get the job done.

Plywood is used as the base of the tool, and several off-the-shelf hinges are used to make the folding apparatus. Stops are cut out of scrap wood to allow the bender to accurately recreate angles of 45, 90, and 135 degrees. Heat is supplied via a nichrome wire, powered by a laptop power supply and a PWM controller. This allows the temperature of the wire to be controlled, to avoid melting or otherwise damaging the acrylic being bent.

If you find yourself routinely working with acrylic, you might find this tool useful to have around the workshop. Vacuum forming may also be relevant to your interests. Video after the break.

Continue reading “Get Your Acrylic Bends Just Right” →

Get Coding With This Atari 2600 Development Suite

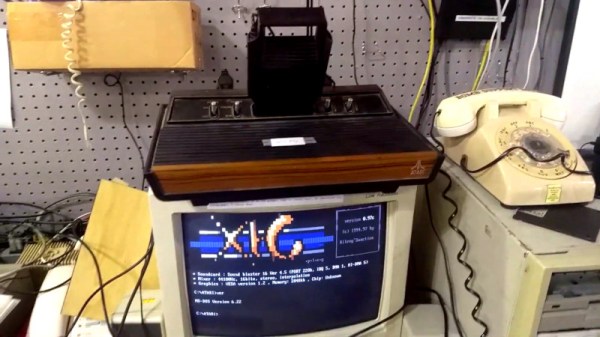
Sometimes the urge strikes to get busy coding for an old retro system, but unfortunately the bar to entry can be high. There’s a need to find a workable compiler, let alone trying to figure out how to load code onto original vintage hardware. It doesn’t have to be so hard, though. The team at [HeatSync Labs] built an Atari 2600 development station so hackerspace members can simply rock up and get to work.

With this rig, development is a multi-step process. A paper manual is on hand to provide detail of how to code for the Atari. An IBM PC is then on hand to allow the budding developer to code in assembly. This text file is then compiled into an Atari ROM, which is then passed through a special utility to convert it to an audio file. This is to allow it to be used with a Starpath Supercharger, which allows games to be loaded onto the Atari via cassette tape, or in this case, raw digital audio. By playing the audio file on the PC, connected to the Supercharger cartridge, it’s possible to run arbitrary code on the Atari 2600.

Programming in 6502 assembly isn’t the easiest mountain to climb for an absolute novice, but experienced coders will likely appreciate the no-fuss development environment. It makes for an easy gateway into the world of retro console programming, and there’s nothing like the fun of seeing your code running on original hardware.

We love a good story of retro development – like this tale of fixing a 37-year-old bug in an Apple II game. Video after the break.

Continue reading “Get Coding With This Atari 2600 Development Suite” →

JigFab Makes Woodworking Easier

Woodworking is an age-old craft that requires creativity and skill to get the best results. Experienced hands get the best results, while the new builder may struggle to confidently produce even basic pieces. JigFab is here to level the playing field somewhat.

Much of the skill in woodworking comes with mastering the various joints and techniques required to hold a piece together. Cutting these joints often requires specialized tools and equipment – ideally, some sort of jig. These jigs can be difficult to build in themselves, and that’s where JigFab shines.

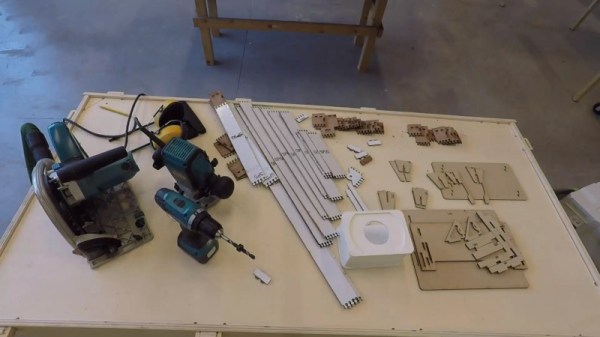
The workflow is straightforward and quite modern. A piece is designed in Autodesk Fusion 360. Various joints can then be defined in the model between individual parts. JigFab then generates a series of laser cut constraints that can be used with power tools to easily and accurately cut the necessary parts to build the final piece.

It’s an impressive technology which could rapidly speed the workflow of anyone experimenting with woodwork and design. There’s even smart choices, like having a toolkit of standard predefined elements that reduce laser cutting time when producing new constraints. If you’re eager to get stuck in to woodwork, but don’t know where to start, don’t worry – we’ve got a primer for that. Video after the break.

Continue reading “JigFab Makes Woodworking Easier” →