Home Brewing Rig Gets A Particle Upgrade

Home brewing is a pastime that can be as much an art or a science as you make it, depending on your predilections. [Brandon Satrom] is one who leans very much towards the science side. There’s plenty that can be done to monitor and control a brew, and [Brandon] is one of many who have built custom hardware to help get the best possible results. Now, that hardware was due for an upgrade.

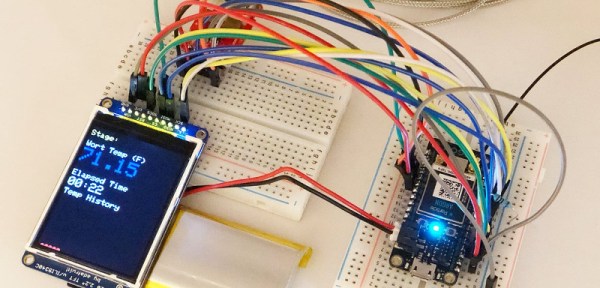
[Brandon]’s original BrewBuddy system relied on the Particle Photon, a useful platform that was nonetheless getting on in years. With the launch of the new Particle Argon, [Brandon] set his sights on new features that were possible with the added horsepower available. Graphics were added to the LCD screen, and a piezo sensor to detect the start of the fermentation process. This is in addition to the original temperature monitoring and plotting features of the first build.

The upgrade from one microcontroller platform to another can be fraught with headaches, but in this case, only minor changes were needed. 3 lines of code were changed to account for different pin assignments, and the rest fell neatly into place. It’s a testament to the compatibility of the Particle platforms that this upgrade was so easy.

We’ve talked about the 3rd generation Particle boards before, and we expect to see them turning up in many more builds to come. Video after the break.

[Thanks to dcschelt for the tip!]
Continue reading “Home Brewing Rig Gets A Particle Upgrade” →

A Game Boy Supercomputer For AI Research

Reinforcement learning has been a hot-button area of research into artificial intelligence. This is a method where software agents make decisions and refine these over time based on analyzing resulting outcomes. [Kamil Rocki] had been exploring this field, but needed some more powerful tools. As it turned out, a cluster of emulated Game Boys running at a billion FPS was just the ticket.

The trick to efficient development of reinforcement learning systems is to be able to run things quickly. If it takes an AI one thousand attempts to clear level 1 of Super Mario Bros., you’d better hope you’re not running that in real time. [Kamil] started by coding a Game Boy emulator in C. By then implementing it in Verilog, [Kamil] was able to create a cluster of emulated Game Boys that enabled games to be run at breakneck speed, greatly speeding the training and development process.

[Kamil] goes into detail about how the work came to revolve around the Game Boy platform. After initial work with the Atari 2600, which is somewhat of a defacto standard in RL circles, [Kamil] began to explore further. It was desired to have an environment with a well-documented CPU,  a simple display to cut down on the preprocessing required, and a wide selection of games.

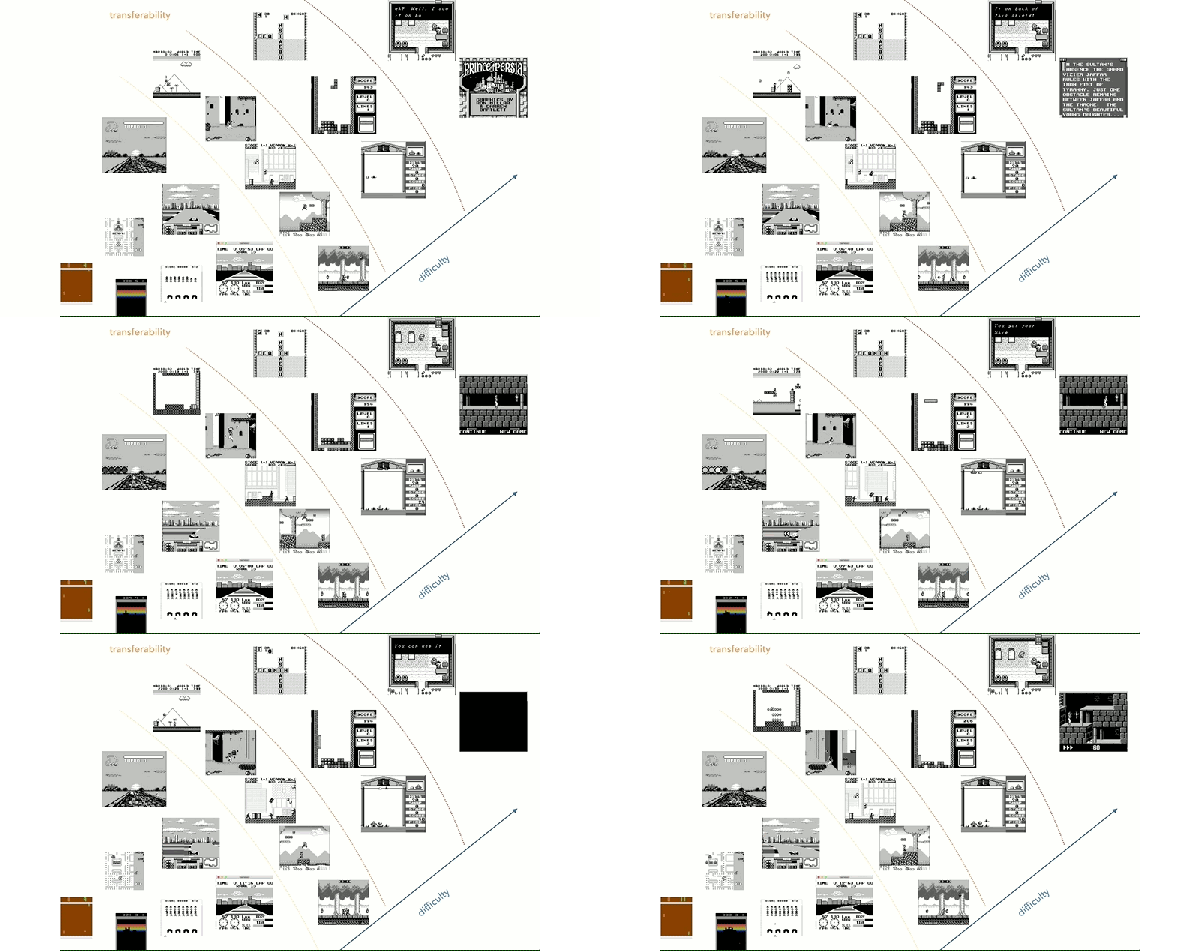
The goal of the project is to allow [Kamil] to explore the transfer of knowledge from one game to another in RL systems. The aim is to determine whether for an AI, skills at Metroid can help in Prince of Persia, for example. This is arguably true for human players, but it remains to be seen if this can be carried over for RL systems.

It’s rather advanced work, on both a hardware emulation level and in terms of AI research. Similar work has been done, training a computer to play Super Mario through monitoring score and world values. We can’t wait to see where this research leads in years to come.

This Vibrating Continuity Tester Is Quietly Useful

Continuity testing is one of the most valuable functions on the modern multimeter. It will help you investigate wiring problems in your car, tell you if you’re holding a nullmodem serial cable or the regular kind, and even reveal when you’ve accidentally shorted the data lines right to the power supply. However, all that beeping can get annoying, so [bitelxux] built a vibrating version instead.

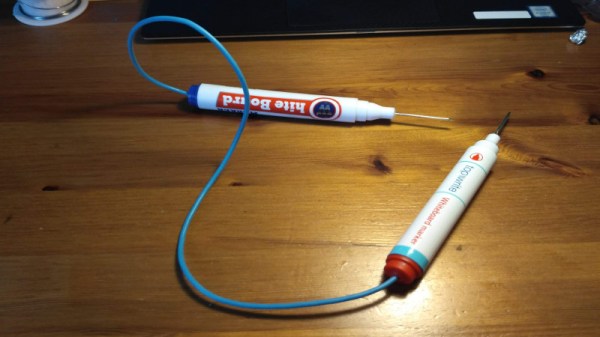
The build was borne out of necessity; [bitelxux]’s meter lacked a buzzer, and it grew frustrating to always look at the display. In order to allow late night hacking sessions to go on undisturbed, an unobtrusive vibrating tester was desired, as opposed to the usual audible type. Two whiteboard markers donated their shells to the hack, fitted with small nails to act as probes. Inside, a pager vibration motor is connected, vibrating when continuity is found. The circuit runs from a 1.5V AA battery which neatly fits inside the marker shell.

It’s a basic build, but gets the job done with a minimum of fuss using parts that most makers probably have lying around. Of course, you can always go a slightly more complicated route and throw an Attiny at the problem.

Emulating An Altair 8800 On An Apple II

The Altair 8800 was, to its creators, a surprise hit. Despite looking nothing like what we would today consider to be a computer, it sold thousands of units almost immediately upon its launch, way back in 1975. A few years later, the Apple II burst onto the scene, and the home computer revolution began in earnest.

Emulating older machines on newer hardware has always been a thing, and [option8] has coded an Altair 8800 emulator for the Apple II. Of course, if you don’t have one lying around, you can run this emulator on an Apple II emulator right in your browser. Honestly, it’s emulators all the way down.

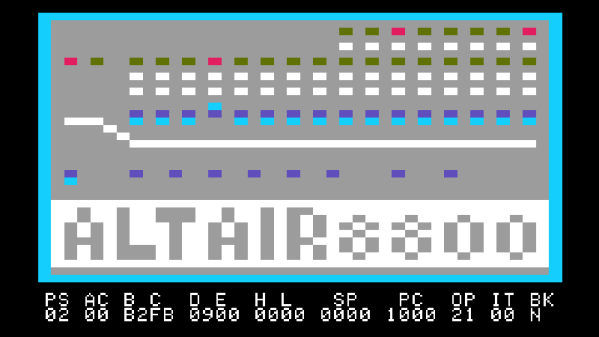
As far as emulators go, this is a particularly charming one, with the Altair’s front panel displayed in glorious color on the Apple’s 40 column screen. Replete with a full set of switches and blinking LEDs, it’s a tidy low-resolution replica of the real thing. Instructions to drive it are available, along with those for another similar emulator known as Apple80.

If that still hasn’t quenched your thirst, check out this Game Boy emulator that lives inside emacs.

ATtiny Gets A Tiny Software UART

Modern microcontroller platforms spoil us with their performance and expansive spec sheets. These days it’s not uncommon to be developing for a cheap micro that has a clock rate well in excess of 100MHz, with all manner of peripherals baked in. DACs, WiFi, you name it – it’s in there, with a bunch of libraries to boot. It wasn’t always this way, and sometimes you would even find yourself lacking hardware serial support. In these cases, the bitbanged software UART is your friend, and [MarcelMG] decided to document just how it’s done.

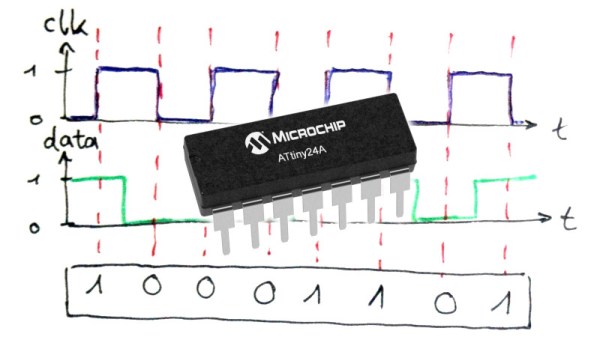
The amateur programmer’s first recourse may be to use delays to properly time the output data stream. This has the drawback of wasting processor cycles and doesn’t let the microcontroller do much else useful. Instead, [Marcel] discusses the proper way to do things, through the use of interrupt service routines and hardware timers.

[Marcel]’s implementation is for the ATtiny24A, though it should be easily portable to other AVR8 processors. Taking up just 2 bytes of RAM and 276 bytes of program space, it’s compact – which is key on resource-limited 8-bit devices. The code is available on Github if you fancy trying it out yourself.

It’s a technique that is more than familiar to the old hands, but useful to those new to the art. It can be particularly useful if you need to get data out of a legacy platform with limited options. As times change, it’s important to pass on the techniques of yesteryear to the new generation. Of course, if things are really tight, you can even do a half-duplex UART on a single pin.


3D Scanning Via DIY Photogrammetry

For those with 3D printers, taking a 3D model and spitting out a physical object is so routine as to be blasé. The reverse is something a little different. There are many ways to create a digital 3D model of a physical object, of varying complexity. [Eric Strebel] favors photogrammetry, and has shared a useful guide for those interested in using this technique.

In its most basic sense, photogrammetry refers to taking measurements from photographs. In the sense being discussed here, it more precisely refers to the method of creating a 3D model from a series of photographs of a physical object. By taking appropriate images of an object, and feeding them through the right software, it’s possible to create a digital representation of the object without requiring any special hardware other than a camera.

[Eric] shares several tips and tricks for getting good results. Surface preparation is key, with the aim being to create a flat finish to avoid reflections causing problems. A grey primer is first sprayed on the object, followed by a dusting of black spots, which helps the software identify the object’s contours. Camera settings are also important, with wide apertures used to create a shallow depth-of-field that helps the object stand out from the background.

With the proper object preparation and camera technique taken care of, the hard work is done. All that’s then required is to feed the photos through the relevant software. [Eric] favors Agisoft Metashape, though there are a variety of packages that offer this functionality.

We first reported on photogrammetry back in 2016. If cameras aren’t your thing, you can always give lasers a try. Video after the break.

Continue reading “3D Scanning Via DIY Photogrammetry” →

MIDI Grid Can Glow Up With The Best Of Them

Traditional musical instruments have a variety of interfaces, some simple, some complex. The piano is a fairly intuitive machine with a key for every note and a couple of pedals you can ignore if you like. The saxophone is a little more complex, with its many interoperable keys used to produce varying pitches. However, modern electronic instruments are not constrained by physicalities, and there has been an explosion in such devices that simply present a MIDI interface and a big pile of glowing addressable buttons. [Gediminas]’s MIDI Grid build is a great example of the type.

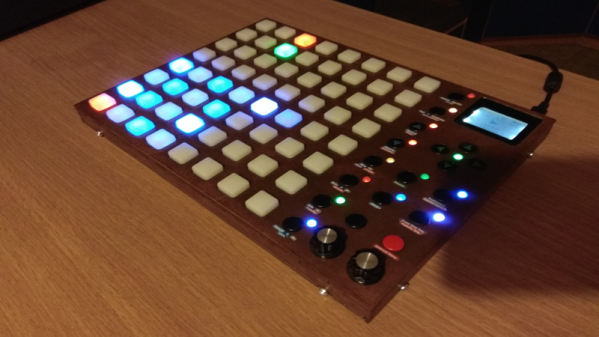
The build relies on an STM32 to do the heavy lifting, talking to an 8×8 array of buttons, each with addressable RGB LEDs. These are combined with silicone pads for a wonderfully tactile feel. There are then a further 17 buttons on the side for various purposes, along with two rotary encoders – useful for implementing smooth fades and intoxicating filter sweeps. Unusually for this type of instrument, in addition to USB there’s also a hardware serial MIDI interface. Finally, a Nokia 5110 LCD is implemented to display relevant data.

There are precious few details on the case, but it appears to be made from lasercut wood pieces, with a nice stain giving it a rich color. Buttons also have printed labels for a more professional look.

The build has functionality most similar to Novation’s Launchpad line. [Gediminas] currently has it working primarily with Ableton Live, however there is scope for further work to integrate the device with other DAWs or MIDI hardware.

With electronic instruments such as these, it’s possible to make musical life more accessible through smart design choices – and the Kord Kontroller is another great example.