What’s Mu Metal?

If you tear into old TVs or recording equipment, you may see shields made from some exotic-looking metal. Old timers will tell you it’s called mu metal, and its purpose is to — sort of — shield things from magnetic fields. The qualification is important. Unlike a conductive RF shield, mu metal doesn’t really stop a magnetic field. Instead, it gives magnetic flux an easier path to follow around whatever you’re trying to protect.

What’s In The Metal?

Mu metal belongs to a family of soft magnetic nickel-iron alloys. A typical modern formulation is about 80% nickel and 15% iron, with molybdenum and a few other elements making up most of the remainder. What makes it useful is its extremely high magnetic permeability. Commercial material can have relative permeability around 100,000 or more, and some specialty alloys can reach even higher.

You can think about reluctance as the magnetic equivalent of resistance. Put a high-permeability shell around something sensitive, and magnetic flux would much rather travel through the shell than through the space inside it, just like current tends to take the path of least resistance.

This works particularly well for DC and low-frequency fields, exactly where your usual copper or aluminum EMI shield isn’t much help.
Continue reading “What’s Mu Metal?”

Digital “Film” For Your Pi Camera

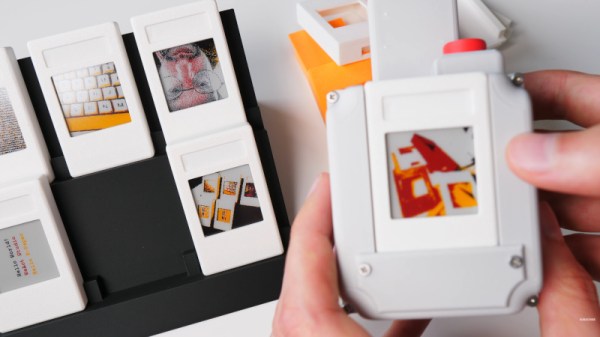
The formula of a Raspberry Pi camera is such that it’s almost a self-assembly kit of parts. Over the years we’ve seen a lot of attempts to make one that’s more impressive, usually due to a different take on a case design. It’s not often we see something genuinely out of the ordinary, and perhaps [Strange Inventions] has made one. He’s produced an instant camera where the “film” is a removable cartridge containing a color e-paper display.

It’s a straightforward enough idea: the camera writes the image to the display, and since these displays are persistent, there it stays. The displays connect via headers, and the cartridge slips in in a similar manner to a console game cartridge. They’re not cheap, but at least unlike a Polaroid or Instax cartridge, they are reusable.

You’ll have to pay up if you want to download the files, but it’s not outrageously expensive if you really want to build one. But perhaps the key here is that it’s not something beyond the abilities of the average Hackaday reader to make their own. We’re sure this idea will be expanded upon by others in due course.

Meanwhile, if it’s simpler instant photography you crave, you can always print the real thing.

Continue reading “Digital “Film” For Your Pi Camera”

A Flip Disc Display That Does It Slow And Steady

Flip disc displays can be quite a task to drive, what with having some sort of actuator mechanism for each and every dot in the display. [Zimm] has built an altogether different kind of flip disc display, though, which gets around this with a complexity all its own.

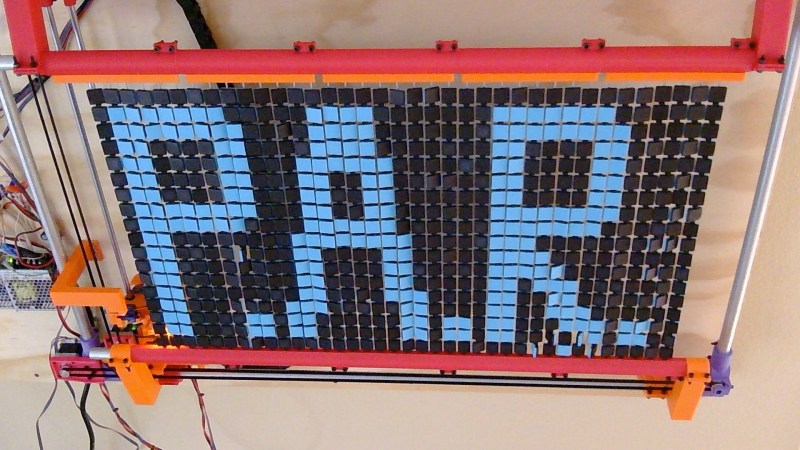
The idea behind the build is simple. There is still an array of discs, in this case, 37 x 18 square discs that are black on one side and blue on the other. However, they’re not actuated by magnets or any kind of per-disc flipper. Instead, a CNC machine is charged with flipping them one at a time. There’s a tool head that scans through the array, and uses a color sensor and LIDAR to identify which pixels to flip and how far to push them. It’s not fast, by any means, but it’s a perfectly cromulent way to build a flip disc display, as it turns out.

If you so desire, you can draw or upload images to be displayed on PAR yourself, right from your browser. The project reminds us quite a lot of various plotters we’ve covered over the years, perhaps more than a traditional flip disc display, even.

Continue reading “A Flip Disc Display That Does It Slow And Steady”

Making A Robot To Serve Some Mean Badminton Shuttlecocks

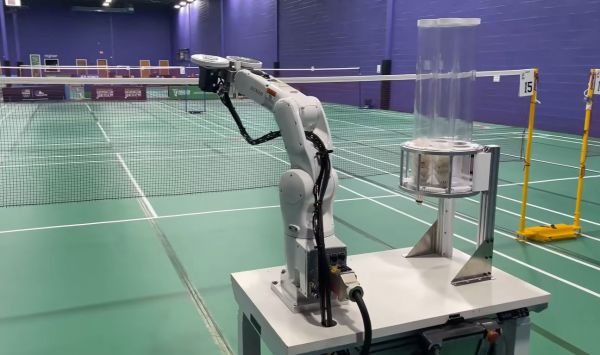
Sometimes regarded as a less violent form of tennis, badminton is still a pretty challenging sport. One which suffers like so many sports from requiring at least two players since magically flying balls and shuttlecocks haven’t been invented yet. After years of tinkering on a shuttlecock serving robot, [Travis Mitchell] hit upon the idea to convert a small industrial robotic arm for the purpose.

The target of this conversion is a positively cute-sized Denso VS050 robotic arm, with Denso helpfully providing a 3D model of the arm as a solid jumping-off point in a CAD project. Here the task of the robotic arm is two-fold: one is to grab a fresh shuttlecock from a hopper with a pneumatic grabber, the other is to feed it into the spinning wheels that grip and launch it. Fortunately [Travis] has a pretty tricked-out workshop available, including the ability to 3D print metal parts, making building the prototype a snap.

After initially thinking of using a Raspberry Pi Pico, he ended up using an ATmega AVR due to the input-output requirements when communicating with the arm. Using a height-adjustable desk as the base, the whole assembly was put together for some testing on the badminton court.

With most of the testing having been done in the shop already, the remaining issue was to determine the best disc material, as the two high-speed discs that grip the shuttlecock must be well-balanced and not stretch too much. Ultimately a 3D printed plastic disc with a silicone strip as gripping surface was found to work pretty well, allowing for the robot to finally start serving its function.

Continue reading “Making A Robot To Serve Some Mean Badminton Shuttlecocks”

Get Your Monitor Transmitting VHF With A Browser Tool

If you’re intending to transmit on the VHF band, you’re probably going to reach for a handheld or some kind of rackmount rig in your ham shack. But you needn’t bother with all that complexity, when you can use the computer on your desk to spit out such signals using a simple browser tool from [Efe].

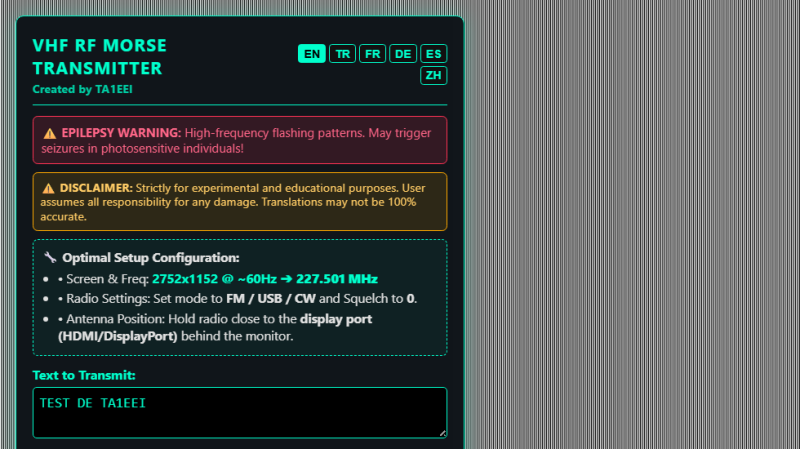
The concept is straightforward—[Efe]’s tool manipulates pixel clocks in order to create spurious transmissions from your computer’s graphics hardware. The math pencils out pretty easily—multiply the horizontal resolution by the vertical resolution by the refresh rate, while paying attention to the precise timing of the video standard your monitor is using, and you’ve got your transmission frequency. For example, for a screen displaying 1080p at 60 Hz, with the CEA-861 timing standard, your horizontal and vertical resolutions are 2200 and 1125 respectively when paying attention to the requisite blanking intervals. Multiply those by 60 hz, and you’ll find you’re creating a signal at 148.500 MHz. Leverage this by displaying the right pattern of black and white pixels to maximise changes in voltage state on the HDMI or DisplayPort lines, and you might create a strong enough signal that you can actually pick something up. [Efe] created a tool to display these patterns to send simple Morse code messages over VHF just by flickering your screen just right.

You can test the transmitter tool for yourself here, right in your browser. You’ll want to hold your radio’s antenna nice and close to the monitor to see if you can pick up much of a signal. After all, the monitor, connectors, and cable are all built to optimize for clear signal transmission to the display, while preventing signal from leaking out to interfere with surrounding equipment.

Of course, a fair warning—you’re not supposed to intentionally transmit on bands you’re not licensed for, even if it’s incredibly weak and unlikely for anyone else to notice in a scenario like this. Still, it’s an interesting project that shows you just how electromagnetic interference can leak out of just about anything under the right conditions.

Hackaday Links Column Banner

Hackaday Links: August 30, 2026

The big news today is, of course, the successful launch and deployment of NASA’s Nancy Grace Roman Space Telescope earlier this morning. The space agency’s latest observatory lifted off at 7:26 AM Eastern from Launch Complex 39A at Kennedy Space Center aboard a SpaceX Falcon Heavy, and by 8:00 AM it was separated from the rocket’s upper stage and flying on its own.

While the sound and fury of launch is exciting, it’s just the beginning of the journey for Roman. It will take several months for the spacecraft to complete its roughly 1.5 million-kilometer trek out to Earth’s second Lagrange point (L2), where it will set up shop near — in cosmic terms, anyway — the James Webb Space Telescope (JWST). Along the way, it will switch on and test various systems and components, with its primary 300 megapixel infrared camera scheduled to power up in three weeks or so.

There’s a lot to cover about the Roman Space Telescope. Built from spy satellite spare parts donated by the National Reconnaissance Office and featuring a field of view 100 times greater than that of Hubble, its launch is widely considered to be one of the most important scientific milestones of the decade. We’ll be bringing you more about the past, present, and future of this flagship mission as it progresses.

Continue reading “Hackaday Links: August 30, 2026”

Dissecting A Lethal Universal Travel Adapter

The world’s refusal to standardize on a single type of mains power outlet has led to a vibrant market of so-called travel adapters, all of which try to outdo each other in convenience and universality. This comes at the cost of complexity, something which ultimately reflects in the price. The cheapo $9.26 universal travel adapter that [Brainiac 75] got off an online retailer’s site is thereby a good example of how safety suffers if the overarching goal is to ‘make it cheap’.

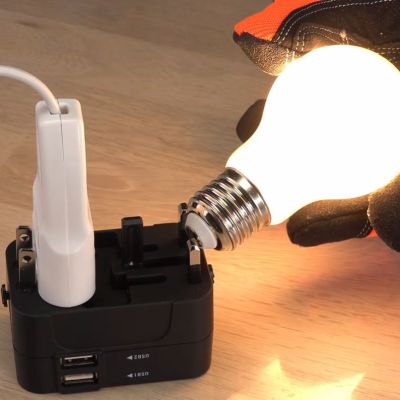
The first exciting discovery is that when you plug any of its three sets of connectors into an outlet, the others become live at the same voltage. This would suggest that they’re just wired together, a fact soon confirmed with a quick resistance check between the respective prongs. Though to the adapter’s credit, the prongs are not live when fully retracted into the enclosure. Yet as demonstrated in the video, the retracting of prongs is not enforced, so mistakes here are possible.

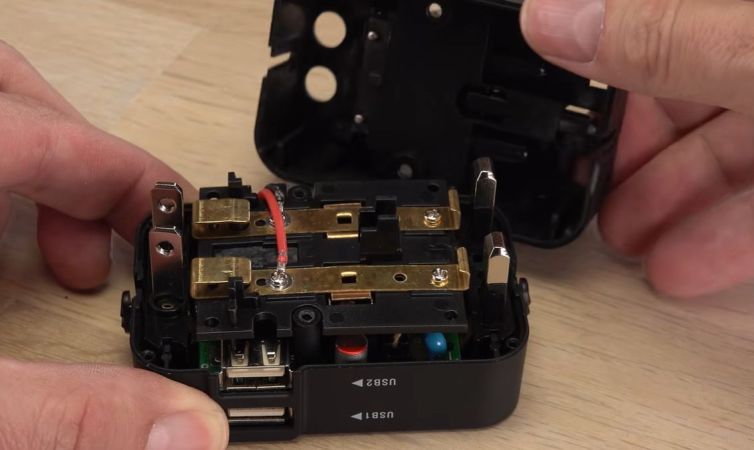
The adapter also has two USB ports that claim to provide 5 V at 2.1 A, with as it turns out no hard cut-off. This is probably the best part of the adapter despite not featuring any advanced charging features. After opening the adapter, you can see that the sliding mains prongs connect to a central bus bar when either unfolded or extended, which is definitely straightforward, but doesn’t enforce that only one type of prongs can be used at any given time.

To make it safer, [Brainiac75] removed the less useful US and UK plugs, taping over the empty holes. It’s now just a USB charger with a universal mains port to plug random non-EU plugs into, which is probably relatively safe and a better idea than really using it as a travel adapter.

Continue reading “Dissecting A Lethal Universal Travel Adapter”