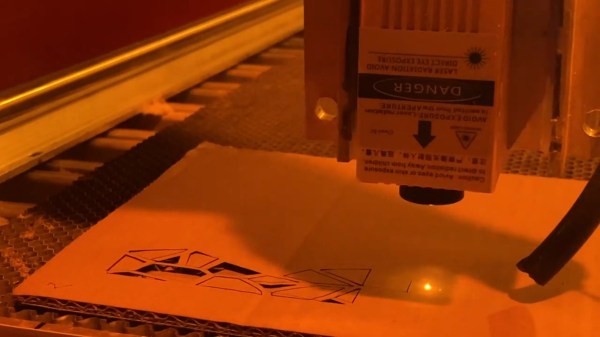
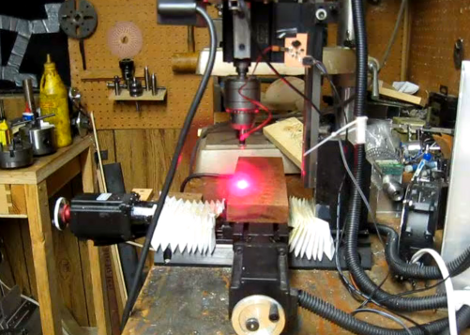
The laser module shown cutting shapes out of a piece of cardboard that's lying on the CNC's work surface

Giant CNC Partners With Powerful Laser Diode

[Jeshua Lacock] from 3DTOPO owns a large-format CNC (4’x8′, or 1.2×2.4 m), that he strongly feels is lacking laser-cutting capabilities. The frame is there, and a 150 W CO2 laser tube has been sitting in a box for ages – what else could you need? Sadly, at such a scale, aligning the mirrors is a tough and finicky job – and misalignment can be literally blinding. After reading tales about cutters of such size going out of alignment when someone as much as walked nearby, he dropped the idea – and equipped the CNC head with a high-power laser diode module instead. Having done mirror adjustment on a few CO2 tube-equipped lasers, we can see where he’s coming from.

Typically, the laser modules you see bolted onto CNC heads are firmly under three watts, which is usually only enough for engraving. With a module that provides 5 watts of optical power, [Jeshua] can cut cardboard and thin plywood as well he tells us even 10 W optical power modules are available, just that he didn’t go for one. We reckon that 20 W effective power diodes are not that far into our future, which is getting very close to the potential of the blue box “40 W but actually 35 W but actually way less” K40 laser cutters we cherish. [Jeshua]’s cutter is not breaking speed limits, but it’s built on what’s already there, and the diode is comparatively inexpensive. Equipped with a small honeycomb surface and what seems to be air assist, it’s shown in the video cutting an ornamental piece out of cardboard!

We hackers have been equipping CNCs with laser diodes for a while, but on a way smaller scale and with less powerful diodes – this is definitely a step up! As a hacker, you should have at least some laser cutting options at your disposal, and this overview of CO2 cutters and their availability can get you started. We’ve also given you detailed breakdowns about different sides of laser cutting, be it the must-have of safety, or the nice-to-have of air assist.

Continue reading “Giant CNC Partners With Powerful Laser Diode”

Hackaday Prize Entry: Characterizing LED And Laser Diodes

Needless to say, we’re fascinated by LEDs, laser diodes, and other blinkies. Although we can get just about any light emitting thing, the data sheets aren’t always accurate or available. For his Hackaday Prize entry, [Ted] is building a device to characterize the efficiency, I/V curve, and optical properties of all the blinkies. It’s a project to make glowy stuff better, and a great entry for the Hackaday Prize.

The inspiration for this project came from two of [Ted]’s projects, one requiring response curves for LEDs, and laser diodes for another. This would give him a graph of optical output vs. current, angular light output distribution, and the lasing threshold for laser diodes. This data isn’t always available in the datasheet, so a homebrew tool is the only option.

The high-level design of this tool is basically a voltmeter and ammeter measuring a glowy diode, producing IV curves and measuring optical output. That takes care of all the measurements except for the purely optical properties of a LED. This is measured by a goniometer, or basically putting the device under test on a carriage attached to a stepper motor and moving it past a fixed optical detector.

If you’re wondering why this device is needed and a simple datasheet is insufficient, check this out. [Ted] measured the efficiency of a Luxeon Z LED, and found the maximum efficiency is right around 10mA. The datasheet for this LED shows a nominal forward current of 500mA, and a maximum of 1000mA. If you just looked at the datasheet, you could easily assume a device powered for years by a coin cell would be impossible. It’s not, and [Ted]’s device gave us this information.

Sciencing DVD-RW Laser Diodes

If you’ve played around with laser diodes that you’ve scavenged from old equipment, you know that it can be a hit-or-miss proposition. (And if you haven’t, what are you waiting for?) Besides the real risk of killing the diode on extraction by either overheating it or zapping it with static electricity, there’s always the question of how much current to put into the thing.

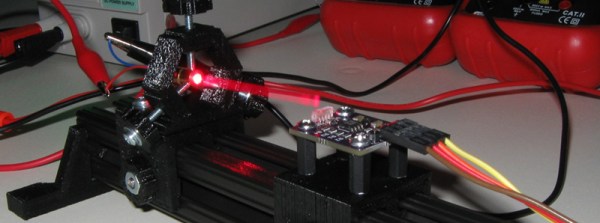
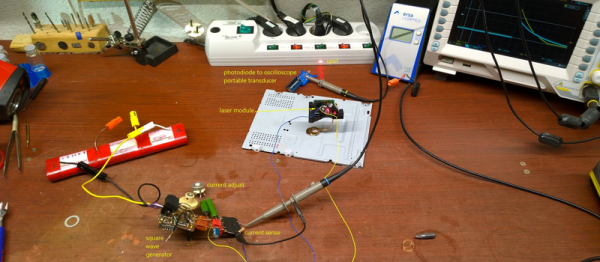
[DeepSOIC] decided to answer the latter question — with science! — for a DVD-burner laser that he’s got. His apparatus is both low-tech and absolutely brilliant, and it looks like he’s getting good data. So let’s have a peek.

Laser Detector on 3D Printer Scrap

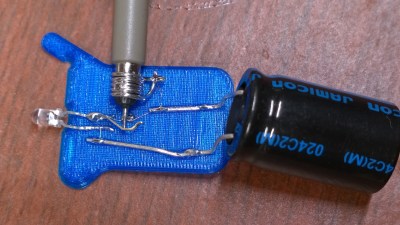
First up is the detector, which is nothing more than a photodiode, 100k ohm load resistor, and a big capacitor for a power supply. We’d use a coin-cell battery, but given how low the discharge currents are, the cap makes a great rechargeable alternative. The output of the photo diode goes straight into the scope probe.

He then points the photodiode at the laser spot (on a keyboard?) and pulses the laser by charging up a capacitor and discharging it through the laser and a resistor to limit total current. The instantaneous current through the laser diode is also measured on the scope. Plotting both the current drawn and the measured brightness from the photodiode gives him an L/I curve — “lumens” versus current.

laser_curve

Look on the curve for where it stops being a straight line, slightly before the wiggles set in. That’s about the maximum continuous operating current. It’s good practice to de-rate that to 90% just to be on the safe side. Here it looks like the maximum current is 280 mA, so you probably shouldn’t run above 250 mA for a long time. If the diode’s body gets hot, heatsink it.

If you want to know everything about lasers in general, and diode lasers in particular, you can’t beat Sam’s Laser FAQ. We love [DeepSOIC]’s testing rig, though, and would love to see the schematic of his test driver. We’ve used “Sam’s Laser Diode Test Supply 1” for years, and we love it, but a pulsed laser tester would be a cool addition to the lab.

What to do with your junk DVD-ROM laser? Use the other leftover parts to make a CNC engraver? But we don’t need to tell you what to do with lasers. Just don’t look into the beam with your remaining good eye!

DVD Laser Diode Used To Build A Laser Engraver

[Johannes] has been reading Hackaday for years but this is the first project he’s tipped us off about. It’s a laser engraver built from a DVD burner diode (translated). It turned out so well we wonder what other projects he’s forgotten to tip us off about?

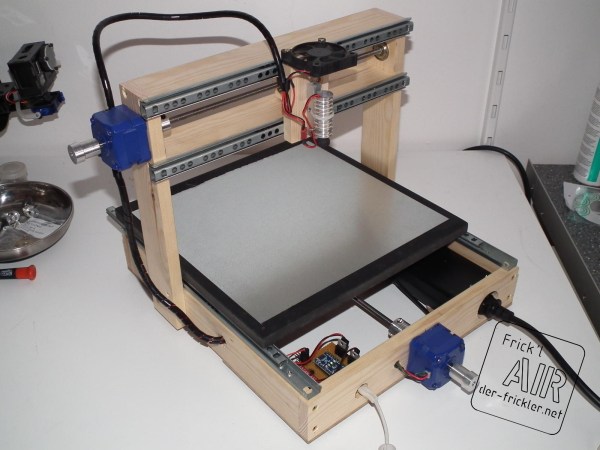
This is the second CNC machine he’s seen through from start to finish. It improves upon the knowledge he acquired when building his CNC mill. The frame is built from pine but also uses bits of plywood and MDF. It can move on the X and Y axes, using drawer sliders as bearings. The pair of blue stepper motors drive the threaded rods which move the platform and the laser mount. Just above the laser he included a small DC fan to keep it from burning up. The control circuitry is made up of an Arduino Nano and a stepper motor driver board. Catch a glimpse of the engraver cutting out some stencil material after the break.

There must be something about Spring that brings out the urge to work with laser diodes. We just saw a similar 1W cutter last week.

Continue reading “DVD Laser Diode Used To Build A Laser Engraver”

Laser Diode Controller For A CNC Mill

[Smells of Bikes] wanted to add laser etching to the list of tricks his home CNC setup is capable of. He has a diode which will work for the task, but he needed a driver that could be interfaced with the CNC system. He ended up designing a driver board based around the LM3402 chip.

Now driving one of these laser diodes isn’t all that different from driving a Light Emitting Diode. He chose to use the LM3402 chip because he’s the TI engineer who designed the official evaluation board for the part. It’s meant for high-power LED applications, and the 700 mA he needs for the laser is within spec. Since he’s soldering by hand, and this part has a ground pad on the bottom, he shares his soldering technique in detail. Once the driver board is ready, he uses a ‘sed’ command to replace the g-code Z axis commands with digital on/off commands to switch the diode.

Check out the demo video after the break. He uses a diffuse beam since the cutting beam is bright enough to damage his camera.

Continue reading “Laser Diode Controller For A CNC Mill”

RGB Laser Diode Projector


[fl-consult] published this interesting RGB laser diode projector. The build uses three lasers, 532nm green, 660nm red and a 405nm blue diode from an XBox 360 HD-DVD drive. Aside from the salvaged diodes, it uses some off the shelf hardware to power and scan the lasers to make the display. Details are a bit lacking, but google translate helps a bit. If you’re not quite sure what’s going on: the three lasers bounce off of a set of mirrors that scan from side to side as well as up and down to create images.

Review: WAINLUX K8, A Diode Laser That’s Ready To Work

Rarely a week goes by that some company doesn’t offer to send us their latest and greatest laser. You know the type — couple of aluminum extrusions, Class 4 diode flopping around in the breeze, and no enclosure to speak of unless you count the cardboard box they shipped it in. In other words, an accident waiting to happen. Such gracious invitations get sent to the trash without a second thought.

Now don’t get me wrong, I have no doubt that the average Hackaday reader would be able to render such a contraption (relatively) safe for use around the shop. Build a box around it, bolt on a powerful enough fan to suck the smoke out through the window, and you’ve turned a liability into a legitimate tool. But the fact remains that we simply can’t put our stamp on something that is designed with such a blatant disregard for basic safety principles.

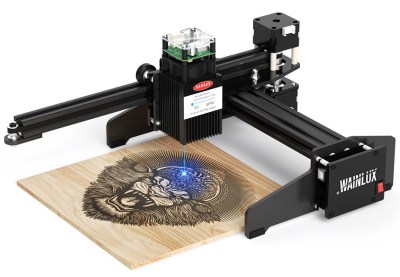
The earlier WAINLUX JL4 — lucky rabbit foot not included.

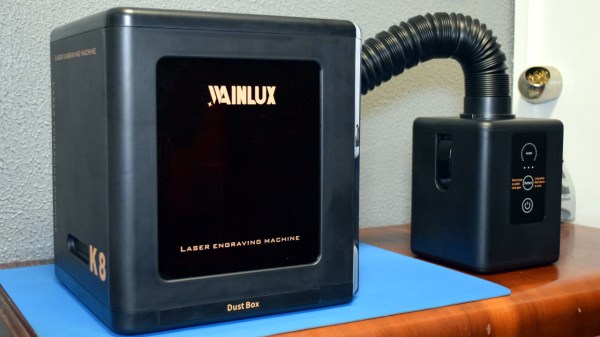
That being the case, a recent email from WAINLUX nearly met the same fate as all those other invitations. But even at a glance it was clear that this new machine they wanted to send out, the K8, was very different from others we’d seen. Different even from what the company themselves have put out to this point. This model was fully enclosed, had a built-in ventilation fan, an optional air filter “sidecar”, and yes, it would even turn off the laser if you opened the door while it was in operation. After reading through the promotional material they sent over, I had to admit, I was intrigued.

It seemed like I wasn’t the only one either; it was only a matter of days before the Kickstarter for the WAINLUX K8 rocketed to six figures. At the time of this writing, the total raised stands at just under $230,000 USD. There’s clearly a demand for this sort of desktop laser, the simplicity of using a diode over a laser tube is already appealing, but one that you could actually use in a home with kids or pets would be a game changer for many people.

But would the reality live up to the hype? I’ve spent the last couple of weeks putting a pre-production WAINLUX K8 through its paces, so let’s take a look and see if WAINLUX has a winner on their hands.

Continue reading “Review: WAINLUX K8, A Diode Laser That’s Ready To Work”