PCB Laser Printer

PCB Toner Transfer Method, Now Without The Transfer

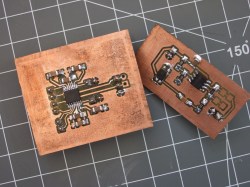
A common way to create a custom PCB at home is to do what is called the Toner Transfer Method. In this process, the trace layout of the board is printed out on a piece of special toner transfer paper that allows the ink to come off in the following step. The toner transfer paper is then put print-side-down on a copper clad PCB blank, heated and pressed with an iron. The heat and pressure from the iron transfers the toner from the paper to the copper. The exposed copper then is chemically removed, the previously applied toner protects the copper in the pad and trace areas. The toner is then removed using paint thinner.

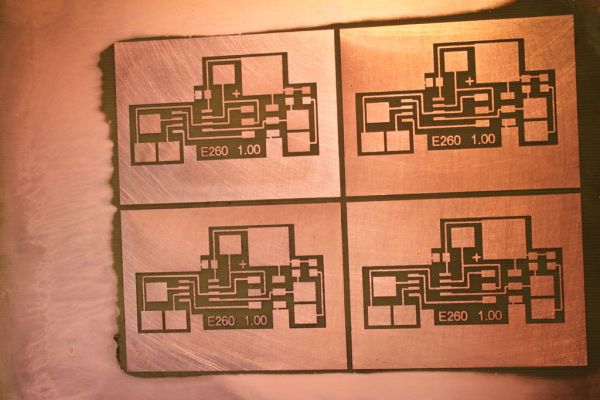
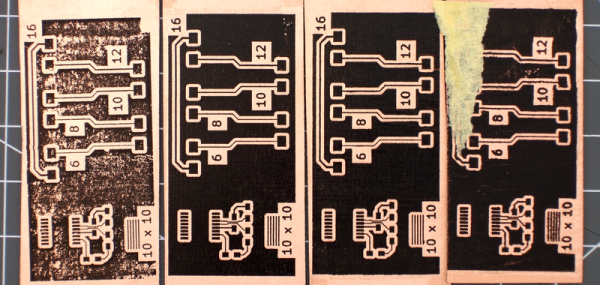
That is a long process with many critical steps. [mlerman] wondered why no one was printing the toner directly to the PCB. He has been tinkering with printing directly on PCB blanks for 4 years now. He’s made hundreds of boards over that time and can now make a PCB in under 15 minutes.

The obvious route to take would be to modify a current laser printer to accept the much-thicker-than-paper PCB boards. A few printer models were tried but [mlerman] feels the Lexmark E260 works the best due to the cost, internal mechanical components and an easily modifiable manual feed system. There is also a Local Printer Utility that allows the majority of the printer parameters to be adjusted.

Continue reading “PCB Toner Transfer Method, Now Without The Transfer”

£D printed parts with glossy toner transfer images on

Add Full-Color Images To Your 3D Prints With Toner Transfer

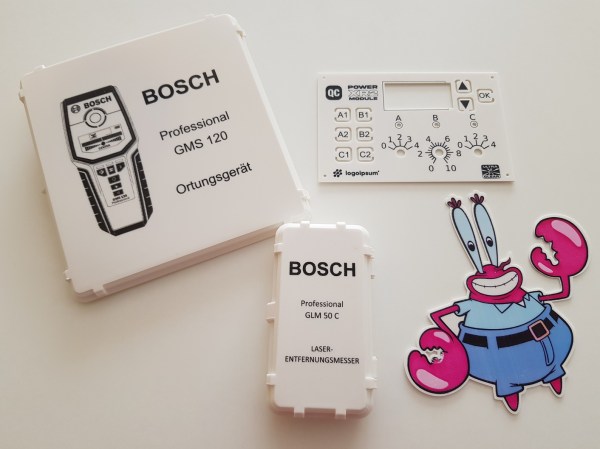
Toner transfer is a commonly-used technique for applying text and images to flat surfaces such as PCBs, but anybody who has considered using the same method on 3D prints will have realized that the heat from the iron would be a problem. [Coverton] has a solution that literally turns the concept on its head, by 3D printing directly onto the transparency sheet.

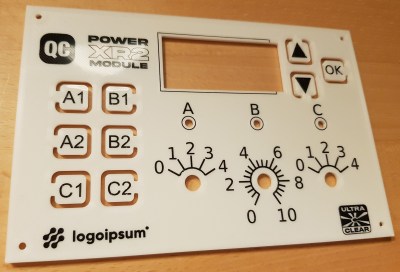
instrument panel design with toner transfer markings
The fine detail is great for intuitive front-panel designs

The method is remarkably straightforward, and could represent a game-changer for hobbyists trying to achieve professional-looking full-color images on their prints.

First, the mirrored image is printed onto a piece of transparency film with a laser printer. Then, once the 3D printer has laid down the first layer of the object, you align the transparency over it and tape it down so it doesn’t move around. The plastic that’s been deposited already is then removed, and a little water is placed on the center of the bed. Using a paper towel, the transparency gets smoothed out until the bubbles are pushed off to the edges.

Another few pieces of tape hold the transparency down on all corners, and the hotend height is adjusted to take into account the transparency thickness. From there, the print can continue on as normal. When finished, the image should be fused with the plastic. If it’s hard to visualize, check out the video after the break for a step-by-step guide.

There are, of course, some caveats. Aligning the transfer and the print looks a little fiddly at the moment, the transparency material used (obviously) has to be rated for use in laser printers, and it only works on flat surfaces. But on the other hand, there will be some readers who already have everything they need to try this out at home right now — and we’d love to see the results!

We’ve covered some other ways to get color and images onto 3D prints in the past, such as this hydrographic technique or by using an inkjet printhead, but [Coverton]’s idea looks much simpler than either of those.  If you’re interested in toner transfer for less heat-sensitive materials, then check out this guide from a few years back, or see what other Hackaday readers have been doing on wood or brass.

Continue reading “Add Full-Color Images To Your 3D Prints With Toner Transfer”

Chemotransfer For DIY PCBs

Making PCBs with the toner transfer method has been around since you could buy your traces at Radio Shack. There are a million techniques for removing copper from sheets of fiberglass, from milling to using resist pens, to the ubiquitous laser printer toner transfer. Here’s a technique we haven’t seen before. [Darko Volk] is calling this ‘chemotransfer’. It’s mostly a laser printer toner transfer process, but the toner is transferred from paper to copper with the help of a special mix of solvents.

This chemotransfer process is almost identical to the usual process of making a toner transfer PCB. First, the design is printed in reverse on dextrin-coated paper, the paper is placed down on polished copper, the entire assembly is sent through a laminator, and finally the board is etched with the chemical of your choice. The key difference here is a solvent applied to the copper just before the design is laid down. [Darko Volk] made a mixture of 25% “cleaning petrol” (benzene, naphtha, or gasoline, or some sort of light hydrocarbon, apparently), 5% linseed oil, and 70% isopropanol. This apparently aids in releasing the toner from the paper and sticking it down to the copper.

From there, the process is effectively a standard toner transfer process. [Darko Volk] is using a solution of sodium persulphate for the etch, and rigged a camera up to a CNC machine for the drilling.

This process can be expanded to two-layer boards very easily using a light table to align the layers of paper before placing them down on the copper. You can check out a video of the fabrication of a single side and double sided board below.

Thanks [Andrej] for the tip.

Continue reading “Chemotransfer For DIY PCBs”

Need An Enclosure? Try Scrap Wood With Toner Transfer Labels

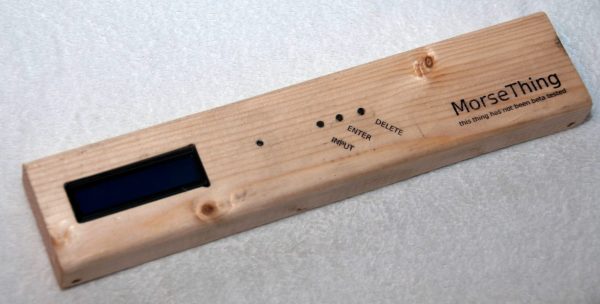
This utilitarian-looking device takes an unusual approach to a problem that many projects face: enclosures. [Jan Mrázek] created a device he calls the Morse Thing for a special night’s event and used what appears to be a humble two-by-four plank for the enclosure. The device is a simple puzzle using Morse code and was intended to be mounted to a railing, so [Jan] milled out the necessary spaces and holes for the LCD and buttons then applied labels directly to the wood via toner transfer – a method commonly used for making PCBs but also useful to create clean, sharp labels.

Continue reading “Need An Enclosure? Try Scrap Wood With Toner Transfer Labels”

Take Your PCBs From Good To Great: Toner Transfer

dscf8697
One-offs that I never would have gotten professionally made, but that were infinitely handy during development

A lot of us make circuit boards at home. I find it a useful skill to have in my bag of tricks for intermediate steps along the way to a finished project, even if the finished version is going to be sent out to a PCB fab. When I need a breakout board that meshes with other development tools, for instance, there’s nothing like being able to whip something up that plugs right in. Doing it quickly, and getting on with the rest of the project instead of placing an order and waiting for delivery, helps keep me in the flow.

Toner transfer is by far the fastest way to make a circuit board at home — simply print the circuit out on a laser printer, iron it onto the copper, and etch. When it works, it’s awesome. When it doesn’t, it can be a hair-pulling exercise in figuring out which of myriad factors are misaligned.

For a long time now, I’ve been using a method that’s very reliable and repeatable. Recently, I’ve been tweaking a bit on the performance of the system, and I thought I’d share what I’ve got. At the moment, I’m able to very reliably produce boards with 6 mil (0.15 mm) traces and 8 mil (0.20 mm) spacing. With a little care in post-production, 4 mil / 6 mil is entirely plausible.

Continue reading “Take Your PCBs From Good To Great: Toner Transfer”

Even Easier Toner Transfer PCBs

One of the most popular methods of homebrew PCB fabrication is the toner transfer process. Compared to UV-sensitive films and CNC mills, the toner transfer process is fantastically simple and only requires a laser printer. Being simple doesn’t mean it’s easy, though, and successful toner transfer depends on melting the toner to transfer it from a piece of paper to a copper clad board.

This is heatless toner transfer for PCB fabrication. Instead of using a clothes iron or laminator to transfer toner from a paper to board, [simpletronic] is doing it chemically using acetone and alcohol.

Acetone usually dissolves laser printer toner, and while this is useful for transferring a PCB from paper to board, it alone is insufficient. By using a mixture of eight parts alcohol to three parts acetone, [simpletronic] can make the toner on a piece of paper stick, but not enough to dissolve the toner or make it blur.

From there, it’s a simple matter of putting a piece of paper down on copper clad board. After waiting a few minutes, the paper peels off revealing perfectly transferred board art. All the usual etching techniques can be used to remove copper and fabricate a PCB.

This is an entirely novel method of PCB fabrication, but it’s not exactly original. A few days ago, we saw a very similar method of transferring laser printed graphics to cloth, wood, and metal. While these are probably independent discoveries, it is great evidence there are still new techniques and new ways of doing things left to be discovered.

Thanks [fridgefire] for the tip.

Using Acetone To Create Print Transfers

Looking for an easy way to print transfer a logo or image? Don’t have time to get transfer paper? Did you know you can use… regular paper? Turns out there’s a pretty awesome method that just uses Acetone to transfer the ink!

Using a laser printer, print off your desired logo or image. Don’t forget to mirror it! Place the paper onto the material you would like to transfer the graphic to, face down. It works best on wood and cloth, but can also be done on metal, glass and even plastic!  Continue reading “Using Acetone To Create Print Transfers”