Voice Without Sound

Voice recognition is becoming more and more common, but anyone who’s ever used a smart device can attest that they aren’t exactly fool-proof. They can activate seemingly at random, don’t activate when called or, most annoyingly, completely fail to understand the voice commands. Thankfully, researchers from the University of Tokyo are looking to improve the performance of devices like these by attempting to use them without any spoken voice at all.

The project is called SottoVoce and uses an ultrasound imaging probe placed under the user’s jaw to detect internal movements in the speaker’s larynx. The imaging generated from the probe is fed into a series of neural networks, trained with hundreds of speech patterns from the researchers themselves. The neural networks then piece together the likely sounds being made and generate an audio waveform which is played to an unmodified Alexa device. Obviously a few improvements would need to be made to the ultrasonic imaging device to make this usable in real-world situations, but it is interesting from a research perspective nonetheless.

The research paper with all the details is also available (PDF warning). It’s an intriguing approach to improving the performance or quality of voice especially in situations where the voice may be muffled, non-existent, or overlaid with a lot of background noise. Machine learning like this seems to be one of the more powerful tools for improving speech recognition, as we saw with this robot that can walk across town and order food for you using voice commands only.

Continue reading “Voice Without Sound”

Retrotechtacular: Military Graphics In The 1960s

While you might think the military doesn’t have a sense of humor with names. Take the AN/MSQ-19 “automated tactical operations central” for example. (Video, embedded below.) But then, when you find out that the truck-sized computer at the heart of it was MOBIDIC — yes, that’s pronounced Moby Dick — you know someone had a good chuckle somewhere. The video below was a promotional video from the early 1960s, and although it shows the unit in operation, it was most likely a mockup and not fully functional.

The MOBIDIC program ran from 1960-1964 and cost a whopping $25 million in 1960-era money. In 1964, testing revealed the system was too unwieldy, requiring at least five tractor-trailers, eight generators, portable buildings, and several large trucks to move around.

Continue reading “Retrotechtacular: Military Graphics In The 1960s”

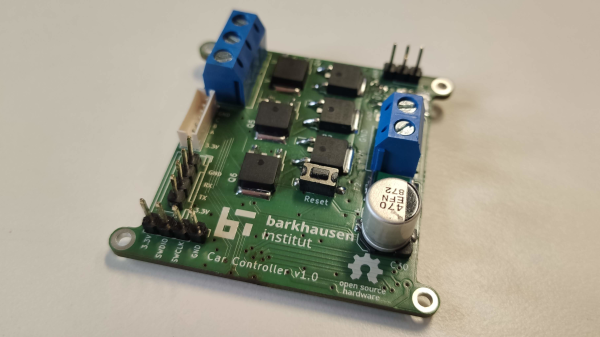
Photograph of a BLDC motor controller circuit board

Take A Ride Through The Development Of A Custom BLDC Motor Controller

The folks over at the [Barkhausen Institut] are doing research into controlling autonomous fleets of RC cars and had been using off the shelf electronic speed controllers (ESCs) to control the car motors. Unfortunately they required more reliable feedback for closed loop control of the motors, so they created their own open source hardware brushless DC (BLDC) controller.

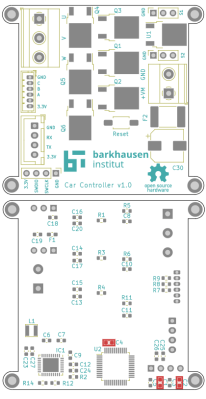
The motor controller they developed uses an STM32 microcontroller that talks to a TMC6140 3 phase MOSFET driver to drive 6 IRLR 2905 MOSFETs. The [Barkhausen Institut] researchers went with the SimpleFOC library as the basis to program the STM32, with installed hall effect sensors indicating motor orientation for their closed loop control.

Designing a functioning BLDC and ESC controllers can be subtle, and their post goes into details about the problems and solutions they came up with to deal with with what was ultimately improper isolation of the MOSFETs interfering with the power rail for the STM32. The source for their BLDC motor controller is available through their GitLab page. For more information on the parent project that uses the BLDC driver, be sure to check out their work on a connected convoy of RC cars.

There’s now a wealth of open source BLDC drivers and projects, many of which we’ve featured in the past, like the Moteus and haptic smart knob, and it’s nice to see other projects explore different options.

Review: XHDATA D-219 Short Wave Radio Receiver

As any radio amateur will tell you, the world of radio abounds with exciting possibilities. Probably the simplest pursuit of them all is that of the SWL, or short wave listener, who scours the airwaves in search of interesting stations. SWLs will often have fully-featured setups with high-end general-coverage communications receivers and tuned antenna arrays, but it can start with the cheapest of radios at its bottom end. Such a radio is the subject of this review, the XHDATA D-219 is a miniature portable receiver that costs under ten dollars, yet is currently the talk of the town in SWL circles. This interest is in no small amount due to its being an especially low-price way to get your hands on a shortwave radio using one of the SIlicon Labs integrated software-defind radio receiver chips. We don’t often review a consumer radio here at Hackaday, but with an avid eye for unexpected gems at the cheaper end of the market this one’s worth a second look.

What Do You Get For Your Tenner?

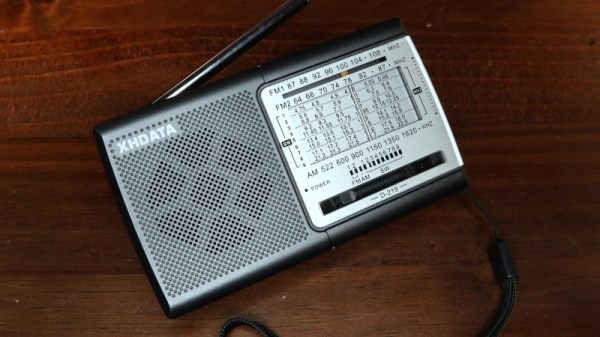
A picture of the radio on my bench
This form factor is very typical for cheap “world band” radios.

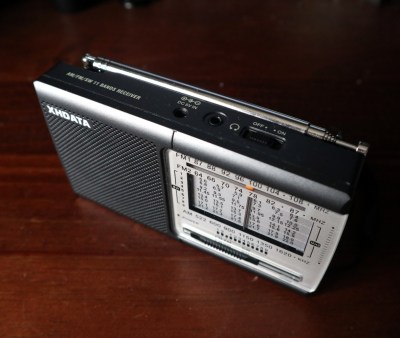
I ordered my D-219 from the XHDATA website, spending about £10 including the postage from China. The usual wait ensued before the package landed on my doormat, and inside was the radio in its box with an instruction leaflet. It’s a small unit about 135 mm x 75 mm x 30 mm, and it follows closely the form factor of other similar radios.

On the top is the extensible antenna with an on-off switch and sockets for headphone and 5 V power, on the side are side-on knobs for tuning and volume, while on the front is the speaker and old-style multi-band tuning display.

On the back is a flip-up stand and a hatch for a pair of AA cells. There’s a band switch covering AM, nine different shortwave bands from 4.75 MHz to 22 MHz, the east Asian FM band from 64 MHz to 87 MHz, and the international FM band from 87 MHz to 108 MHz. The tuning indicator is very old-school, a vertical bar that moves across a frequency scale with the tuning knob. Continue reading “Review: XHDATA D-219 Short Wave Radio Receiver”

The International Space Station Is Always Up There

Thanks to its high orbital inclination, the International Space Station (ISS) eventually passes over most inhabited parts of the Earth. Like other artificial satellites, though, it’s typically only visible overhead during passes at sunrise and sunset. If you’d like to have an idea of where it is beyond the times that it’s directly visible, take a look at this tabletop ISS tracking system created by [dpelgrift].

The tracker uses an Adafruit Feather inside its enclosure along with a Featherwing ESP32 WiFi co-processor. Together they direct a 3D printed rocket-shaped pointing device up and down by way of a SG90 micro-servo, while a 28BYJ-48 stepper motor provides rotation.

This setup allows it to take in all of the information required to calculate the Station’s current position. The device uses the current latitude and longitude, as well as its compass heading, and combines that with data pulled off the net to calculate which direction it should be pointing.

While it might seem like a novelty or programming challenge, this project could be useful for plenty of people who just want to keep track so they know when to run outside and see the Station pass by, or even by those who use the radio repeater aboard the ISS. The repeater on the ISS and plenty of other satellites are available to amateur radio operators for long-distance VHF and UHF communication like we’ve seen in projects like these.

A Smart Home That CAN Do It All

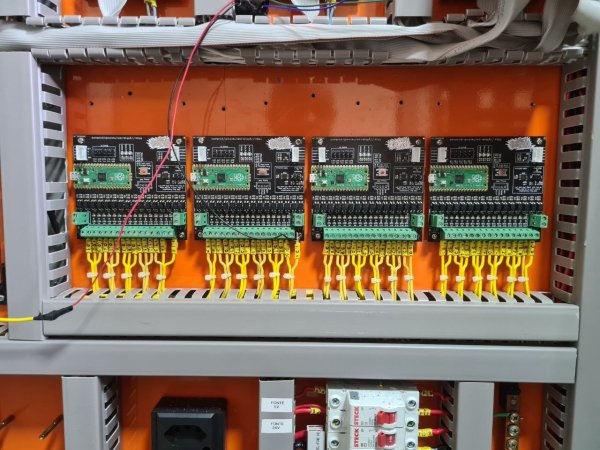
In an ideal smart home, the explosion of cheap WiFi and Bluetooth chips has allowed hundreds of small wireless devices to control the switches, lights, and everything else required for a “smart home” at a relatively low price. But what if you don’t want hundreds of internet-connected devices in your home polluting the wireless spectrum and allowing potential security holes into your network? If you’re like [Lucas Teske], you might reach for something wired and use cheap and (currently) available Raspberry Pi Picos to create PicoHome.

The unique twist of PicoHome is that it uses a CAN bus for communication. One of [Lucas’] goals was to make the boards easily swappable when hardware failed. This meant board-to-board communication and protocols like I2C were susceptible to noise (every time a relay triggered, the bus would lock up briefly). The CAN bus is designed to work in an electrically noisy environment.

There are two parts to the system: pico-relay and pico-input. The first connects to a 16 relay board and can control 16 different 24v relays. The second has 16 optoisolators to read from 12v-24v switches and various buttons throughout the house. These can be placed in a giant metal box in a central wiring location and not worry about it.

The firmware and board files are all released under an Apache 2.0 license, but the CAN2040 library this project relies on is under GPL. We covered the CAN2040 library when it was first released, and it’s lovely to see it being used for something entirely unexpected.

Continue reading “A Smart Home That CAN Do It All”

A Pi Calculating Pi For Pi Day

What is it about pi that we humans — at least some of us — find so endlessly fascinating? Maybe that’s just it — it’s endless, an eternal march of digits that tempts us with the thought that if we just calculate one more digit, something interesting will happen. Spoiler alert: it never does.

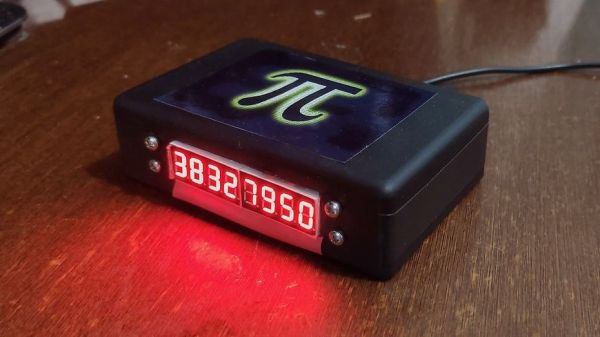
That doesn’t stop people from trying, of course, especially when “Pi Day” rolls around on March 14 every day  — with apologies to the DD/MM set, of course. This year, [Cristiano Monteiro] commemorated the day with this Pi-based eternal pi calculator. The heart of the build is a Raspberry Pi Pico board, which does double duty thanks to its two cores. One core is devoted to running the pi calculation routine, while the other takes care of updating the seven-segment LED display with the last eight calculated digits. Since the calculation takes increasingly more time the farther into pi it gets, [Cristiano] thoughtfully included a 1-Hz heartbeat indicator, to assure users that the display isn’t frozen; the video below shows how slow the display gets even just a few seconds after starting up, so it’s a welcome addition.

This is actually [Cristiano]’s second go at a Pi Day pi calculator; last year’s effort was a decidedly tactical breadboard build, and only supported a four-digit display. We applaud the upgrades, and if anyone wants to replicate the build, [Cristiano] has posted his code.

Continue reading “A Pi Calculating Pi For Pi Day”