The basic concept of human intelligence entails self-awareness alongside the ability to reason and apply logic to one’s actions and daily life. Despite the very fuzzy definition of ‘human intelligence‘, and despite many aspects of said human intelligence (HI) also being observed among other animals, like crows and orcas, humans over the ages have always known that their brains are more special than those of other animals.
Currently the Cattell-Horn-Carroll (CHC) theory of intelligence is the most widely accepted model, defining distinct types of abilities that range from memory and processing speed to reasoning ability. While admittedly not perfect, it gives us a baseline to work with when we think of the term ‘intelligence’, whether biological or artificial.
This raises the question of how in the context of artificial intelligence (AI) the CHC model translate to the technologies which we see in use today. When can we expect to subject an artificial intelligence entity to an IQ test and have it handily outperform a human on all metrics?
For less than $30 USD, you can get a 10×10 centimeter hotplate with 350 Watts of power. Sounds mighty fine to us, so surely there must be a catch? Maybe not, as [Stefan Nikolaj]’s review of this AliExpress hotplate details, it seems to be just fine enough.
At this price, you’d expect some shoddy electronics inside, or maybe outright fiery design decisions, in the vein of other reviews for similar cheap heat-producing tech that we’ve seen over the years. Nope – the control circuitry seems to be more than well-built for our standards, with isolation and separation where it matters, the input being fused away, and the chassis firmly earthed. [Stefan] highlights just two possible problem areas: a wire nut that could potentially be dodgy, and lack of a thermal fuse. Both can be remedied easily enough after you get one of these, and for the price, it’s a no-brainer. Apart from the review, there’s also general usage recommendations from [Stefan] in the end of the blog post.
While we’re happy to see folks designing their own PCB hotplates or modifying old waffle irons, the availability of cheap turn-key options like this means there’s less of a reason to go the DIY route. Now, if you’re in the market for even more build volume, you can get one of the classic reflow ovens, and maybe do a controller upgrade while you’re at it.
The “Long Dark” is upon us, at least for those who live north of the equator, and while it’s all pre-holiday bustle, pretty lights, and the magical first snow of the season now, soon the harsh reality of slushy feet, filthy cars, and not seeing the sun for weeks on end will set in. And when it does, it pays to have something to occupy idle mind and hands alike, a project that’s complicated enough to make completing even part of it feel like an accomplishment.
But this time of year, when daylight lasts barely as long as a good night’s sleep, you’ve got to pick your projects carefully, lest your winter project remain incomplete when the weather finally warms and thoughts turn to other matters. For me, at least, that means being realistic about inevitabilities such as competition from the day job, family stuff, and the dreaded “scope creep.”
It’s that last one that I’m particularly concerned with this year, because it has the greatest potential to delay this project into spring or even — forbid it! — summer. And that means I need to be on the ball about what the project actually is, and to avoid the temptation to fall into any rabbit holes that, while potentially interesting and perhaps even profitable, will only make it harder to get things done.
Back in March, a small aircraft in the UK lost engine power while coming in for a landing and crashed. The aircraft was a total loss, but thankfully, the pilot suffered only minor injuries. According to the recently released report by the Air Accidents Investigation Branch, we now know a failed 3D printed part is to blame.
The part in question is a plastic air induction elbow — a curved duct that forms part of the engine’s air intake system. The collapsed part you see in the image above had an air filter attached to its front (towards the left in the image), which had detached and fallen off. Heat from the engine caused the part to soften and collapse, which in turn greatly reduced intake airflow, and therefore available power.
Serious injury was avoided, but the aircraft was destroyed.
While the cause of the incident is evident enough, there are still some unknowns regarding the part itself. The fact that it was 3D printed isn’t an issue. Additive manufacturing is used effectively in the aviation industry all the time, and it seems the owner of the aircraft purchased the part at an airshow in the USA with no reason to believe anything was awry. So what happened?
The part in question is normally made from laminated fiberglass and epoxy, with a glass transition of 84° C. Glass transition is the temperature at which a material begins to soften, and is usually far below the material’s actual melting point.
When a part is heated at or beyond its glass transition, it doesn’t melt but is no longer “solid” in the normal sense, and may not even be able to support its own weight. It’s the reason some folks pack parts in powdered salt to support them before annealing.
The printed part the owner purchased and installed was understood to be made from CF-ABS, or ABS with carbon fiber. ABS has a glass transition of around 100° C, which should have been plenty for this application. However, the investigation tested two samples taken from the failed part and measured the glass temperature at 52.8°C and 54.0°C, respectively. That’s a far cry from what was expected, and led to part failure from the heat of the engine.
The actual composition of the part in question has not been confirmed, but it sure seems likely that whatever it was made from, it wasn’t ABS. The Light Aircraft Association (LAA) plans to circulate an alert to inspectors regarding 3D printed parts, and the possibility they aren’t made from what they claim to be.
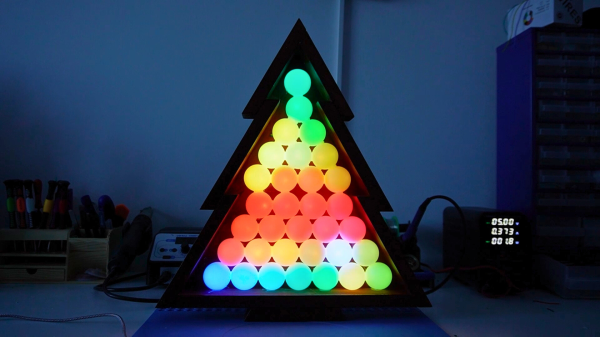
Regular Christmas trees don’t emit light, nor do they react to music. If you want both things in a holiday decoration, consider this build from [dbmaking].
An ESP32-D1 mini runs the show here. It’s hooked up to a strip of WS2812B addressable LEDs. The LED strip is placed on a wooden frame resembling the shape of a traditional Christmas tree. Ping-pong balls are then stacked inside the wooden frame such that they act as a light diffuser for the LEDs behind. The microcontroller is also hooked up to an INMP441 omnidirectional MEMS microphone module. This allows the ESP32 to detect sound and flash the LEDs in time, creating a colorful display that reacts to music. This is achieved by using the WLED web installer to set the display up in a sound reactive mode.
Raspberry Pi boards are no longer constrained – these days, you can get a quad-core board with 8 or 16GB of RAM to go around, equip it with a heatsink, and get a decently comfortable shop/desk/kitchen computer with GPIOs, cameras, speedy networking, maybe even NVMe, and all the wireless you’d expect.
Raspberry OS, however, remains lightweight with its pre-installed LXDE environment – and, in many cases, it feels quite constrained. In case you ever idly wondered about giving your speedy Pi a better UI, [Luc] wants to remind you that setting up KDE on your Raspberry OS install is dead simple and requires only about a dozen commandline steps.
[Luc] walks you through these dozen steps, from installation to switching the default DE, and the few hangups you might expect after the switch; if you want to free up some disk space afterwards, [Luc] shows how to get rid of the original LXDE packages. Got the latest Trixie-based Pi OS? There’s an update post detailing the few necessary changes, as well as talking about others’ experiences with the switch.
All in all, [Luc] demonstrates that KDE will have a fair bit of graphical and UX advantages, while operating only a little slower, and if you weren’t really using your powerful Pi to the fullest, it’s a worthwhile visual and usability upgrade. For the regular desktop users, KDE has recently released their own distro, and our own [Jenny] has taken a look at it.
Recently the MagQuest competition on improving the measuring of the Earth’s magnetic field announced that the contestants in the final phase have now moved on to launching their satellites within the near future. The goal here is to create a much improved World Magnetic Model (WMM), which is used by the World Geodetic System (WGS). The WGS is an integral part of cartography, geodesy and satellite-based navigation, which includes every sat nav, smartphone and similar with built-in GNSS capabilities.
Although in this age of sat navs and similar it can seem quaint to see anyone bother with using the Earth’s magnetic field with a compass, there is a very good reason why e.g. your Android smartphone has an API for estimating the Earth’s magnetic field at the current location. After your sat nav or smartphone uses its magnetometer, the measurements are then corrected so that ‘north’ really is ‘north’. Since this uses the WMM, it’s pertinent that this model is kept as up to date as possible, with serious shifts in 2019 necessitating an early update outside of the usual five-year cycle.