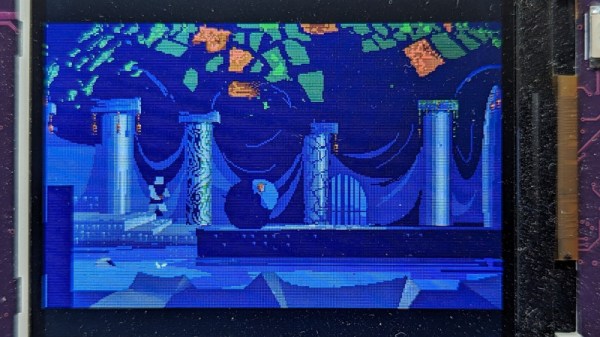
3d printed tiny gym in a box with mirror and led strip lighting

Get Pumped For This Miniature Gym

[Duncan McIntyre] lives in the UK but participated in a secret Santa gift exchange for his Dutch friends’ Sinterklaas celebration. In traditional maker fashion, [Duncan] went overboard and created a miniature gym gift box, complete with flashing lights, music and a motorized lid.

[Duncan] used [TanyaAkinora]’s 3D printed tiny gym to outfit the box with tiny equipment, with a tiny mirror added to round out the tiny room. An ATmega328P was used as the main microcontroller to drive the MP3 player module and A4988 stepper motor controller. The stepper motor was attached to a drawer slide via a GT2 timing belt and pulley to actuate the lid. Power is provided through an 18V, 2A power supply with an LM7805 providing power to the ATmega328P and supporting logical elements. As an extra flourish, [Duncan] added some hardware audio signal peak detection, fed from the speaker output, which was then sampled by the ATmega328P to be able to flash the lights in time with the playing music. A micro switch detects when the front miniature door is opened to begin the sequence of lights, song and lid opening.

[Duncan] provides source on GitHub for those curious about the Arduino code and schematics. We’re fans of miniature pieces of ephemera and we’ve featured projects ranging from tiny 3D printed tiny escalators to tiny arcade cabinets.

Video after the break!

Continue reading “Get Pumped For This Miniature Gym”

All About USB-C: Power Delivery

USB-C eliminates proprietary barrel plug chargers that we’ve been using for laptops and myriads of other devices. It fights proprietary phone charger standards by explicitly making them non-compliant, bullying companies into making their devices work with widely available chargers. As a hobbyist, you no longer need to push 3 A through tiny MicroUSB connectors and underspecced cables to power a current-hungry Pi 4. Today, all you need is a USB-C socket with two resistors – or a somewhat special chip in case the resistors don’t quite get you where you want to be.

You get way more bang for your buck with USB-C. This applies to power too; after all, not all devices will subsist on 15 W – some will want more. If 15 W isn’t enough for your device, let’s see how we can get you beyond.

Reaching Higher

USB-C power supplies always support 5 V and some are limited to that, but support for higher voltages is where it’s at. The usual voltage steps of USB-C are 5 V, 9 V, 15 V and 20 V ; 12V support is optional and is more of a convention. These steps are referred to as SPR, and EPR adds 28 V, 36 V and 48 V steps into the mix – for up to 240 W; necessitating new cables, but being fully backwards and forwards compatible, and fully safe to use due to cable and device checks that USB-C lets you perform.

A charger has to support all steps below its highest step, which means that 20 V-capable chargers also have to support 5 V, 9 V, and 15 V as well – in practice, most of them indeed do, and only some might skip a step or two. You can also get voltages in-between, down to 3.3 V, even, using a PD standard called PPS (or the AVS standard for EPR-range chargers) – it’s not a requirement, but you’ll find that quite a few USB-C PSUs will oblige, and PPS support is usually written on the label. Continue reading “All About USB-C: Power Delivery”

A blue Mercedes SLS AMG sports car body with bicycle wheels. The gull wing is open to reveal the spartan interior and the hood is open to reveal an empty engine compartment since this is actually a bike.

SLS AMG Velomobile

Many gearheads dream of owning a supercar, but their exorbitant prices make them unattainable for all but the most affluent. [Andrzej Burek] decided to make his dreams come true by building his own supercar with a human-powered twist. [YouTube]

At first glance, [Burek]’s SLS AMG looks like the real thing. Pop the hood, and you’ll find this “car” is missing it’s V8 which has been replaced by a beefy speaker pumping out engine sounds from any car you choose. Both driver and passenger can provide propulsion for the sociable tandem, and the power is routed through a differential to the rear wheels. [Burek] decided to install the differential to make installing power assist motors simpler in future revisions of this quadracycle.

[Burek] said it’s taken him four years from buying the first component to the bike’s status in the video after the break. Other than the front and rear bumpers, he built the body himself out of fiberglass to learn how to work with the material. He welded the frame himself as well, and, in a testament to good measurements, the two parts fit together when united despite being built in separate locations. You can checkout more pictures on his Instagram.

If you want some more bike hacks, check out this Open Source Bike Computer or this Exercise Bike Game Controller.

Continue reading “SLS AMG Velomobile”

Ask Hackaday: What’s Your Worst Repair Win?

Like many of you, I’ve become the designated “fix-it” person for my family and friends. While it can be a lot of work — I just finished an oil change that required me to lay in a cold, wet driveway and I can’t mention in polite company the substances I was bathed in while fixing a clogged pipe last week  — I generally relish my role. I enjoy solving problems, I love working with my hands and my head, and who doesn’t like saving money and time?

But for me, the best part of being the fix-it guy is the satisfaction that comes from doing something others can’t do. I find this especially true with automotive repairs, which conventional wisdom says is strictly the province of factory-trained experts. A little bit of a hero complex, perhaps? Absolutely! After all, I don’t get paid for my repairs, so I’ve got to get a little something for the effort.

This is why a recent pair of unrelated fixes left me feeling thoroughly unsatisfied. Neither of these jobs was a clear win, at least in terms of getting the rush of being able to do something that nobody else could. At best, these were qualified wins, which both still left me feeling a little defeated. And that got me thinking that I’m probably not the only one who has had marginal repair wins like these.

Continue reading “Ask Hackaday: What’s Your Worst Repair Win?”

A Simple Serial Display

Often with more “modern” complex protocols involving handshaking, token exchanges, and all the other hoops and whistles accompanying them, we forget how useful and powerful serial can be. In what might be a wonderful tribute to that, [Davide Gironi] created a simple AVR-powered 16-digit serial display.

It can display two numbers, and that’s it. A MAX7219 drives the display, and the brains are an ATmega8. It’s straightforward to send new values: a start byte, a CRC, the data to display, and an end byte. A CP2102 provides a UART to USB interface to connect to a host. An EEPROM helps it remember the last numbers shown. It supports positive, negative, and floating-point numbers.

This is a beautiful example of doing one thing and doing it well. The design is simple and allows it to be used for anything. You can show the current stock market price, the time for the next two trains for your commute, or whatever else you can think of. [Davide] included a schematic, code, and a 3d printed enclosure.

Perhaps the idea could be combined with a clever design for a single-motor seven-segment display.

Continue reading “A Simple Serial Display”

Spaceballs Get Serialized

As much as we’d love a TV show version of the cult classic movie, we’re talking about a different kind of Spaceball. While there have been many iterations, [Evan] had a Spaceball built by a company known as Spacetec in 1991 and rebranded by HP. Being an older peripheral, he used the Orbotron 9001, a converter from RS232 serial to USB, to interface his Spaceball with modern devices.

The spaceball was one of the first 6 degrees of freedom controllers, useful for CAD and some games that supported it. It’s famous for being involved in the NASA Mars Pathfinder mission as it was used to control the Sojourner rover. In addition to the perfect orb, it also features eight handy buttons.

The Orbotron is a USB-capable microcontroller (Atmel SAMD21) designed to support the Spaceball 360, 4000, and 5000 series. Ultimately, after tinkering with the code to support the 2003 and 3003 Spaceballs, he had some reasonably usable with some rough edges. For example, acceleration curves still need tweaking, and going too fast can get you stuck. The downside was the rubber coating on the ball that had degraded over the years, making it horrendously sticky.

All the code changes are on GitHub. We’d love to see more spacemice integrated into things, like this ergonomic keyboard. Or even an open-source version of a spacemouse. After the break, we have a video of [Adafruit] showing a Spaceball 2003 working with a serial adapter.

Continue reading “Spaceballs Get Serialized”

Recreating A Numpad For The ADM-3A

[Evan] already had a working ADM-3A (a dumb terminal from 1976) but was starting to eye the accessories hungrily. He had only seen the numpad on Wikipedia and in the manual. So when he found some authentic stackpole numpads on a surplus sale, he grabbed them and converted them to be ADM-3A compatible.

Looking at the schematic for the ADM-3A, [Evan] figured out that the numpad was parallel to the keyboard matrix, not adjacent. This meant that pressing a five on the keyboard was electrically equivalent to pressing a five on the keyboard. So holding shift while punching on the numpad leads to some unexpected characters for those of us used to more modern keyboards. Since [Evan] only needed to make one or two of these, he soldered wires directly to switch contacts in the matrix that the ADM-3A expects. A 3d printed housing, some rubber feet, and a ribbon cable later, it was done. While it looks slightly different from the original, the vibe is right, and given that it is a stackpole switch, it has the same feel. With the spare numpads, he created a replacement PCB that runs QMK and connects to a more modern computer via USB-C. The files for the 3d printed housing are also up on GitHub, along with the PCBs and QMK configuration files.

If you’re interested in what more you can do with an ADM-3A, why not hook it up to a Raspberry Pi?