Homebrew LED Strips That Are HomeKit-Compatible

Google, Amazon and Apple are all duking it out for supremacy in the smart home space. As you’ve probably noticed, cheaper smart lights and the like typically don’t offer connectivity with Apple’s HomeKit system. However, if you want some smart lighting that works in that ecosystem without breaking the bank, you can always build your own!

This simple build uses an ESP8266-01S as the brains of the operation. It’s a cut-down board that only has two GPIO pins available, but for this job, that’s enough. It’s paired with a simple relay for switching a single-color LED strip on and off, and an MP2307 buck converter for power. The code loaded onto the ESP8266 is simple, and allows it to connect to Wi-Fi and link up with Apple HomeKit for control.

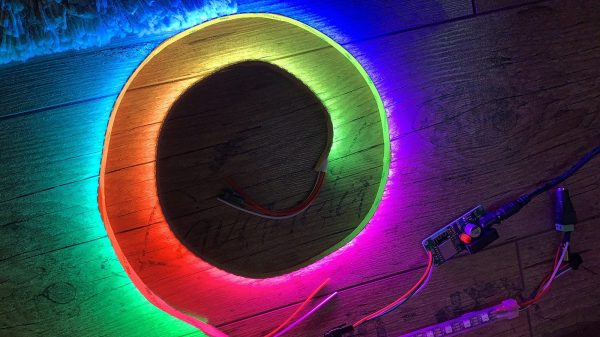
Let’s say you’re a real fancy-pants, though, and you want RGB-addressable LEDs for your HomeKit setup. No problem, you can do that too! It’s as straightforward as hooking up an ESP8266 to some WS2812B LED strip and flashing the right firmware that emulates an Elgato EVE LED strip. You can even activate special lighting effects on the via the EVE app if you so desire, to take advantage of the fully-addressable nature of the strip.

There are plenty of off-the-shelf solutions in this space, but many of them are quite expensive for what you actually get in the box. Sometimes building your own is more fun, too. Alternatively, if you don’t like Apple’s smart home solutions, you can always try a more open alternative. Video after the break.

Continue reading “Homebrew LED Strips That Are HomeKit-Compatible”

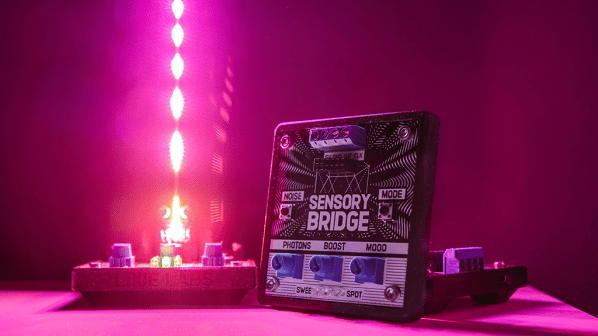
three sensory bridge audio spectrum analyzers, one in use with a lit LED array plugged in, the other facing the camera and leaning against the third, all on a table

The Sensory Bridge Is Your Path To A Desktop Rave

[Lixie Labs] are no strangers to creating many projects with LEDs or other displays. Now they’ve created a low latency music visualizer, called the Sensory Bridge, that creates gorgeous light shows from music.

The Sensory Bridge has the ability to update up to 128 RGB LEDs at 60 fps. The unit has an on-board MEMS microphone that picks up ambient music to produce the light show. The chip is an ESP32-S2 that does Fast Fourier Transform trickery to allow for real-time updates to the RGB array. The LED terminal supports the common WS2812B LED pinouts (5 V, GND, DATA). The Sensory Bridge also has an “accessory port” that can be used for hardware extensions, such as a base for their LED “Mini Mast”, a long RGB array PCB strip.

The unit is powered by a 5 V 2 A USB-C connector. Different knobs on the device adjust the brightness, microphone sensitivity and reactivity of the LED strip. One of the nicer features is its “noise calibration” that can record ambient sound and subtract off the background noise frequency components to give a cleaner music signal. The Sensory Bridge is still new and it looks like some of the features are yet to come, like WiFi communication, accessory port upgrades and 3.5 mm audio input to bypass the on-board microphone.

The stated goals of the Sensory Bridge are to provide an open, powerful and flexible platform. This can be seen with their commitment to releasing the project as open source hardware, providing firmware, PCB design files and even the case STLs under a libre/free license. Audio spectrum analyzers are a favorite of ours and we’ve seen many different iterations ranging from ones using Raspberry Pis to others use ESP32s.

Video after the break!

Continue reading “The Sensory Bridge Is Your Path To A Desktop Rave”

Animated LED Arrows Point The Way

Visitors at the Garden D’Lights in Bellevue, Washington had a problem. While touring the holiday lights show, they kept straying off the path. The event organizers tried some simple LED arrows, but they were just more points of light among a sea filled with them. This is when [Eric Gunnerson] was asked to help out. He’s apparently had some experience with LED animations, even cooking up a simple descriptor language for writing animations driven by an ESP32. To make the intended path obvious, he turned to a PVC board with 50 embedded WS2812 pixels –RGB controllable LEDs. The control box was a USB power adapter and an ESP8266, very carefully waterproofed and connected to the string of pixels. The backer board is painted black, to complete the hardware. Stick around after the inevitable break, to get a look at the final

The description of the build process is detailed and contains some great tips, but without a clever LED animation, it’s still of questionable utility. The pattern chosen is great, with the LEDs being blue most of the time, and a flame-like gradient chasing through the arrow every couple seconds. It’s obviously different from the lights of the show, and seems to be a real winner. [Eric] has published his code, with the sheepish caveat that he had to reinvent the wheel once again, and couldn’t reuse any of his previous LED animation work on this one. It’s a simple hack, but a great build log, and an effective solution to a subtle problem. And if addressable LEDs are your thing, check out our other hacks!

Continue reading “Animated LED Arrows Point The Way”

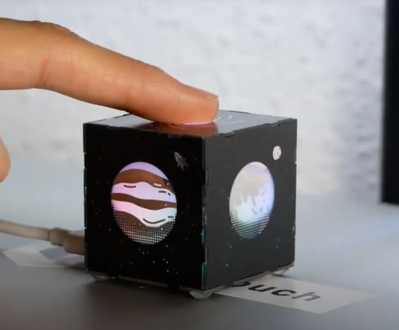
Shot of CubeTouch, a six sided cube built out of PCBs with each of the top PCB allowing for diffusion of the LEDs on the inside to shine through

Keyboard Shortcuts At The Touch Of A Planetary Cube

[Noteolvides] creates the CubeTouch, a cube made of six PCBs soldered together that creates a functional and interactive piece of art through its inlaid LEDs and capacitive touch sensors.

The device itself is connected through a USB-C connector that powers the device and allows it to send custom keyboard shortcuts, depending on which face is touched.

Finger touching the top of a CubeTouch device

The CubeTouch is illuminated on the inside with six WS2812 LEDs that take advantage of the diffusion properties of the underlying FR4 material to shine through the PCBs. The central microprocessor is a CH552 that has native USB support and is Arduino compatible. Each “planet” on the the five outward facing sides acts as a capacitive touch sensor that can be programmed to produce a custom key combination.

Assembling the device involves soldering the connections at two joints for each edge connecting the faces.

We’re no strangers to building enclosures from FR4, nor are we strangers to merging art and functionality. The CubeTouch offers a further exploration of these ideas in a sweet package.

The CubeTouch is Open Source Hardware Certified with all documentation, source code and other relevant digital artifacts available under a libre/free license.

Continue reading “Keyboard Shortcuts At The Touch Of A Planetary Cube”

Frequency Counter Restoration Impeded By Kittens

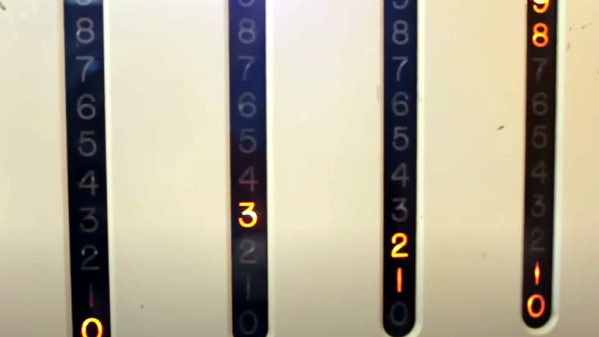
We think of digital displays as something you see on relatively modern gear. But some old gear had things like nixies or numitrons to get cool-looking retro digital displays. The HP 521A frequency counter, though, uses four columns of ten discrete neon bulbs to make a decidedly low-tech but effective digital display. [Usagi Electric] has been restoring one of these for some time, but there was a gap between the second and third videos as his workshop became a kitten nursery. You can see the last video below.

In previous videos, he had most of the device working, but there were still some odd behavior. This video shows the final steps to success. One thing that was interesting  is that since each of the four columns are identical, it was possible to compare readings from one decade to another.

However, in the end, it turned out that the neon bulbs were highly corroded, and replacing all the neon bulbs made things work better. However, the self-check that should read the 60 Hz line frequency was reading 72 Hz, so it needed a realignment. But that was relatively easy with a pot accessible from the back panel. If you want to see more details about the repair, be sure to check out the earlier videos.

We love this old gear and how clever designers did so much with what we consider so little. We hate to encourage your potential addiction, but we’ve given advice on how to acquire old gear before. If you want to see what was possible before WS2812 panels, you could build this neon bulb contraption.

Continue reading “Frequency Counter Restoration Impeded By Kittens”

Discreet CO2 Monitor Hides Elegant Internal Layout

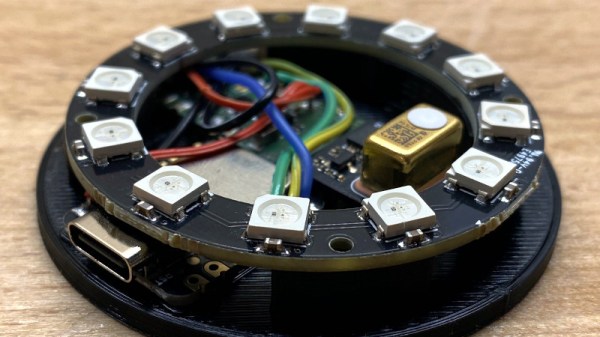
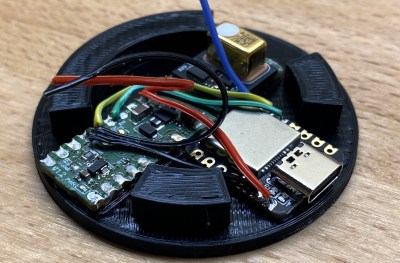
Outwardly, this sleek CO2 monitor designed by [Daniel Gernert] might look like something cooked up in Amazon’s consumer electronics division. But open up that 3D printed case, and you’ll find a surprisingly low parts count that’s been cleverly packed in so as to make the most of the enclosure’s meager internal dimensions.

No wasted space here.

There are, if you can believe it, just three principle components to this device: a Seeed Studio Seeeduino XIAO microcontroller, a Infineon S2GO PAS CO2 sensor board, and a ring of WS2812B LEDs. You could even delete the ring altogether and replace it with a single addressable LED to accomplish the same goal, but we’d say the full ring is money-well-spent if you’re going to spin up your own copy.

Functionality is very straightforward — the LED ring will indicate the detected CO2 concentration by lighting up green and working its way through yellow and onto red. The sensor has no wireless capability, but if you plug it into your computer, you can get a local readout of current conditions.

We love environmental monitoring solutions here almost as much as we love intricately designed 3D printed enclosures. If you’d like to see another project where those two concepts aligned, check out this printable ESP8266 sensor enclosure.

Hackaday Podcast 178: The Return Of Supercon, Victory For Open Source, Exquisite Timepieces, And Documentation To Die For

Hackaday Editor-in-Chief Elliot Williams and Managing Editor Tom Nardi start this week’s podcast off with an announcement the community has been waiting years for: the return of the Hackaday Supercon! While there’s still some logistical details to hammer out, we’re all extremely excited to return to a live con and can’t wait to share more as we get closer to November. Of course you can’t have Supercon without the Hackaday Prize, which just so happens to be wrapping up its Hack it Back challenge this weekend.

In other news, we’ll talk about the developing situation regarding the GPLv3 firmware running on Ortur’s laser engravers (don’t worry, it’s good news for a change), and a particularly impressive fix that kept a high-end industrial 3D printer out of the scrapheap. We’ll also fawn over a pair of fantastically documented projects, learn about the fascinating origins of the lowly fire hydrant, and speculate wildly about the tidal wave of dead solar panels looming menacingly in the distance.

Or download the fresh bitstream yourself.

Check out the links below if you want to follow along, and as always, tell us what you think about this episode in the comments!

Continue reading “Hackaday Podcast 178: The Return Of Supercon, Victory For Open Source, Exquisite Timepieces, And Documentation To Die For”