[Ovidiu] cares for their house plants, trying to dial in the perfect soil humidity and light levels. However, many cheap monitors tend to rust after a few weeks of sitting in a damp, slightly acidic environment. By creating a custom plant monitor with a removable probe, not only can [Ovidiu] integrate better with their Home Assistant setup, but it will also be less wasteful.
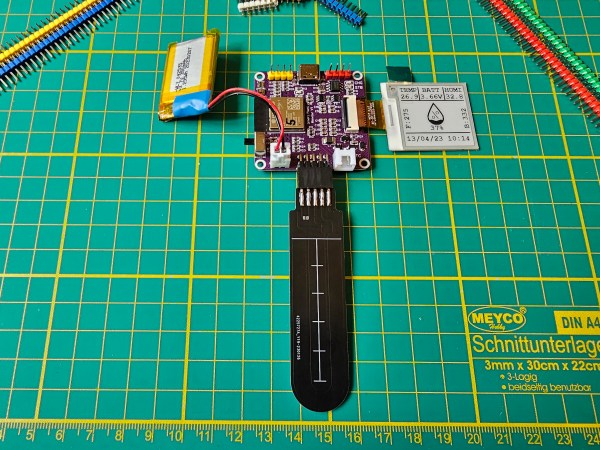
The build starts with an ESP32-S3, a TP4056 charging circuit, a small e-ink display, and an AHT20 IC for air humidity and temperature. The ESP32 reads the probe using the capacitance measuring devices for touchpads built into the chip. Or course, a 450mAh battery provides a battery life of about 11 days. The probe is just a bare PCB with a connector at the top, making them cheap and easy to swap. They included pads on the probe for a thermistor for reading soil temperature, but this is optional. A handsome 3D-printed case wraps it all up nicely.
Continue reading “2023 Hackaday Prize: A Reusable Plant Monitor”