A long-running story in the world of electronic security has been the reconstruction of on-screen data using RF interference from monitors or televisions. From British TV detector vans half a century ago to 1980s scare stories about espionage, it was certainly easy enough to detect an analogue CRT with nothing more than an AM broadcast radio receiver. But can this still be done in the digital age? It’s something [Windytan] has looked into, as she reconstructs images using leakage from HDMI cables.
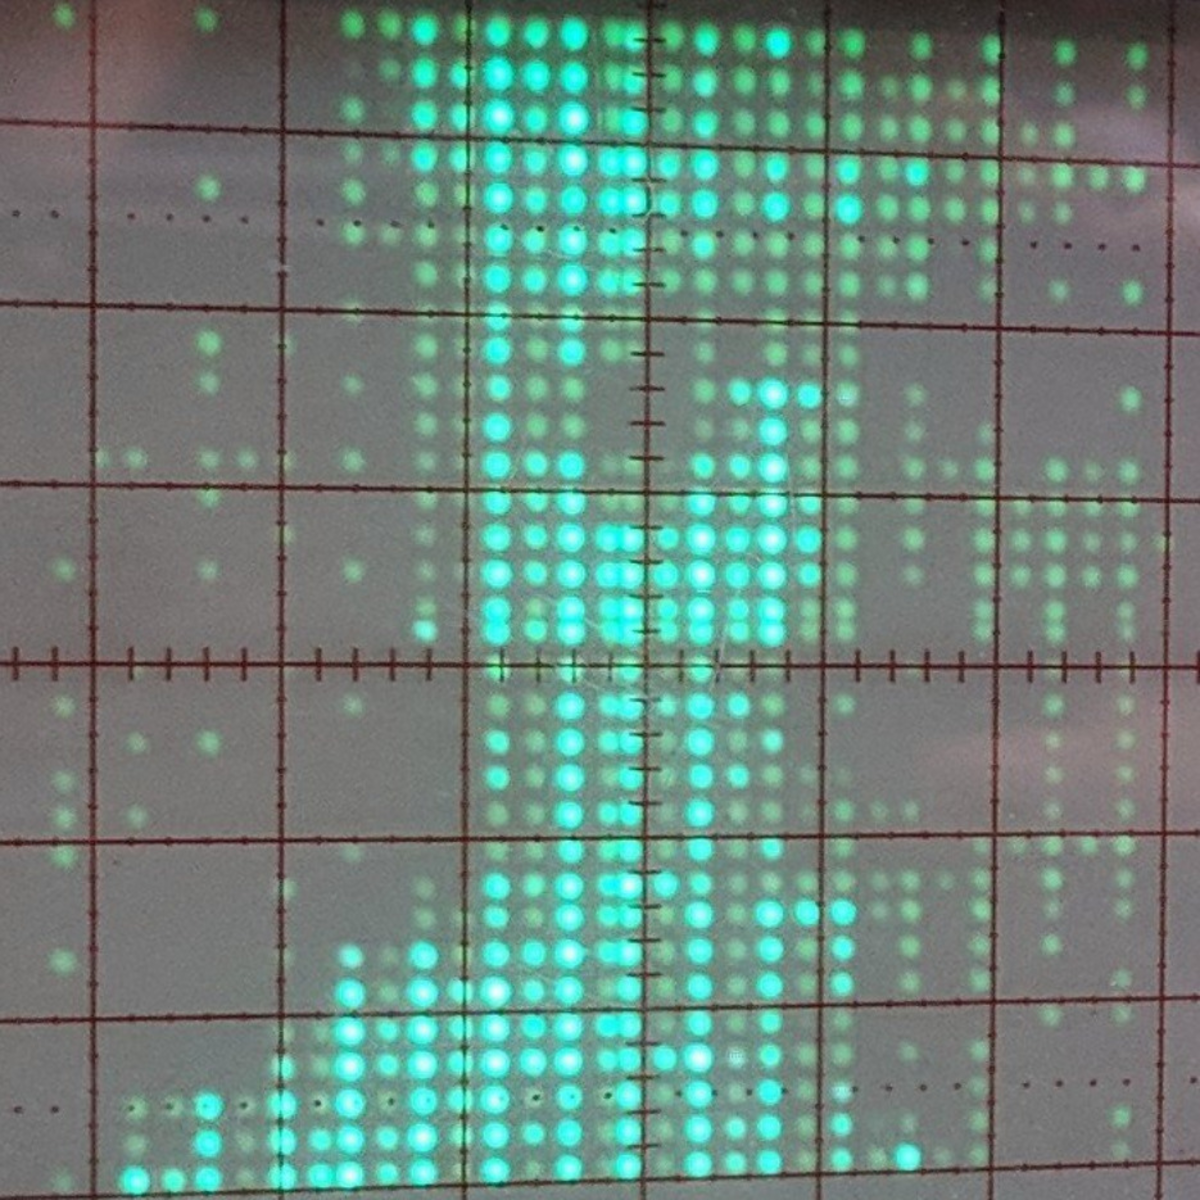
 The tale starts with a mystery RF noise, soon identified as not unlike the scanning frequencies of a video signal. Plotting the noise intensities while treating the supposed scanning frequencies as video synchronization yields a shadowy version of her Raspberry Pi desktop, so she’s on to something. It’s important to note that this isn’t a video signal she’s receiving, but the noise associated with the bit transitions in an uncompressed digital video stream, so she quickly concludes that trying to resolve color would be futile.
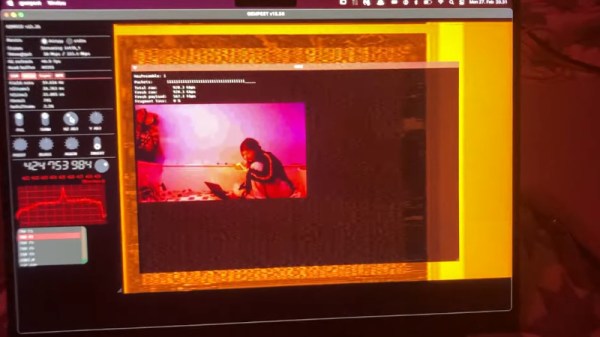
It does however leave the tantalizing possibility of using this as a medium to wirelessly export data from a compromised machine, and it’s down this route she goes. She finally arrives on a scheme of encoding data as lines of individual colors that look like interference patterns over a desktop, and from there can send and retrieve files. It works for digital audio streams, and as shown in the video below, even an MJPEG video stream, hidden in the noise from a video signal. That’s impressive work, by any standard!
We covered those BBC detector vans in detail a while back.