Adjustable Workholding For Honeycomb Tables, With A Bit Of DIY

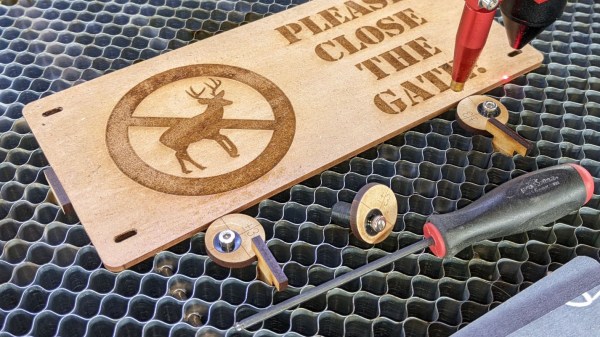
Honeycomb tables are often found on laser cutters, where they provide a way for work material to be laid flat while not interfering with things like airflow. This leads to a cleaner laser cut and a nicer finish, but if one’s work depends on precise positioning and placement, they leave something to be desired because there’s no good way to attach rails, jigs, or anything of the sort in an easy and stable fashion.

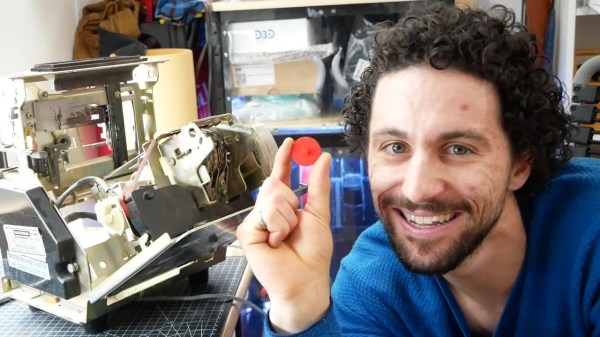
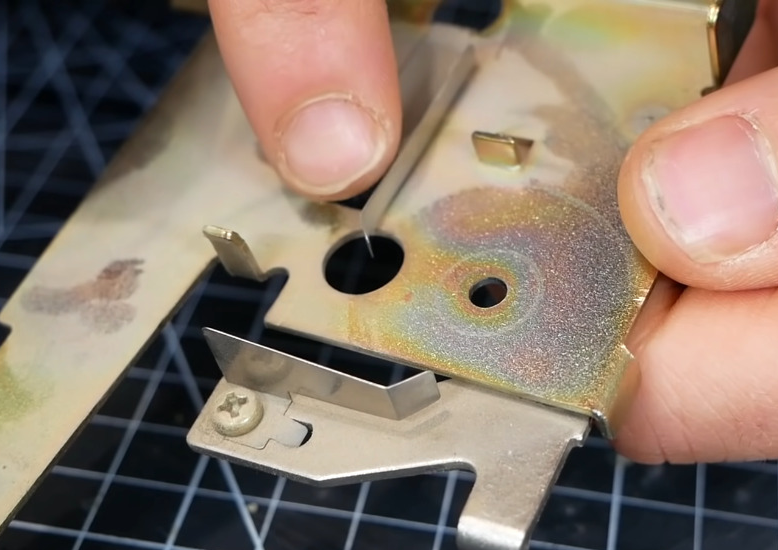
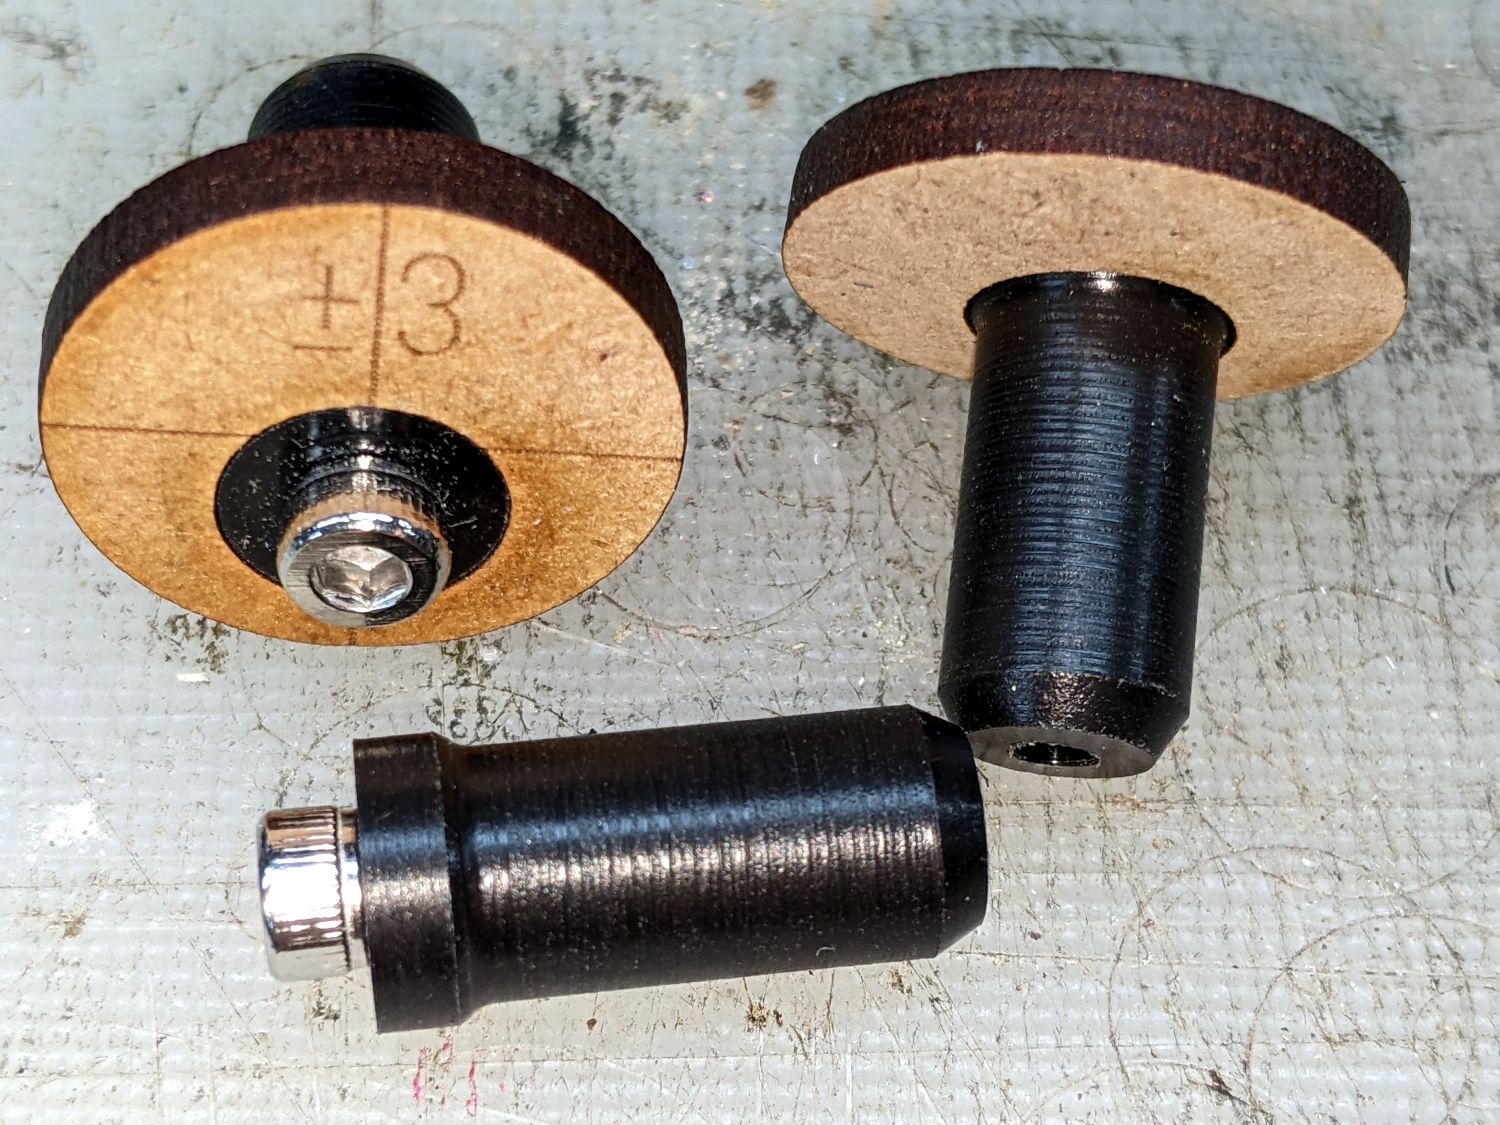
The solution [Ed] found for this was to make himself some adjustable offset stops designed to fit into his laser cutter’s honeycomb table. Each consists of a laser-cut disc of wood, which is screwed off-center into an acetal “plug” sized to fit into the vertical gaps in the honeycomb table. This allows each disc to be rotated to fine-tune positioning. With the help of some T-shaped pegs that are also sized to fit into the honeycomb table, [Ed] has all he needs to fix something like a workpiece or jig into a particular and repeatable position.

The whole thing depends on a friction fit, so the sizing of the plug needs to match a particular honeycomb table’s construction. We think this makes it a good match for 3D printing, as one can measure and print plugs (perhaps employing the Goldilocks approach) that fit with just the right amount of snug.

Honeycomb tables are fantastic for laser cutting, but if you find yourself in a pinch for a replacement, an old radiator can make a pretty decent stand-in.

Resulting tweezer assembly, with a 3D printed replacement case for both of the probes

Hackaday Prize 2022: Glue-Hindered Smart Tweezer Repair Involves A Rebuild

[Dan Julio] owns a pair of Miniware multimeter tweezers, a nifty helper tool for all things SMD exploration. One day, he found them broken – unable to recognize any component between the two probes. He thought it could be a broken connection problem, and decided to take them apart. Presence of some screws on their case fooled him – in the end, it turned out that the case was glued together, and could only be opened destructively. For an entry in the “Reuse, Recycle, Revamp” round of 2022 Hackaday Prize, he tells us how he brought these tweezers back from the dead.

During the disassembly, he broke a custom flexible PCB, which wasn’t reassuring either. However, that was no reason to give up – he reverse-engineered the connections and the charging circuitry, then assembled parts of the broken tweezers together using a small generic protoboard as a base. Indeed, it was likely a broken connection between probes, because the reassembled tweezers worked!

Of course, having exposed PCBs wouldn’t do, and from the very start, assembling these tweezers back together was not an option. Instead, he developed a replacement case in OpenSCAD, bringing the tweezers back to life as his trusty tool – and still leaving repairability on the table. If you’re interested in the details, he goes more into how these tweezers are designed when it comes to charging and connectivity, and we recommend that you give his write-up a read!

We’ve been seeing smart tweezers around for over a decade now, from reviews and hacks of commercially made ones, to DIY chopstick-based and PCB-based ones. If you already own a pair of tweezers you’ve grown attached to, you can neatly retrofit them with a capacitance sensing function!

Hackaday Prize 2022: Recycled Tire Table Is Where The Rubber Meets The Road

The problem with good inventions is that we usually end up with way too many of that particular widget lying around, which can cause all kinds of problems. Take the car tire, for instance. They were a great invention that helped spell the end of buggy whips and broken wagon wheels. But there are so many used-up tires about today that some people end up burning them in large piles, of all possible things.

Not [Vaibhav], who prefers to turn trash into utilitarian treasures. With little more than an old tire, some jute rope, and four plastic drink bottles, they made a sturdy, low-slung piece of furniture that could be used as a coffee table, a foot stool, or whatever life calls for.

Construction was fairly simple and involved stabilizing the hollow core with a round piece of cardboard glued to either side of the tire. Then came the jute rope and glue artistry, which hides any trace of the foundational materials. Finally, [Vaibhav] glued four plastic bottles to the bottom to act as legs. We think that steel cans would last longer and support more weight, but if plastic bottles are the only option, you could always fill them with dirt or sand.

Printable Fix For Time Card Clock Has Owner Seeing Red Again

When [Morley Kert] laid eyes on a working time card-punching clock, he knew he had to have it for a still-secret upcoming project. The clock seemed to work fine, except that after a dozen or so test punches, the ink was rapidly fading away into illegibility. After a brief teardown and inspection, [Morley] determined that the ribbon simply wasn’t advancing as it should.

This clock uses a ribbon cassette akin to a modern typewriter, except that instead of a feed spool and a take-up spool, it has a short length of ribbon that goes around and around, getting re-inked once per revolution.

When a card is inserted, a number of things happen: a new hole is punched on the left side, and an arm pushes the card against the ribbon, which is in turn pushed against the mechanical digit dials of the clock to stamp the card.

Finally, the ribbon gets advanced. Or it’s supposed to, anyway. [Morley] could easily see the shadow of a piece that was no longer there, a round piece with teeth with a protrusion on both faces for engaging both the time clock itself and the ribbon cassette. A simple little gear.

After emailing the company, it turns out they want $95 + tax to replace the part. [Morley] just laughed and fired up Fusion 360, having only caliper measurements and three seconds of a teardown video showing the missing part to go on. But he pulled it off, and pretty quickly, too. Version one had its problems, but 2.0 was a perfect fit, and the clock is punching evenly again. Be sure to check it out after the break.

Okay, so maybe you don’t have a time card clock to fix. But surely you’ve had to throw out an otherwise perfectly good coat because the zipper broke?

Continue reading “Printable Fix For Time Card Clock Has Owner Seeing Red Again”

A small PCB with an OLED screen showing a Dinosaur Game

Hackaday Prize 2022: RunTinyRun Is A Fully Solar-Powered, Portable Dinosaur Game

Fully solar-powered handheld gadgets have so far mostly been limited to ultra-low power devices like clocks, thermometers and calculators. Anything more complicated than that will generally have a battery and some means to charge it. An entirely solar-powered video game console is surely out of reach. Or is it? As [ridoluc] shows, such a device is actually possible: the RunTinyRun gets all its power directly from the Sun.

To be fair, it’s not really a full-fledged game console. In fact it doesn’t even come close to the original Game Boy. But RunTinyRun is a portable video game with an OLED display that’s completely powered by a solar panel strapped to its back. It will run indefinitely if you’re playing outside on a sunny day, and if not, letting it charge for a minute or two should enable thirty seconds of play time.

The game it runs is a clone of Google’s Dinosaur Game, where you time your button presses to make a T-Rex jump over cacti. As you might expect, the game runs on an extremely minimalist hardware platform: the main CPU is an ATtiny10 six-pin micro with just 1 kB of flash. The game is entirely written in hand-crafted assembly, and takes up a mere 780 bytes. A 0.1 farad supercap powers the whole system, and is charged by a 25 x 30 mm2 solar cell through a boost converter.

RunTinyRun is a beautiful example of systems design within strict constraints on power, code size and board area. If you’re looking for a more capable, though slightly less elegant portable gaming console, have a look at this solar-powered Game Boy.
A Dinosaur Game implementation running on a breadboard setup

The Sinclair ZX Spectrum Turns 40

It’s an auspicious moment for retrocomputing fans, as it’s now four decades since the launch of the Sinclair ZX Spectrum. This budget British microcomputer was never the best of the bunch, but its runaway success and consequent huge software library made it the home computer to own in the UK. Here in 2022 it may live on only in 1980s nostalgia, but its legacy extends far beyond that as it provided an entire generation of tech-inclined youngsters with an affordable tool that would get them started on a lifetime of computing.

What Was 1982 Really Like?

Cover of Sincalir User, Sir Clive Sinclair as a magician
Sinclair User issue 3 captures the excitement surrounding the Spectrum launch.

There’s a popular meme among retro enthusiasts that the 1980s was a riot of colour, pixel artwork, synth music, and kitschy design. The reality was of growing up amid the shabby remnants of the 1970s with occasional glimpses of an exciting ’80s future. This was especially true for a tech-inclined early teen, as at the start of 1982 the home computer market had not yet reached its full mass-market potential. There were plenty of machines on offer but the exciting ones were the sole preserve of adults or kids with rich parents. Budget machines such as Sinclair’s ZX81 could give a taste of what was possible, but their technical limitations would soon become obvious to the experimenter.

1982 was going to change all that, with great excitement surrounding three machines. Here in the UK, the Acorn BBC Micro had been launched in December ’81, the Commodore 64 at the start of ’82, and here was Sinclair coming along with their answer in the form of first the rumour of a ZX82, and then the reality in the form of the Spectrum.

This new breed of machines all had a respectable quantity of memory, high-res (for the time!) colour graphics, and most importantly, sound. The BBC Micro was destined to be the school computer of choice and the 64 was the one everybody wanted, but the Spectrum was the machine you could reasonably expect to get if you managed to persuade your parents how educational it was going to be, because it was the cheapest at £125 (£470 in today’s money, or about $615). Continue reading “The Sinclair ZX Spectrum Turns 40”

Hacking A Fuel Sensor Into A Portable Tank, Literally

Regular readers of Hackaday will know that the projects we feature are generally of the high-tech variety. Microcontrollers, 3D printed parts, embedded Linux, lots of wires, that sort of thing. But that’s not to say we don’t appreciate the somewhat more visceral builds out there; after all, hacking is about creative problem solving and thinking outside the box, and none of that is limited to how complex the fix actually is.

Take for example this quick hack that [R. Preston McAfee] recently sent our way. Looking for a way to check how much fuel was left in his outboard motor’s small portable gas tank without crawling back to look at it, he decided to rig it up with a sending unit. While they’re technically designed for larger tanks which are permanently installed into a boat’s hull, he reasoned there was nothing about the float sensor that would keep it from working in his case so long as it could be safely mounted.

To that end, [Preston] started by cutting a 38 mm (1.5″) hole in the thickest part of the tank, and sanded the area around the opening to smooth things out. He then measured the depth of the tank at that point, and ordered an appropriately sized float sensor. He drilled out the holes for the five mounting bolts, and inserted them through the larger whole so their heads would be inside the tank. By holding the exposed threads with a pair of vice grips he was able to crank the nuts down on each bolt to form a tight seal to the gasket, though it should be noted that the resulting damage to the threads will likely make it difficult to remove the nuts in the future.

Admittedly this is a pretty simple fix, but it’s well thought-out and we appreciate the effort [Preston] put in to documenting the whole process. We’ve certainly covered more elaborate ways of seeing what’s left in the tank, but just because a solution is flashier doesn’t mean it’s necessarily any better.