Circuit VR: Arduino Virtually Meets Analog

There was a time when building electronics and building software were two distinct activities. These days, almost any significant electronic project will use a CPU somewhere, or — at least — could. Using a circuit simulator can get you part of the way and software simulators abound. But cosimulation — simulating both analog circuits and a running processor — is often only found in high-end simulation products. But I noticed the other day the feature quietly snuck into our favorite Web-based simulator, Falstad.

The classic simulator is on the left and the virtual Arduino is on the right.

Back in March, the main project added work from [Mark McGarry] to support AVR8js written by [Uri Shaked]. The end result is you can have the circuit simulator on the left of the screen and a Web-based Arduino IDE on the right side. But how does it work beyond the simple demo? We wanted to find out.

The screen looks promising. The familiar simulator is to the left and the Arduino IDE — sort of — is to the right. There’s serial output under the source code, but it doesn’t scroll very well, so if you output a lot of serial data, it is hard to read.

Continue reading “Circuit VR: Arduino Virtually Meets Analog”

12-Arduino Orchestra Plays Star Wars Fanfare

Back in the early days of the musical synthesizer, some designers who wished for polyphony in their instruments would simply build multiple tone-generators for as many notes as they wished to play. [Kevin] took that same approach with his Arduino orchestra, and set about having it play the closing number from Star Wars: A New Hope.

The build consists of twelve Arduino Nanos, each wired up to power, a speaker, and the same MIDI cable. The MIDI cable carries note data for each Arduino on a separate MIDI channel, allowing each to play its own role in the orchestra. [Kevin] then set about arranging the Star Wars music into a MIDI file suitable for the Arduinos, roughly setting six voices to high parts and six voices low. The Arduinos play the notes received using the simple tone() function. The result is a very chiptune rendition of the end of the fourth episode of the world’s most famous space opera.

It may not be neat, tidy, or efficient, but it certainly is fun. Twelve Arduinos bleeping away with their flashing LEDs and cute little speakers makes quite the conversation piece. It’s a similar approach to the Floppotron, which plays more notes by adding more floppy drives. We’ve also seen the same thing done with SEGA sound chips. Video after the break.
Continue reading “12-Arduino Orchestra Plays Star Wars Fanfare”

Arduino Compatible IR Blaster Keeps TVs At Bay

The TV-B-Gone is a well known piece of kit in hacker circles: just point it at a noisy TV in a public space, hit the button, and one of the hundreds of IR remote codes for “Power Off” that it blinks out in rapid succession is more than likely to get the intended response. Unfortunately, while a neat conversation starter, its practical use is limited to a single function. But not so with this programmable IR development board that creator [Djordje Mandic] describes as a “TV-B-Gone on steroids”.

Sure you can point it at a random TV and turn it off with a single button press, but you can also plug the board into your computer and control it directly through the serial connection provided by its CP2104 chip. Using a simple plain-text control protocol, the user can modify the behavior of the device and monitor its status. [Djordje] imagines this feature being used in conjunction with a smartphone application for covert applications. To that end, the device’s support for an onboard battery should keep it from draining the phone during extended operations.

Of course you could do something else entirely with it simply by firing up the Arduino IDE and writing some new code for the device’s ATmega328P microcontroller. As with the IR-enabled ESP8266 development board we looked at a few months ago, there are plenty of applications for an all-in-one board that allows you to communicate with the wide world of IR devices.

Continue reading “Arduino Compatible IR Blaster Keeps TVs At Bay”

Arduino Variometer In A Mint Tin

While humans have done a pretty good job of figuring out how to fly with various mechanical contrivances, the fact remains that our natural senses aren’t really well suited to being off the ground. For example, unless you have a visual reference point, determining which way is up is quite a bit harder than you might think. Which is why pilots rely on instruments such as the variometer, that determines the current rate of climb and descent, to guide them when their eyes can’t be trusted.

It’s also a very handy thing to have when paragliding, which is why [mircemk] decided to build a hand-held version using the Arduino Nano and a BMP180 pressure sensor. Since you don’t want to be staring at a little screen in mid-air, the device conveys changes in altitude with audio tones. A rising tone means you’re moving upwards, while a lower tone indicates downward travel. In the video below, you can see that it only takes a meter or two of vertical movement before the device picks up on the change.

Looking for a simple yet rugged enclosure for the device, [mircemk] found a metal mint tin that would hold the microcontroller, sensor, buzzer, and the 9 V battery that powers it all. We know what you’re thinking, but don’t worry; holes have been popped in the sides to make sure there’s no pressure difference inside the tin. There’s plenty of room to replace the alkaline battery with a rechargeable pack and associated charge controller, but we imagine there’s a certain security in tossing in a fresh new primary cell before slipping the surly bonds of Earth.

If you’re in interested DIY instrumentation for a glider or other aircraft that actually has a proper cockpit, this sunlight readable flight computer made from a Kobo e-reader would be a great start.

Continue reading “Arduino Variometer In A Mint Tin”

Put APIs To Work Wth This ArduinoJson Walkthrough

One of the things this community is famous for is the degree to which people will pitch in to fill an obvious need. Look at the vast array of libraries available for Arduino as an example of how people are willing to devote their time to making difficult tasks easier, often for little more than a virtual pat on the back.

One level up from the library writers are those who go through the trouble of explaining how all these libraries work in real-world applications. [Brian Lough] recently rose to that challenge with a thorough explanation of the use of the ArduinoJSON library, a very useful but often confusing library that makes IoT projects easier.

The need for an ArduinoJSON explainer no knock on its author, [BenoĆ®t Blanchon], who has done excellent work documenting the library; it’s more of a realization that the nature of JSON itself means a library that works with it is going to be complex. [Brian]’s contribution here is sharing his insights into getting ArduinoJSON up and running in a real-world ESP32 example, and dealing with the potential pitfalls of parsing a human-readable text file that can be used to represent almost any data object using the limited resources of a microcontroller. Along with the basics, we found the warning about how pointers refer back to the dynamic JSON document object particularly helpful; the bit about using filters to winnow down a large data set was useful too.

Thanks to [Brian] for taking the time to put this valuable information out there. Here’s hoping this encourages others to share the wealth of hard-earned knowledge in a similarly clear and concise manner.

Continue reading “Put APIs To Work Wth This ArduinoJson Walkthrough”

Speech Recognition On An Arduino Nano?

Like most of us, [Peter] had a bit of extra time on his hands during quarantine and decided to take a look back at speech recognition technology in the 1970s. Quickly, he started thinking to himself, “Hmm…I wonder if I could do this with an Arduino Nano?” We’ve all probably had similar thoughts, but [Peter] really put his theory to the test.

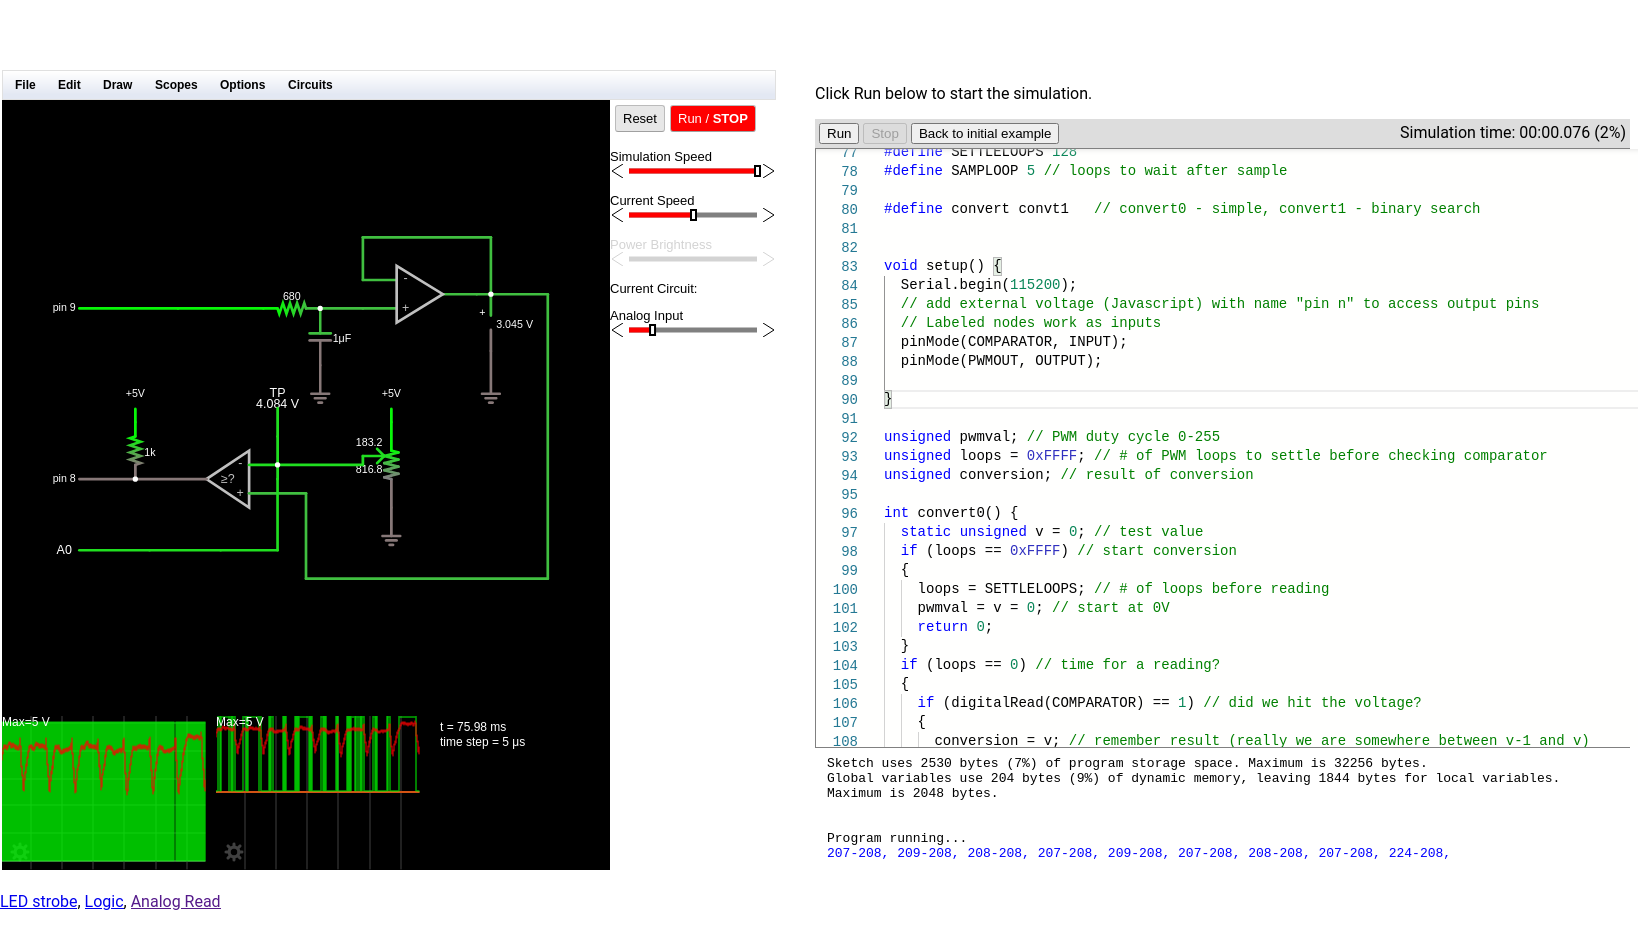
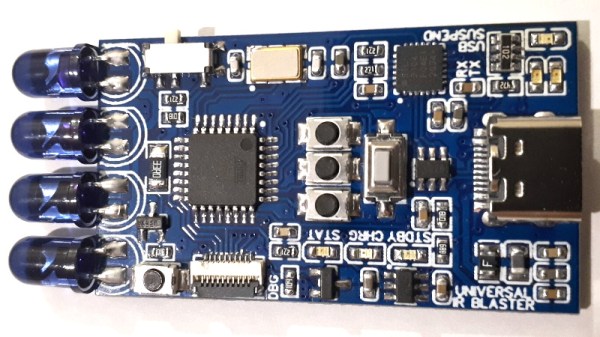
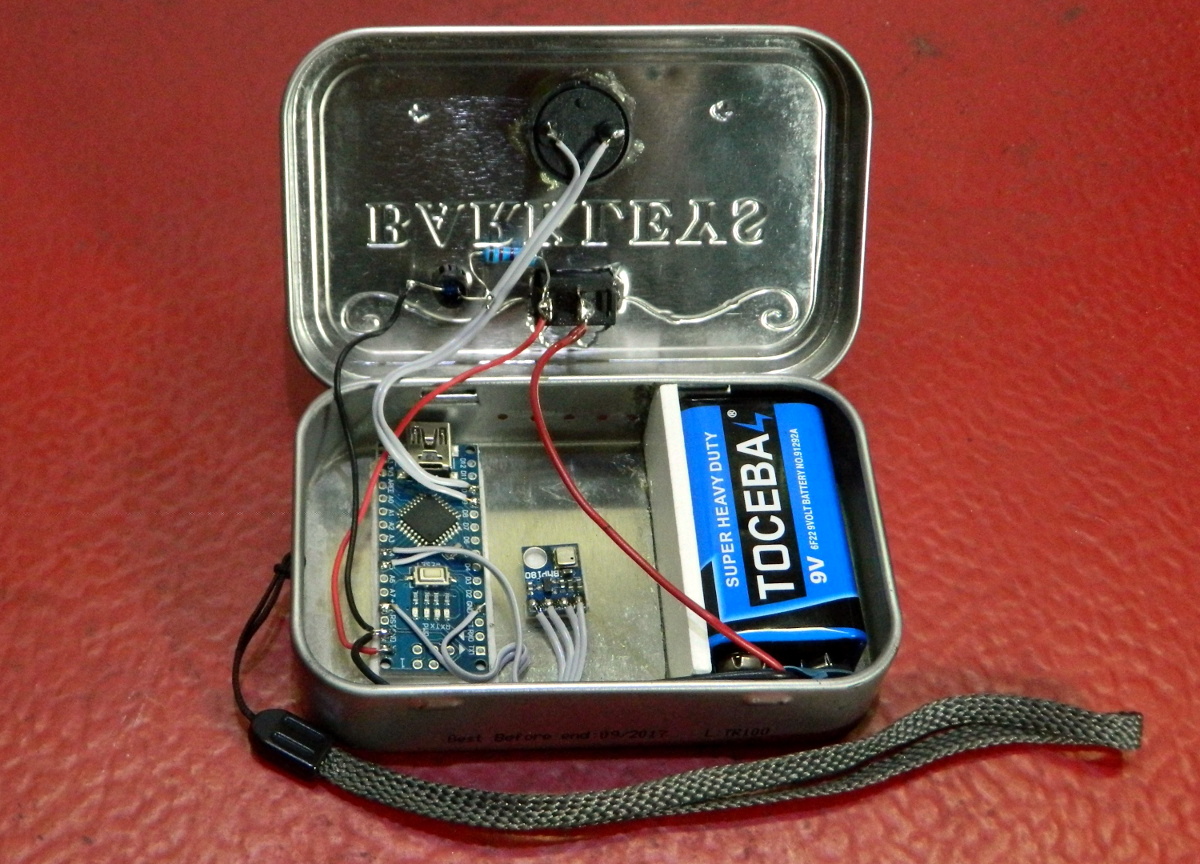
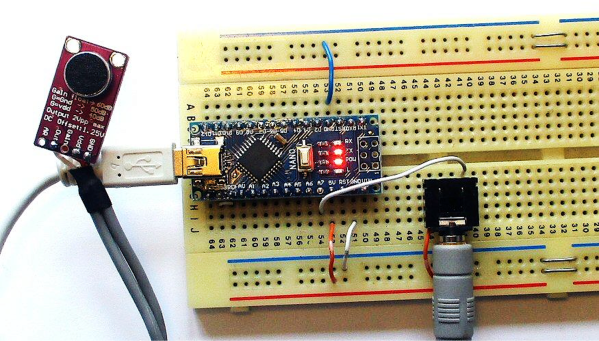
The hardware itself is pretty straightforward. There is an Arduino Nano to run the speech recognition algorithm and a MAX9814 microphone amplifier to capture the voice commands. However, the beauty of [Peter’s] approach, lies in his software implementation. [Peter] has a bit of an interplay between a custom PC program he wrote and the Arduino Nano. The learning aspect of his algorithm is done on a PC, but the implementation is done in real-time on the Arduino Nano, a typical approach for really any machine learning algorithm deployed on a microcontroller. To capture sample audio commands, or utterances, [Peter] first had to optimize the Nano’s ADC so he could get sufficient sample rates for speech processing. Doing a bit of low-level programming, he achieved a sample rate of 9ksps, which is plenty fast for audio processing.

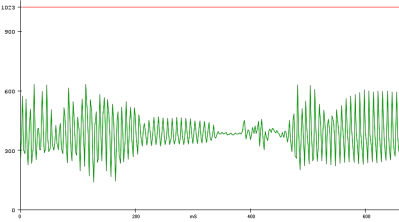
To analyze the utterances, he first divided each sample utterance into 50 ms segments. Think of dividing a single spoken word into its different syllables. Like analyzing the “se-” in “seven” separate from the “-ven.” 50 ms might be too long or too short to capture each syllable cleanly, but hopefully, that gives you a good mental picture of what [Peter’s] program is doing. He then calculated the energy of 5 different frequency bands, for every segment of every utterance. Normally that’s done using a Fourier transform, but the Nano doesn’t have enough processing power to compute the Fourier transform in real-time, so Peter tried a different approach. Instead, he implemented 5 sets of digital bandpass filters, allowing him to more easily compute the energy of the signal in each frequency band.

The energy of each frequency band for every segment is then sent to a PC where a custom-written program creates “templates” based on the sample utterances he generates. The crux of his algorithm is comparing how closely the energy of each frequency band for each utterance (and for each segment) is to the template. The PC program produces a .h file that can be compiled directly on the Nano. He uses the example of being able to recognize the numbers 0-9, but you could change those commands to “start” or “stop,” for example, if you would like to.

[Peter] admits that you can’t implement the type of speech recognition on an Arduino Nano that we’ve come to expect from those covert listening devices, but he mentions small, hands-free devices like a head-mounted multimeter could benefit from a single word or single phrase voice command. And maybe it could put your mind at ease knowing everything you say isn’t immediately getting beamed into the cloud and given to our AI overlords. Or maybe we’re all starting to get used to this. Whatever your position is on the current state of AI, hopefully, you’ve gained some inspiration for your next project.

Hackaday Podcast 117: Chiptunes In An RCA Plug, An Arduino Floppy Drive, $50 CNC, And Wireless Switches

Hackaday editors Mike Szczys and Elliot Williams discuss the latest hacks from around the Internet. 3D-Printed linear rails don’t sound like a recipe for a functional CNC machine but there was one this week that really surprised us. We were delighted by the procedurally generated music from a $0.03 microcontroller inside of an RCA plug (the clever flexible PCB may be the coolest part of that one). There’s an interesting trick to reverse engineering Bluetooth comms of Android apps by running in a VM and echoing to WireShark. And we look at what the buzz is all about with genetically engineered mosquito experiments taking place down in the Florida Keys.

New this week is a game of “What’s that sound?”. Use the form link on the show notes below to send in your answer, one winner will receive a podcast T-shirt.

Take a look at the links below if you want to follow along, and as always, tell us what you think about this episode in the comments!

Direct download (~55 MB)

Places to follow Hackaday podcasts:

Continue reading “Hackaday Podcast 117: Chiptunes In An RCA Plug, An Arduino Floppy Drive, $50 CNC, And Wireless Switches”